/Search: fireplace

Need a new search?

If you didn't find what you were looking for, try a new search!

Celebrating The Latest From Caesarstone

Is there a better way to celebrate good design than with traveling, wining and dining? If there is, I haven’t met it yet, and that’s just what I did recently with a lovely little getaway to Prince Edward County with our friends from Caesarstone. In addition to falling deeper in love with the County, it was a brilliant opportunity to take in the latest colour releases from Caesarstone in context (and a ridiculously charming context at that).

Amongst all of the good food and wine (including a new favourite cider from The Old Third that has the bubbles of champagne and a finish that tastes like buttered popcorn), we had the opportunity to put Caesarstone to the stain test. Spoiler alert: it passes with flying colours, regardless of which colour you’re playing with.

And speaking of colours, the newest releases are right on the money. In addition to a brilliant terrazzo, there are several versions of concrete that make minimalist custom surface treatments a dream.

I’ve been a fan of custom concrete counters and even custom concrete furniture for years. The difficulty with them is they can be delicate and prone to cracking. Well move over, concrete. Caesarstone’s new concrete colours allow you to achieve the look without the delicate sensibilities of a poured surface.
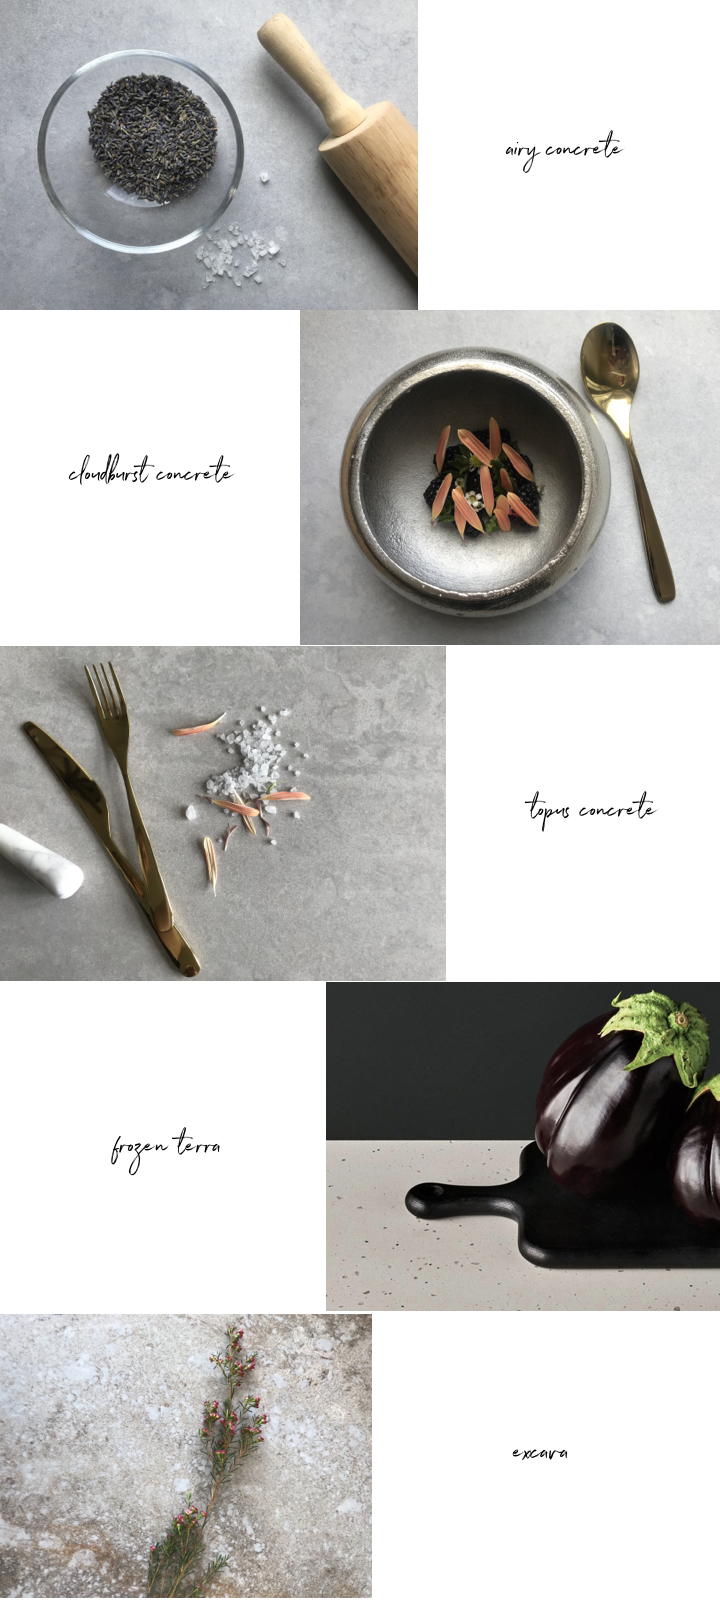
caesarstone-metropolis-new-colours

From top to bottom:

AIRY CONCRETE – Slightly quieter, this Caesarstone new release still has lots of movement and a kind of dimension that feels authentically poured.

CLOUDBURST CONCRETE – The depth and movement in this Caesarstone slab has an effortlessly industrial edge. And speaking of effortless, how beautiful is the food styling on that dish by Chef Sean MacDonald? Brilliant.

TOPUS CONCRETE – With the slightest and most sophisticated whisper of blush, Topus Concrete reminds me of a high quality travertine in the colour we always wished we could find but never did. Wish no more. It’s here.

FROZEN TERRA – Terrazzo is definitely making a big comeback in flooring, so this one is great news for all of the Terrazzo-lovers in our midst. Consider it the perfect finish to the stone story of your Venetian-inspired dreams.

EXCAVA – This one is the singer in the family, and definitely one that needs to be seen in person for full effect. The rusty-hued veining is inspired by foraged industrial objets whose patina feels as rustic as it does refined.

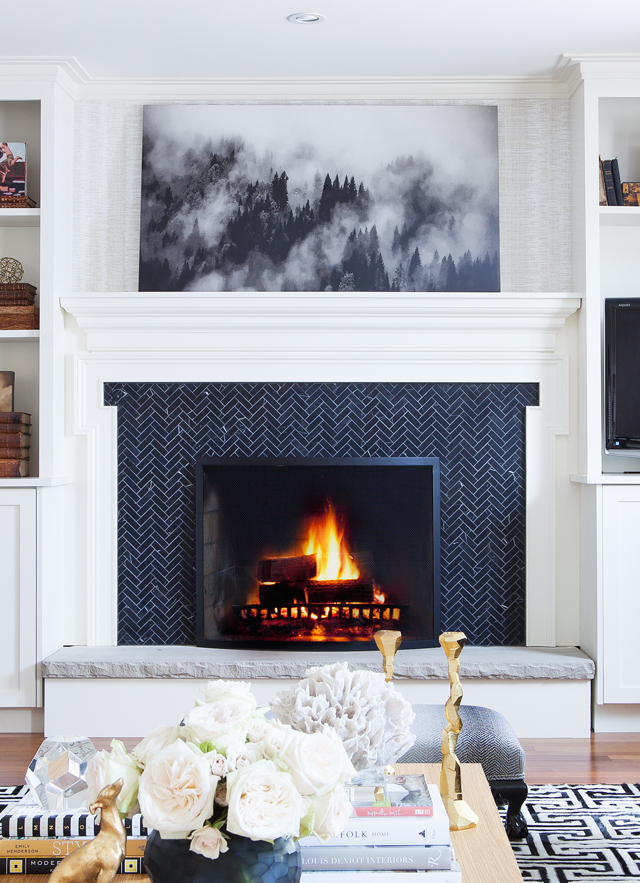
I admit that our little tour of the County reignited in me the dream to one day build a summer retreat for my sweet family on the water. What better place to do that than the County, and what better surface to deck it out with head-to-toe than minimalist, Scandi-inspired Caesarstone concrete counters and fireplace surrounds? Here’s to dreams becoming reality – scratch-resistant, stain-resistant, sustainable reality!

Happy Friday, friends!

Sarah-Signature

By |May 25th, 2018|0 Comments

Our Christmas Home Tour | With Sweet Woodruff + When He Found Her

The-Curated-House-Christmas-Home-Tour-Cover

“Gifts of Time & Love

Are surely the basic ingredients

Of a truly Merry Christmas.”

I was beyond excited when Lindsay from The White Buffalo Styling Co. reached out to me with an invitation to take part in this year’s Christmas Home Tour. It’s such a great opportunity to connect with diverse design lovers from all over the globe and share our love for this most special of seasons. So welcome to all of you taking this virtual home tour, and especially the readers who have just followed the trail from House of Hipsters on over to our little nest.

KINDLE THE FIRE OF HOSPITALITY IN YOUR HOME

I know it might seem logical to start this holiday home tour with a shot of our Christmas tree, but for me, the heart of the Christmas season is the people who gather here and the memories we make together. Many of those memories are made around a roaring fire in our family room, so that’s where this tour starts today.

The-Curated-House-Christmas-Home-Tour-10091-TheCuratedHouse-ChristmasHomeTour0069-TheCuratedHouse-ChristmasHomeTour0067-TheCuratedHouse-ChristmasHomeTour 0081-TheCuratedHouse-ChristmasHomeTour

I confess that my Christmas mantel decor tends to remain quite similar from year to year. I hang the same pair of warm white, fuzzy stockings for the boys on either side of the fireplace. Then I layer in simple greenery which just makes my heart happy. It’s beyond easy to install, it smells fabulous and it lasts all season. What more could you ask for?

This year, I reached out to the brilliant Lisa Gray from Sweet Woodruff to collaborate on the floral elements in our Christmas decor. She is truly a floral design genius, and one of the kindest, loveliest souls you will ever meet.

We both agreed that the family room, for all its understated glamour, needed to be dressed in something a bit wild and free for the holidays. So while I layered the mantle with boughs of cedar, pine and magnolia leaves, Lisa arranged gestural branches of magnolia and fragrant fronds of evergreen into vases of varying heights and sizes.

0086-TheCuratedHouse-ChristmasHomeTour 0064-TheCuratedHouse-ChristmasHomeTour

LAYER IN THE LOVE

0085-TheCuratedHouse-ChristmasHomeTour0084-TheCuratedHouse-ChristmasHomeTour

I wanted the coffee table to feel invitational and interactive, so I layered it with details. Antique silver trays filled with gluten free cookies. Coffee table books and a stack of vintage leather books to remind us to slow down and read. A pair of vintage opera glasses that were my grandmother’s (Tate loves to play with them). That gorgeous tall copper candle base from Renwil for a modern edge and visual balance with those effervescent magnolia branches arching beside it.

And my favourite: A tray of carefully wrapped presents to be opened on Christmas Eve.

0088-TheCuratedHouse-ChristmasHomeTour0070-TheCuratedHouse-ChristmasHomeTour 0076-TheCuratedHouse-ChristmasHomeTour 0078-TheCuratedHouse-ChristmasHomeTour

TRADITIONS TO REMEMBER

0080-TheCuratedHouse-ChristmasHomeTour 0075-TheCuratedHouse-ChristmasHomeTour

In our family, we only really have a few Christmas traditions. We have the same meal on Christmas Eve every year (Chateaubriand). After we eat, we open our Christmas jammies to wear to bed that night. Then the boys get to choose one gift from under the tree – anything they want – to open before bed.

Noah is the only one old enough to truly appreciate this tradition at this point. He carefully weighs and measures each package, trying to sort out what each box contains and what is worthy of being THE gift to be opened on Christmas Eve. It’s so fun to watch him savour the process, and he’s always grateful for whatever he opens, even if he accidentally chooses the box with socks in it.

Tate, on the other hand, is still grasping the concept of WAITING to open presents for Christmas. In fact, he may or may not have unwrapped these packages a good half a dozen times before the brilliant Reid Lambshead from When He Found Her came for our photo shoot together. It would have been adorable if I hadn’t had to rewrap them and stack them just so each time! Of course, now that the shoot is over, he hasn’t touched them. Toddler instincts, man. They’re killer!

TIPS FOR TRIMMING YOUR TREE

0027-TheCuratedHouse-ChristmasHomeTour

When it comes to trimming the tree, you can apply some of the same principles you use when styling a room. The first tip is to choose a palette of three colours/elements and stick to it. This year – taking its direction from the living room – our tree is trimmed with silver, gold and glass ball ornaments. It’s glamorous and simple all at once, and it integrates ornaments we’ve had for years as well as a few new ones.

I consider what goes UNDER the tree to be as much a part of the trimming as what goes on it. That’s why I follow the same rules when wrapping gifts. I choose two papers max (and for me they’ve been the same for a couple of years running – brown kraft paper and leftover Nuvolette wallpaper from Cole & Son). I wrap boxes with lids so I can save them from year to year. They look super pretty under the tree, they are easy to open, and they’re easy to save. This year I finished them with either a herringbone grosgrain ribbon or black-and-white butcher string with a frond or two of incense cedar and a homemade calligraphy tag. Simple.

I also layered my tree skirts for more warmth and interest. I used a traditional circle skirt to cover the tree holder and then layered a reindeer pelt overtop. It integrates really nicely into the room as the reindeer pelt layered over the Morrocan rug just feels like comfort on comfort. Cozy, organic and yet somehow glamorous. That’s what I’m going for!

0029-TheCuratedHouse-ChristmasHomeTour 0025-TheCuratedHouse-ChristmasHomeTour 0024-TheCuratedHouse-ChristmasHomeTour 0023-TheCuratedHouse-ChristmasHomeTour 0022-TheCuratedHouse-ChristmasHomeTour 0020-TheCuratedHouse-ChristmasHomeTour

CASUAL CHIC COFFEE TABLE STYLING

0012-TheCuratedHouse-ChristmasHomeTour0019-TheCuratedHouse-ChristmasHomeTour0015-TheCuratedHouse-ChristmasHomeTour 0018-TheCuratedHouse-ChristmasHomeTour

When it came to styling the coffee table in the living room, I felt like a “less is more” approach was the way to go. Especially with what Lisa had planned for the top of the dresser beyond. So out came my favourite vintage silver tray. I moved my crystal geode (one of my all time favourite accessories) onto the tray with a decadent floral arrangement. Those gorgeous Creators Of Objects candlesticks also moved onto the coffee table, and I kind of love them there. I always like having a couple of vertical elements on a coffee table to keep it interesting. Add in a couple of favourite coffee table books, that decorative and edgy black box and a candle and that’s all it needed! Other than a marbled pink and gold glass tray with gluten free cookies on it, of course!

A side note on decorating holiday cookies: If you follow me on Instagram you my have seen my InstaStory of me and Tate making these cookies. Moment of truth? Baking with toddlers is not for perfectionists. It’s not for the faint of heart, either. So…after surviving the baking part with most of the cookies intact, I decided to forego the beauty of perfectly piped icing. I just dusted them with icing sugar and called it a day instead. And you know what? They still looked pretty, they still got eaten, and no one died of a lack of decorative detail. Sometimes you just have to pick your decor battles, you know? I’m calling this one “icing sugar dusting for the win!”

LE PIECE DE RESISTENCE

When it came to styling the top of the dresser, the real design challenge actually revolved around doing justice to Ashley Woodson Bailey‘s stunning piece “Fringe.” Enter the creative genius of Ms. Lisa Gray of Sweet Woodruff. All I said to Lisa was “let’s treat the top of the dresser like a mantel.” She quite literally took care of the rest, and she totally took my breath away in the process.

0011-TheCuratedHouse-ChristmasHomeTour0010-TheCuratedHouse-ChristmasHomeTour0013-TheCuratedHouse-ChristmasHomeTour0007-TheCuratedHouse-ChristmasHomeTour0005-TheCuratedHouse-ChristmasHomeTour 0003-TheCuratedHouse-ChristmasHomeTour

This is what happens when creative genius (Lisa) meets creative genius (Ashley) and all that magic is captured through the lens of creative genius Reid.

Total. Floral. Ecstasy.

I seriously want this in my house ALWAYS. I mean, weekly Sweet Woodruff floral installations wouldn’t be decadent or over-the-top, right? One could even say they are the necessary dose of beauty required to survive in this world, am I right?

*sigh*

0004-TheCuratedHouse-ChristmasHomeTour 0008-TheCuratedHouse-ChristmasHomeTour

DINING IN FOR THE HOLIDAYS

The last stop on this tour is our little dining room. I mean, I couldn’t do a Christmas Home Tour without setting the table! After all, hospitality over the holidays is my favourite. So, out came the good china and the real silver and the crystal stemware. Add in some herringbone napkins I scooped up at HomeSense, some calligraphy place cards I made and finished with sprigs of rosemary, and the table was almost complete. Almost.

0041-TheCuratedHouse-ChristmasHomeTour 0049-TheCuratedHouse-ChristmasHomeTour 0050-TheCuratedHouse-ChristmasHomeTour 0056-TheCuratedHouse-ChristmasHomeTour

The centrepiece started with several pairs of Renwil Two Pence candlesticks staggered down the middle of the table. Then Lisa layered in a mix of evergreens for truly timeless Christmas elegance. We almost stopped there, but decided we needed to bring in some of the floral magic from the living room by adding in a few gorgeous blooms to finish the look. The nice thing about this tablescape is that the greens can stay, and I can add in fresh flowers or fruit over the next few weeks whenever I want to take it up a notch.

If you’re doing a tablescape like this for yourself, you can put the roses into water picks to keep them fresh for longer. Just hide the picks in the greenery and you’re good to go! Easy peasy.

0052-TheCuratedHouse-ChristmasHomeTour 0047-TheCuratedHouse-ChristmasHomeTour 0044-TheCuratedHouse-ChristmasHomeTour 0043-TheCuratedHouse-ChristmasHomeTour 0040-TheCuratedHouse-ChristmasHomeTour  0042-TheCuratedHouse-ChristmasHomeTour0039-TheCuratedHouse-ChristmasHomeTour

The other element that really makes the table setting for me are the lambswool seat covers on our Ghost chairs. They’ve really transformed the comfort level in this dining room from “eat dinner and retire to the living room ASAP” to “eat and linger over dinner as long as the conversation carries you.” Many of you have asked where to get these beauties for yourself, and the great news is that I now have them available in my new Etsy shop!

THE ESSENCE OF ALL ART IS GRATITUDE

To Lisa and Reid:

Thank you for sharing your creative genius with me. Your time. Your hearts. You are as kind and as talented as they come. I am beyond grateful to have worked with you both on this special tour!

MY CHRISTMAS WISH FOR YOU

“I just like to SMILE.

Smiling’s my favourite.”

– Buddy the Elf

This time of year is so beautiful, with all its sparkle and celebration and festivity. But it can also be hard for some.

So my wish for you, wherever you may be, is that you will be filled with HOPE this Christmas. My wish for you is that you will experience PEACE, regardless of your circumstances. And my wish is that you will know deep JOY, the kind that is not dependent upon the gifts that are wrapped under the tree. The kind that comes from choosing to focus on what matters most, and from making memories with the people who matter most.

It’s my wish for you, and it’s my wish for me, too.

Happy Holidays, my friends! May your days be Merry & Bright.

Here’s to soaking up even more holiday inspiration as you follow along on this beautiful Christmas Home Tour to the home of the lovely Ms. Craftberry Bush. There’s so much beauty to see, my friends, and so many different ways to celebrate! Savour it all as you find your own way of telling the Christmas story in your home.

Be sure to visit all the homes on the BSHT 2016 Christmas Tour: 
White Buffalo Styling Co   |   Julie Blanner   |   Hi Sugarplum!   |   The House Of Silver Lining   |   The Inspired Room   |   Restless Arrow   |   Cuckoo4Design   |   A Designer at Home   |   Dimples and Tangles   |   Place Of My Taste   |   The Chronicles Of Home   |   Sarah M. Dorsey Designs   |   Style Your Senses   |   Cassie Bustamante   |   Jones Design Company   |   The Makerista   |   House Of Hipsters   |   The Curated House   |   Craftberry Bush

COMING THIS THURSDAY:
Zevy Joy   |   withHEART   |   Nesting With Grace   |   Life On Virginia Street   |   My Fabuless Life

COMING THIS FRIDAY:
The DIY Playbook   |   House Seven Design   |   Katie Gavigan   |   Bliss At Home   |   Simple Stylings   |   Megan Pflug Designs   |   Inspired by Charm

“The world waits for a miracle
The heart longs for a little bit of hope
Oh come, Oh come Emmanuel”

– Lauren Daigle

Sarah-Signature

By |December 7th, 2016|21 Comments

Holiday Style | Secrets to Styling a Sophisticated Mantel

One of my favourite elements of holiday decorating has always been dressing my mantel. The lush yet simple layers of greenery add a warm holiday spirit to our home and their fragrance is intoxicating all throughout the season.

There is of course no one right way to style a mantel for the holidays, but for me it always comes down to cedar, magnolia and stockings. Some years I will add in clusters of fruit like clementines and pomegranates, and other years {like this one} I keep it simple with more of a quiet elegance, letting the greenery take centre stage. I thought I’d share my super simple process with you, including my secret to hanging stockings without putting holes in your mantel!

The key to this part is leaning art. If you’re able to lean a piece of art or a large mirror on your mantel you have everything you need to hang stockings without making any holes in your beautiful surround. Here’s how:

Using a long piece of ribbon, tie one stocking onto the end of the ribbon. Feed the length of the ribbon behind your artwork or mirror and then attach the second stocking onto the other end. I chose to use an organza ribbon for it’s subtlety and transparency. 
Next, layer branches of cedar onto the mantel, allowing it to drape over the ribbon, disguising the mechanics of your styling secrets.
Next, add your branches of magnolia, tucking them into the layers of cedar to hide the ends of the stems. I also chose to pot two mini myrtle topiaries and sit them on either end of the mantel for more symmetry and visual balance.

And honest-to-goodness, that’s it! Time to light a fire and cozy up with the ones you love as you enjoy the Advent season.

Wishing you and yours a season of peace, joy and heaps of love as you enjoy your festive decor. And bring on the fireside snuggles!

xx
s.

SOURCES

Artwork: Anewall
Fireplace screen: Anvil Fireside
Christmas stockings: Anthropologie

By |December 8th, 2015|0 Comments

ONE ROOM CHALLENGE: FALL 2015 | WEEK SIX – THE BIG REVEAL!


We made it! I honestly feel like we could rename the One Room Challenge “Survivor: Designer Edition.” Crowbarring your own space in alongside client work and completing it start-to-finish in 6 weeks? Well, as my lovely friend Lisa Canning said last week, it feels a bit like having a baby. While you’re giving birth you’re like “Why am I doing this again?” and when it’s all done you’re totally blissed out on the afterglow. Here’s to the bliss, friends, ’cause this baby is OUT!

I’m so thrilled with how everything came together in the end. The balance of dark and light, cool and warm, and the mixed layers of texture make this room both sophisticated and inviting – the essence of liveable luxury. The gorgeous Zena Holloway Angel print from Citizen Atelier is absolutely breathtaking in her pride of place, flawlessly finished with a Framed & Matted gallery frame. I find her truly mesmerizing! I love how the metalic silver linen drapery from Kravet frames her with a radiant glow.
Gratefully, the CB2 Crane Floor Lamps {see above} arrived at the 11th hour, and I love them. Lighting game is on fleek. I decided to repurpose a pair of end tables I already had and I think the caged brass bases create just the right airy feel next to the luxe Kravet black velvet tufted sofas. They also play beautifully off of the custom rift-cut oak coffee table which I love pretty hard.
I added a custom solid wood helix on the other side of the room to balance the wood tones and the warm against the cool of the black velvet {see below}, and I’m thrilled to finally have a piece that I’ve designed for clients over the years in my own home. I’m a lover of wood in its natural glory, and this piece {though you can’t see it very well} is pure poetry with it’s mind-bendingly torqued shape. I’ll be sure to post a shot of it on Instagram this week so you can get a better look.
I am thrilled with how the Thibaut ikat wallpaper turned out, especially given that we successfully installed it ourselves! It’s the perfect warm and textured backdrop for the art, like the gorgeous David Graham White piece you see above. 
I’m also thrilled at how the canvas-stretched mural from Anewall turned out when resined with Art Resin. If you missed the tutorial on how to do this yourself last week, you can check it out here!

In the hands of my amazing furniture maker, the Metrie mouldings definitely transformed our fireplace surround and mantel into a thing of elegance and beauty. Add to that the custom herringbone mosaic tile from Creekside Tile and a black curved fireplace screen from Anvil & Co and it’s a pretty huge transformation from the before.

I’m quietly delighted with how the shelf styling turned out. For me, styling a bookcase is a labour of love that is as much about curating your story as it is about making things pretty. I tend to add, tweak, edit and repeat until I get something I’m happy with, and I was zhushing this bookcase in little bits as we worked on the room over the last few weeks to get it just right.

The subtle yet sophisticated brushed brass Lewis Dolin pulls from Upper Canada Specialty Hardware are the perfect finishing touch on the cabinet doors of the built-ins.

To say I’m happy about the transformation of my desk area would be a major understatement. I actually LIKE sitting at my desk now. Just like with the laundry room, I’m reminded once again of the power of good design to transform our quality of life. I love my DIY modern pin board with Kelly Wearstler-esque nailhead detail. The radiant Kravet Contract reptile pattern velvet mixed with the faceted antique brass nail heads offers an elegant canvas on which to pin fabric memos and inspiration images, though I confess I may leave it clean for awhile so I can enjoy it in all its modern simplicity.

The trio of art above the desk – framed in gorgeous Framed & Matted gallery frames – fuels my sense of wanderlust and quite simply makes me happy. The two pieces on the left – limited edition prints from Minted – work brilliantly with Amy Friend’s emotional and moving Babushka {Blue}.

I like a bright work area {and I’m somewhat obsessed with symmetry} so I framed out the desk area with a pair of acrylic and brass column lamps from West Elm and love them. They’re timeless classics that I can repurpose in any room of the house should I choose to do so.

As you can see, the great debate on what colour to paint the gorgeous faux bamboo mahogany chairs from 55 Downing St. ended up with a “no paint” solution! My Brazillian walnut floors have a lot of variation in them, and I am a fan of mixing wood tones for a more interesting space. Add to that the madcap dash to the finish line of this design dare, and not painting them turned out to be the perfect solution! I really do love them, especially finished with the Kravet dove grey mohair seats and Bermingham & Co. lumbar cushions. Check out my Instagram for a straight-on shot of the chairs side by side from yesterday’s feed.

As a pair {perched atop the super warm and cozy lambswool rug} they face into the family room for a beautifully balanced floor plan, and one of them easily pulls away to sit at the desk when I’m working. It’s an elegant, flexible solution to a room with more than one function! It is practical and pretty without looking utilitarian. Perfection.

I can’t believe it, but that’s it! I’m grateful and delighted to have this room completed and can say that my family is already connecting more and feeling inspired by the dramatic transformation of this luxe family room makeover. 
Huge thanks to Ashley Capp for being such a delight to work with on the photography, and to the one and only Linda from Calling It Home for corralling all the designers daring enough to dive into this adrenaline-fueled biannual design event!
SOURCES
Black Velvet Tufted Shelter Arm Sofas – Kravet | Ikat Wallpaper – Thibaut | Shelf + desk – Custom | Rolling Desk Drawers – IKEA | Pin board fabric – Kravet | All frames – Framed & Matted | Desk lamps – West Elm | Wall Art – Citizen Atelier, Art Interiors, David Graham White, Minted, Anewall, Art Resin | Crystal Docahedron, Coral Mounted on Lucite, Geode Mounted on Lucite, Gold Stretching Greyhound, Michael Aram gold candlesticks – Elte | Leather Bound Books – Vintage | Sepia Sketch in Bookcase – Purchased on the streets of Paris | Lewis Dolin Brushed Brass Pulls – Upper Canada Specialty Hardware | Glass Cloche, Glass + Brass Box – Indigo | Sea Urchin – Paxton Gate SF | Silver Hurricane – Ralph Lauren available through Elte | Faux Coral – House Warmings | Tibetan Fur Pillows – Fibre by Auskin | Python Print Fabric – Kravet | Herringbone Faux Fur Fabric {on blanket} – Kravet | Ombre Chevron Fabric on Bench – Cassaro | Reupholstery of Bench – Switch Studio | Paint – PARA Paints | Silver Linen Drapery Fabric – Kravet | Sewing of Drapery + Pillows – Hollie Cooper | Hexagon Pencil Cups – CB2 | Lucite + Rose Gold Kate Spade Tape Dispensers + Stapler – Indigo | Brass Wallhanging File Holders – CB2 | Voluspa Candle – Indigo | Sheepskin rug – Costco | Mouldings for Fireplace Surround + Mantel – Metrie | Custom Nero Marquina Herringbone Mosaic – Creekside Tile | Curved Black Fireplace Screen – Anvil & Co. | Rift Cut Oak Coffe Table + Helix End Table – Custom through The Curated House by Sarah Walker | Silver Tray – Heirloom | Vintage Opera Glasses – Heirloom | Coffee Table Books – Indigo |

Be sure to check out the stellar work of these designer daredevils. There are some incredible finished spaces to be seen as a part of this year’s One Room Challenge, my favourites being those by Design Manifest and Kimberly Whitman. But that said, they’re all gorgeous!!

Apartment 34 | Arianna Belle | Because It’s Awesome | Coco+Kelley | Christine Dovey | Design Darling | Design Indulgence | Design Manifest | The English Room | Vanessa Francis | Hi Sugarplum | Honey We’re Home |Jojotastic The Pink Clutch | The Pink Pagoda | Simplified Bee Style Your Senses | A Thoughtful Place |Kimberly Whitman | The Zhush | Guest Participants

Until next time, darlings!

xx
s.

By |November 12th, 2015|96 Comments

ONE ROOM CHALLENGE: FALL 2015 | WEEK FIVE UPDATE

Well friends, things are starting to get real around here. It’s Week Five Update time with the One Room Challenge, and I’m grateful to say we’ve made some progress this week for sure! This week was truly all about the DIY’s for me, and I’m sharing three of them with you today, so fasten your seat belts!

MATTING + FRAMING: HOW TO DO IT YOURSELF

Remember the gorgeous frames from Framed & Matted that I shared in last week’s post? Well, I carved out some toddler-free time to get the gorgeous art safely framed up, and they look beautiful! For anyone who hasn’t mounted artwork before, I thought I’d give a quick tutorial on how to mount your art in a way that preserves the quality for decades to come. Given that I was working with editioned pieces, I wasn’t messing around!

Here’s what you’ll need:

1. Frames and matts from Framed & Matted
2. Lineco archival linen Tape
3. Lineco see-thru archival mounting strips
4. Lineco white gloves for handling the art
5. Needle nosed pliers for tying off the hanging wire
6. A clean sock, filled with rice and tied off with a knot

STEP ONE: Remove the matt and mounting board from the frame.

STEP TWO: Use the linen tape to hinge the matt to the mounting board from the inside.

STEP THREE: Place the artwork and fold the matt overtop, ensuring the art is centred exactly where you want it. Place the sock in the middle of the piece to anchor it so you can lift the matt again and adhere your mounting strips to the mounting board.

STEP FOUR: Hinge the matt back over the artwork and return it to the frame. Close the frame up and install the hanging wire, being careful to follow the instructions provided by Framed & Matted.

STEP FIVE: Install and enjoy your beautifully framed art!

Art from left to right: Men In Red by Kate Baird, Going For A Swim by Whitney Deal, Babushka (Blue) by Amy Friend

HOW TO MAKE YOUR OWN MODERN PIN BOARD

The photo above leads me to my next DIY from this week: the pin board! I wanted to do something unique with the nailheads – something a little modern edge – and landed on this game plan above. I like that the use of nailheads is unexpected, and the pattern energizes my work space while still leaving me with lots of space to actually hang things on the pin board. Just in case you want to make one for yourself, here’s how I did it:

MATERIALS

1. Enough homasote to cover the area
2. Some gorgeous Kravet fabric
3. A piece of craft paper the same size as your pin board
4. A pencil and large ruler
5. Nailheads and a finishing hammer

STEP ONE: Cut the homasote to size, joining it if necessary using PL construction adhesive and screwing strips of wood across any joints to create a stable finished piece. Next, lay the fabric over the face of the board and trim to leave enough to wrap around the back of the board. Using a staple gun, attach the fabric by stapling in the centre of each side, working on opposite ends each time you staple and pulling the fabric tight to ensure it is smooth. Slowly work your way around, always doing small sections and working on the opposite side next to maintain a balance in the tension on the fabric.

STEP TWO: Lay your craft paper over the face of the board and trim it to size. On a flat surface, use the pencil and ruler to determine your patter. Feel free to play with it a bit and erase the lines that don’t work. This part is not an exacting science so much as an intuitive art! I initially drew twice as many lines on the craft paper as what I ended up using in the end, so give yourself the freedom to try an idea and then step back and edit it.

STEP THREE: Following your guidelines, hammer the nailheads in about halfway. Be sure you determine how much space you want between the nailheads and stay consistent.

STEP FOUR: Remove the paper and hammer the nailheads down completely. You can adjust them as you go by hammering the sides to move them back in line if any of them go off the rails a bit. My mantra as I worked was Progress Over Perfection. This took me a couple of days, but it was well worth the effort in the end!

THE ART IS ALWAYS MY FAVOURITE PART: HOW TO RESIN ART

The last and most exciting DIY of the week was customizing the art for over the fireplace. I worked with my lovely friends at Anewall, who graciously customized one of their murals, turning it into a stretched canvas for me. Wanting to take it a step further, I partnered with the awesome Dave and Rebecca of Art Resin to transform the piece into a gorgeous and unique feature.

If a picture’s worth a thousand words, a video’s worth a thousand more! So rather than me typing out the step-by-step instructions on how to do this yourself, have a gander at this video for all the steps you’ll need to resin your own piece of art for a totally stunning end result!


Do you not love the Art Resin product? VOC-free, non-yellowing, super easy to use, and such a gorgeous finished product! I absolutely loved working with them on this.

HOW TO FINISH FURNITURE WITHOUT VOC’s

Speaking of VOC-free, I haven’t been the only one working away on projects for this space. I’m super excited to say that my awesome furniture maker wins the day again and has finished my custom coffee table using the most incredible finish – Rubio Monocoat from my inspiring friends at Exotic Woods in Burlington.

This oil-baed product is truly phenomenal. The nanotechnology actually bonds molecularly with the wood fibres, ensuring that whatever you finish it with – from furniture to floors – is incredibly durable for years to come. Even better, just like the Art Resin, it is totally VOC free and non-toxic, an absolute MUST in my book both as a designer and as a mom.

I can’t wait to get this gorgeous piece in place, along with everything else that will transform this room from a pretty shell to a warm and inspired context where my family can connect. I plan to refinish our dining table with this product myself, so I’ll be sure to post a step-by-step How To DIY once I get to it!

And THAT, my friends, is what I’ve been up to this week! Maybe that explains the bags under my eyes in that video? Haha! Here’s this week’s to-do list:

1. Pick up and load in all the furniture
2. Paint the bamboo chairs
3. Steam the drapes
4. Hang the last of the art
5. Arrange the flowers
6. Style the space
7. Shoot it
8. Write the reveal post
9. High five all my fellow ORC designers/survivors
{10. Take a giant nap}

I do hope you’ll come back to see the final ta-da! In the meantime, be sure to check out what these lovelies have been getting up to this week:

Apartment 34 | Arianna Belle | Because It’s Awesome | Coco+Kelley | Christine Dovey | Design Darling | Design Indulgence | Design Manifest | The English Room | Vanessa Francis | Hi Sugarplum | Honey We’re Home |Jojotastic The Pink Clutch | The Pink Pagoda | Simplified Bee Style Your Senses | A Thoughtful Place |Kimberly Whitman | The Zhush | Guest Participants

xx
s.

By |November 5th, 2015|4 Comments