/Sarah Walker The Curated House

About Sarah Walker The Curated House

This author has not yet filled in any details.
So far Sarah Walker The Curated House has created 396 blog entries.

The Curated Collection | Eric Blum

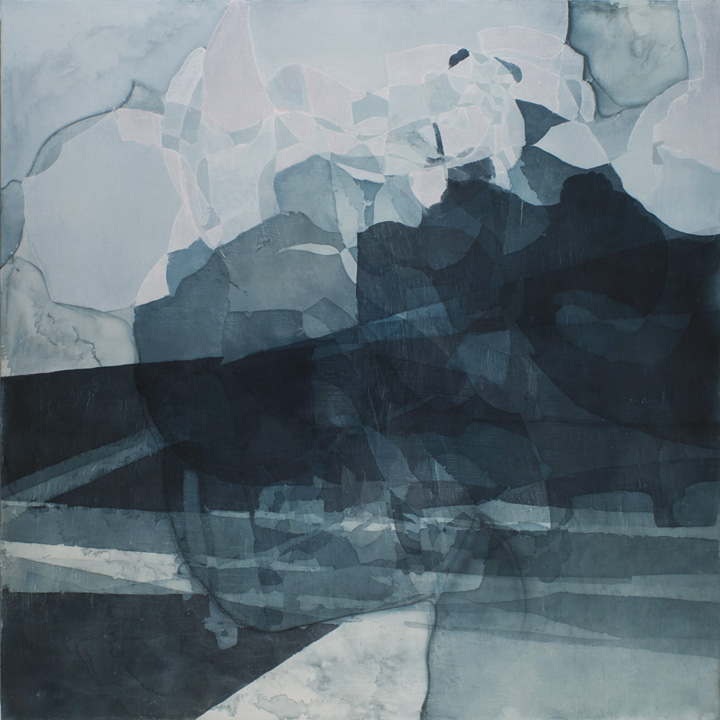
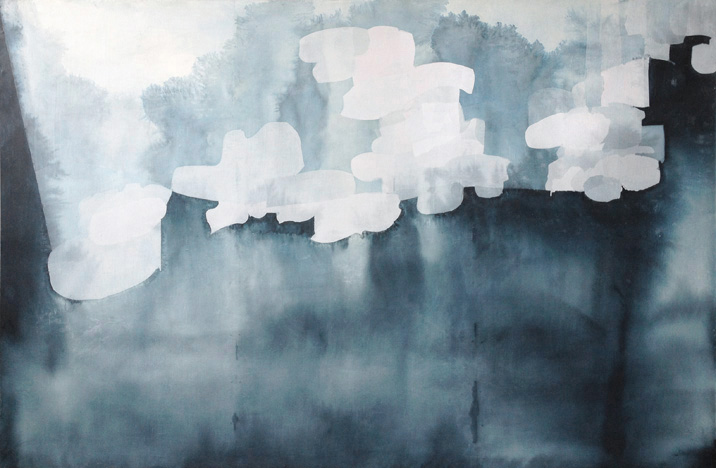
I first stumbled upon the haunting and ethereal work of Eric Blum on Pinterest of all places! It was just one image, but it captivated my imagination. There was something other-worldly, soulful, gentle and transparent about the work that drew me in and made me feel.

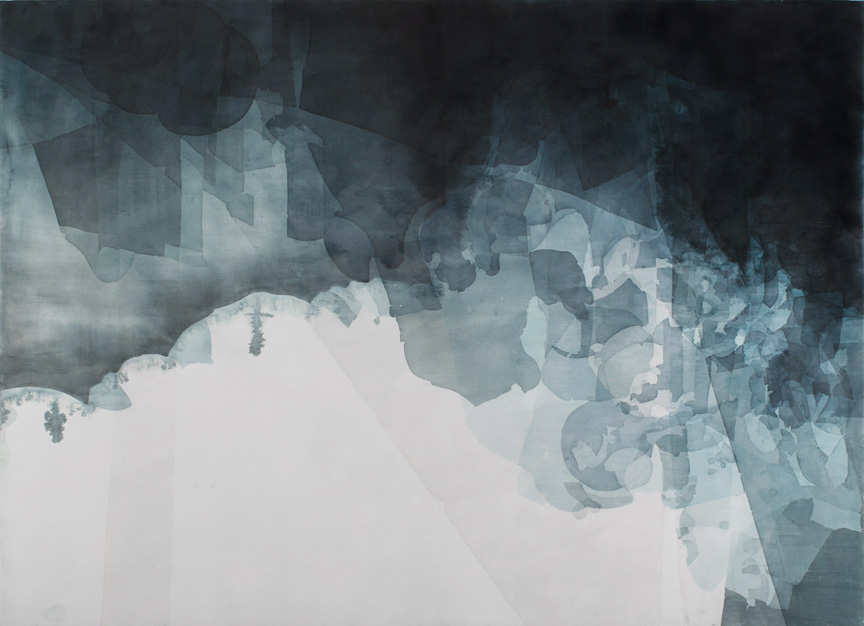
As it turns out, his entire body of work has a similar effect for me. There is a sense that his work is capturing blurry impressions – perhaps early memories that can’t be carved out with hard lines and sharp edges, the way things look when you don’t quite look straight at them, or remember your dreams just before waking.

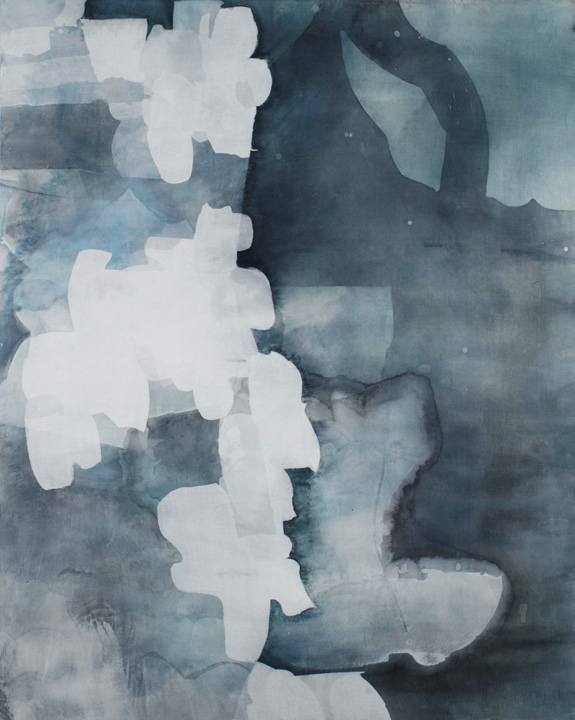
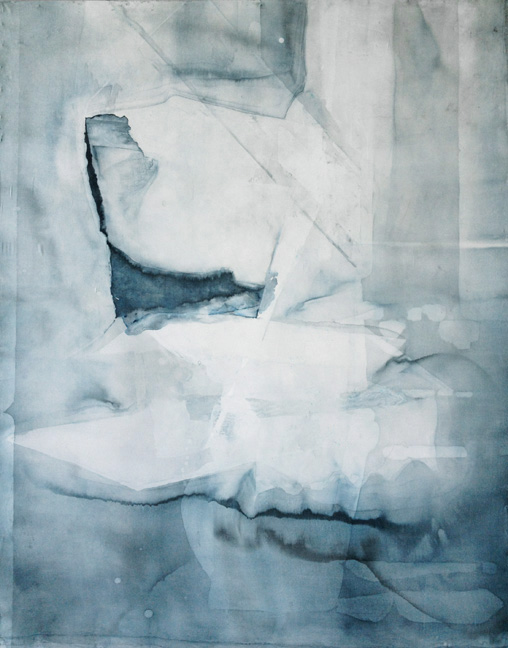
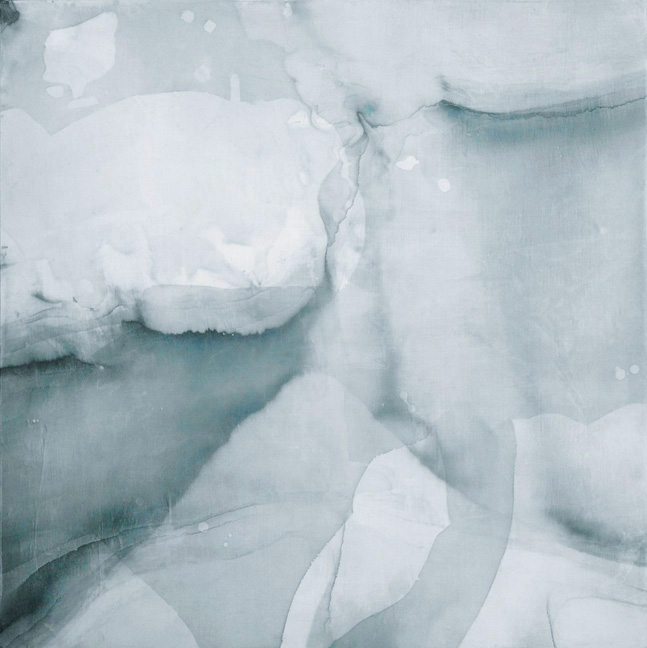
There is something poetic and not at all literal in his work that speaks to me. The organic and gently layered shapes and lines allow perception to become reality.

His technique fascinates me as well – this entire collection is a mixture of ink, silk and beeswax on canvas. I imagine a process similar to the one of really coming to know oneself – slow, patient and deeply rewarding.

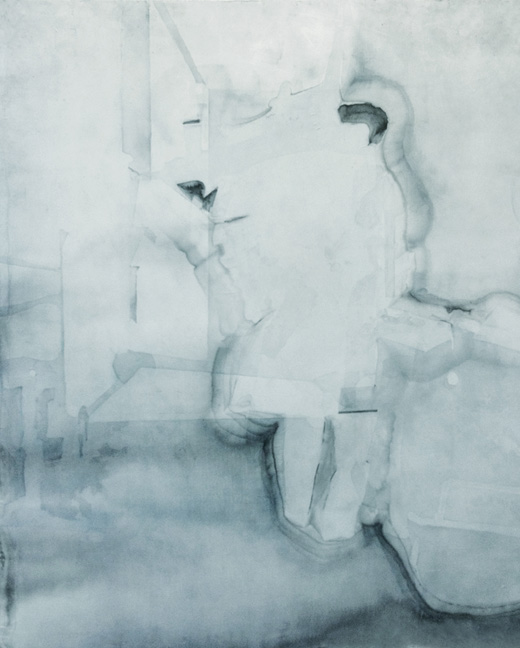
Somehow these pieces remind me that we can be at peace with the unknown. In a world where our daily task seems to be to control it, I find in Eric’s work a reminder to let go instead. In letting go, we find a sweeter, wilder song to sing, a more adventurous path to trod, and more open arms to embrace the surprises that await us.

xo
s.

By |June 17th, 2013|0 Comments

Gluten-Free Foodie Friday | Banana Torte with Salted Caramel Mascarpone Frosting

I know. I’ve got some ‘splaining to do. I’ve been MIA for a week and I’m so sorry! All will be revealed soon enough, but I promise it’s been for good reason. And I haven’t stopped thinking of you, even if I had to take a brief break from posting! In fact, I was thinking of you all just a couple of days ago as I was making this little sumpin’ sumpin’ for a lovely visit from English family this week.

My husband’s favourite dessert has always been some form of banana cake, so I really made this one to please him as much as anyone else. But I wanted to satisfy my own love of contrast to enliven the tastebuds. I accomplished that {I think} with the natural sweetness of the bananas juxtaposed against a salty-sweet and creamy mascarpone frosting that one could really eat by the spoonful all by itself.
The cake itself is moist and dense and really more like a flourless torte in many ways, making it rich and delicious.
The frosting? Well, it’s a repeater for sure. In fact, I’m already dreaming up other desserts to make just so I can use this frosting again. Super yum.
Here’s what I did for the cake:
THE INGREDIENTS:
WET
5 mashed ripe bananas
1 c. fat-free Greek yoghurt
1 tsp vanilla
DRY
2 cups almond flour
1 cup tapioca flour
2 cups coconut sugar
3 Tbsp ground chia seeds
1 1/2 tsp baking soda
THE METHOD:
Preheat the oven to 350°F. Combine all of the dry ingredients together in a large bowl. At the same time, mix together all the wet ingredients in a stand mixer, then slowly add the dry ingredients 1 cup at a time until fully combined with the wet mix.
Pour the batter into a greased 9×9 inch brownie pan and bake for 45-60 minutes or until a toothpick comes out clean. Set aside to cool, then turn out onto a cooling rack to cool completely. I chose to trim the outside edges off of the cake for a perfectly clean edge. {Let’s be honest, we also just really wanted to try some of the cake before we served it!}
OK, now for the magical frosting:
THE INGREDIENTS:
4 Tbsp salted butter
4 Tbsp maple syrup
250 g mascarpone cheese
THE METHOD:
We love making homemade salted caramel sauce to pour over ice cream or just to use as a base when plating a fancy dessert. This time, I decided to use it to sweeten and flavour my frosting. It was an experiment, and let’s just say it did not exactly fail. Super simple, super delish. Simply combine the butter and maple syrup in a microwave safe bowl and microwave at 1 minute intervals, stirring in between. Usually at the 2 minute mark {depending on your microwave} you’ll start to get the gorgeous, candy-creating frothing bubbles that tell you you’re headed in the right direction. After the 2 minute mark, stir it and let it rest to see if it cools to the right viscosity. You want it to thickly coat the back of a spoon. If it’s not quite thick enough, try another 30 seconds. If you go too far, you’ll get maple taffy {not the worst mistake ever} and you’ll want to start again. Once you’ve learned the heat levels of your microwave you’ll find this super quick and easy to do.
Let the maple caramel cool in the fridge while you bring the mascarpone to room temperature. Once they are approximately the same temperature, whip them together with your stand mixture to create this gorgeously creamy, salty-sweet finishing touch.
I decided to make another batch of caramel sauce to just drizzle over the top, and to make it more pourable I added in 3-4 Tbsp of cream after the 2 minute mark.
This dessert may look simple in its presentation, but it wakes up the tastebuds and says “Hey there. How you doin’. Yeah, that’s right. I am that good. Take another bite. You know you want to.”

I hope this finds you happy and well and surrounded by the ones you love as you head into your weekend. And I hope you can enjoy something salty-sweet, creamy and delicious as you savour the richness of such good company. After all, it’s really the people we love that make life taste sweetest.
xo
s.
By |June 14th, 2013|0 Comments

An Update on Project Ugly Duckling + The Winner of the Tata Harper #gorgeousgiveaway !

There’s something about the demolition phase of a project that is rather satisfying. Saying saiyonara to the details that were crying out to be laid to rest almost feels like we are doing our civil duty to the design world. But there are always surprises in the demolition phase. I’ve done enough renovations over my career to have learned to expect the unexpected, and this project has turned out to be no different. But I’m getting ahead of myself just a bit.

Inspired by these photos on Pinterest…

…AND by the lovely Christine Dovey of Bijou and Boheme bringing this concept to life in her own bathroom reno, I wanted to reinvent the shower in this bathroom to have more of a debonaire, Paris loft feel. It is, after all, to be the bathroom for my rather dashing and debonaire young son whose sophisticated tastes lean towards all things London and Paris. All that glass would of course also make the shower feel so much brighter and more open. My heart skipped a beat as I started to research reclaimed metal doors and windows and other creative ideas for how to bring this concept to life.

But alas, it was not meant to be in this house, for surreptitiously hidden inside the wall I had envisioned becoming the black-metal-framed, Paris-window-inspired pièce de rèsistance was my nemesis… A big, clunky, no-where-else-to-run-it plumbing stack, linking the upstairs toilet to the one in this bathroom. The location was totally unexpected and illogical, but logic and budget both dictate that you don’t move a plumbing stack unless you have gobs of discretionary income with which to do so. And so, my inspired statement wall of black metal framed glass was quietly laid to rest. {Sniff}

Back to the rather mundane tasks at hand, my superhero of a husband has finished gutting the bathroom. SO exciting to see the blank canvas emerging!

Well, an almost blank canvas, that is… Remember that wallpaper? Oh. My. Word. What a beast to get off! We tried rolling hot water over the paper. We tried steam. We tried a scraper. This stuff is just having a hard time letting go, like a bad boyfriend that won’t stop calling! I’m confident some industrial strength wallpaper remover will finally do the trick, and I’ll keep you posted on that.

The hallway is also a part of the deal as it shared the same tile floor with the bathroom, and if you can believe it, there was yet another wallpaper installed in the hallway that I forgot to show you last week. It, too, has separation anxiety and is having a very hard time letting go of the past.

With this one I kind of get it. I mean, it’s kind of gorgeous for 1969! It does seem a shame to be removing this one, but it just doesn’t work with the stunning floor we have planned. So, it is with just one lone and silent tear that I say “Farewell, gold-and-mint flocked damask wallpaper. I wish I could have salvaged you to reinstall you somewhere where you could be more aptly appreciated, but you will remain {all warm and fuzzy} in our hearts forever.”

Now it’s on to the good stuff – some design planning! Given that my longed-for feature wall of black metal framed glass for the shower was nixed by that inconvenient plumbing stack, the floor will have to more than pull its weight in making the kind of statement I want out of this bathroom. I want it to be restrained yet sophisticated and a bit unexpected. So, I have set to work dreaming up ways to use a regular old 12×24 tile in creative ways. Here’s what I’ve landed on, encompassing both the bathroom and the hallway:

I literally planned it out down to the piece so that we know exactly how many tiles to buy and how many cuts to make. This is where my husband earns another really big and shiny medal of “weekend warrior” honour, because he is cutting every single one of these tiles to create the chevron pattern I am dreaming of, resulting in about a thousand off-cuts like this one:

And a really big stack of tiles like these ones waiting to be installed:

SO exciting!! I can’t wait to share the installed floor with you next week. Wish us luck! This is the kind of installation that is not for the faint of heart.

I must thank you all for sharing the Tata Harper #gorgeousgiveaway on Twitter, Facebook and Pinterest! As promised, it is time to reveal our lucky winner! Jennifer, if you would please email me {sarah@thecuratedhouse.com} with your mailing address, you can consider yourself travel ready, armed with an emerald green bag of Tata Harper gorgeousness to have you looking fresh and flawless when you step off that plane!

xo
s.

By |June 6th, 2013|0 Comments