/Cree

THE ONE ROOM CHALLENGE | Week Three Update | Gold vs. Brass

Hello lovelies!

I hope this finds you all happy and inspired now that Spring has finally shown up on the scene. My body has decided to continue to do some “Spring cleaning” of its own by way of the nastiest flu I’ve ever experienced. Yes, I mentioned we had it run through our household last week. Well, it decided it wasn’t quite ready to break up with me and came back for an extra special bonus round. So grateful I’m the only one its clinging to, but that said, I’m working on my harshest break up lines as we speak. It’s not me, Flu, it’s you.

Gratefully, my amazing husband is currently picking up our incredible floor tile which has just arrived! More on that next week once we have it installed. I. Can’t. Wait!!

In the meantime, let me update you on the current state of affairs.

STONE SELECTED!

First off, thank you for weighing in with your thoughts on the Silestone countertop selection via Facebook, Instagram and here on the blog! The decision has been made and with a 25 year warranty, it’s a countertop that will definitely stand the test of time. I can’t wait to reveal it to you on Week Six!

THE GREAT FAUCET DEBATE

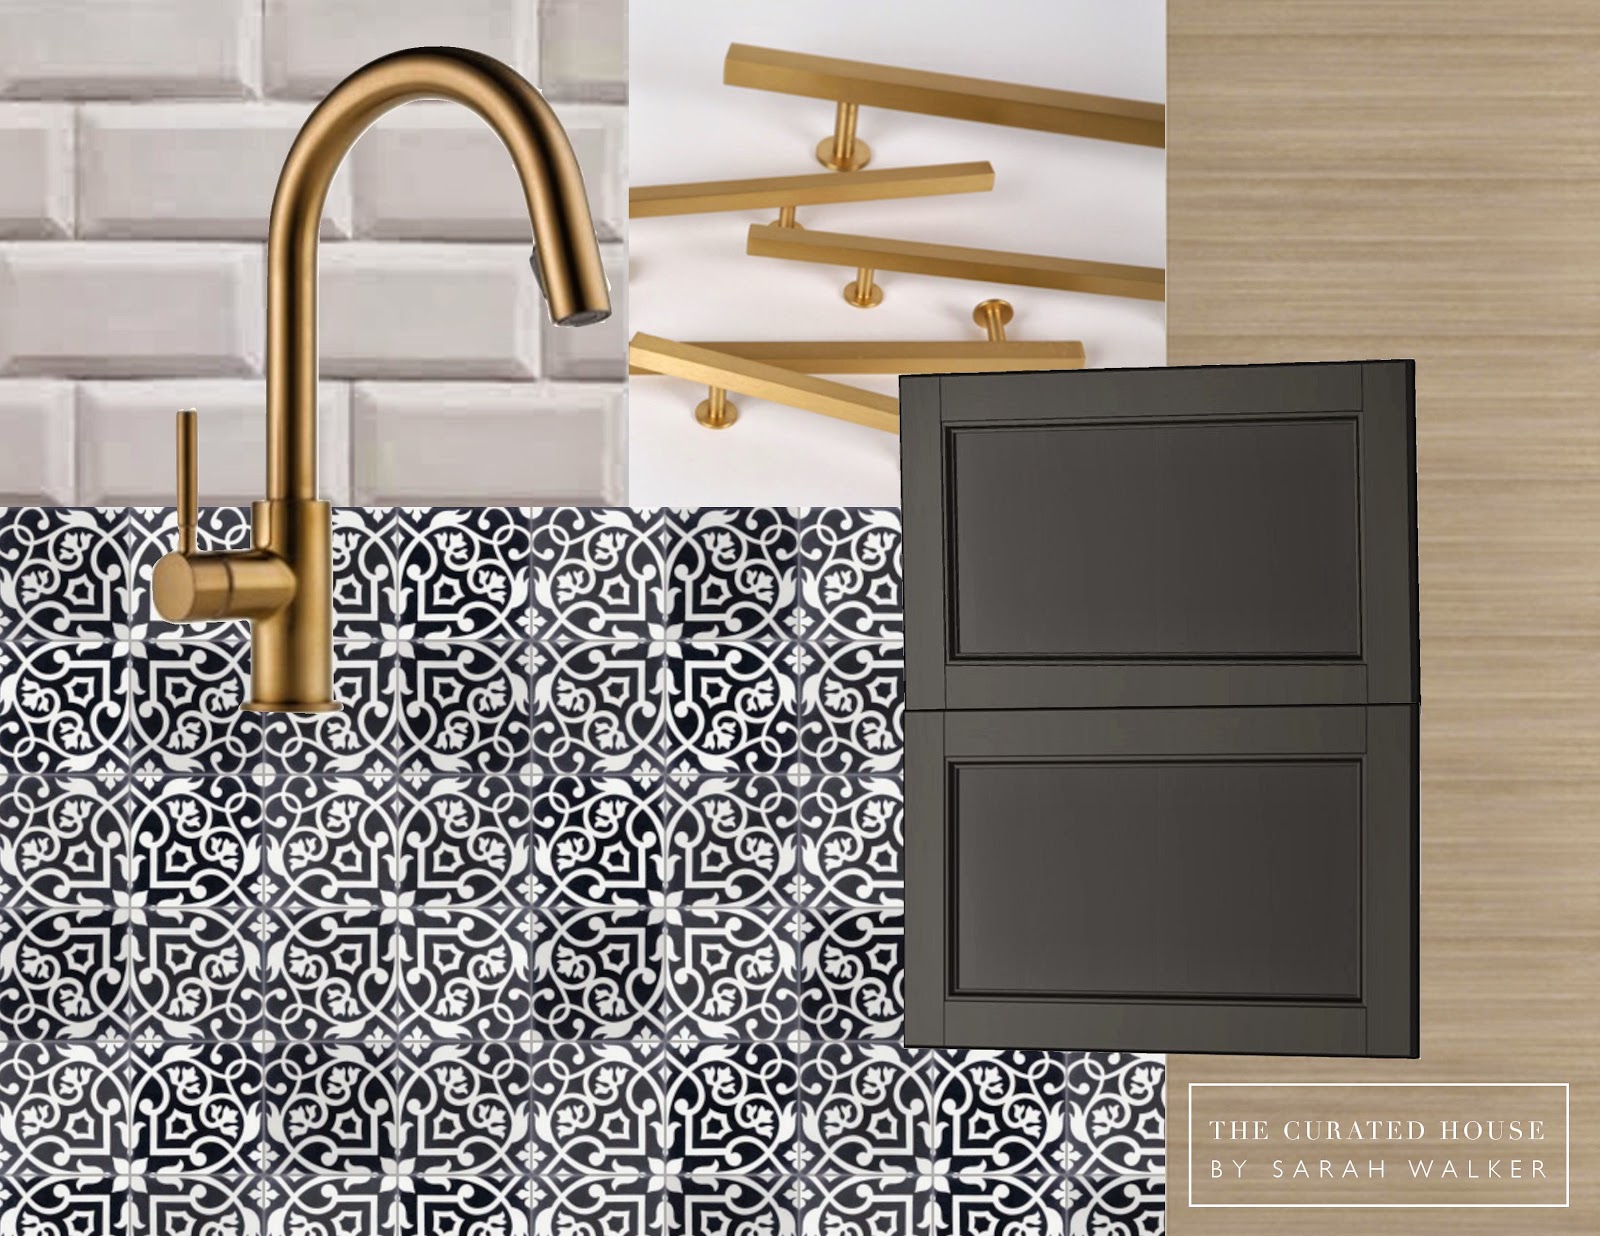
The decision of the hour relates to the great faucet debate. It’s a battle of gold vs. brass by way of two awesome faucet options. On the left you will see the more gold finish of the Delta Trinsic, and on the right, the more brass {dare I say slightly coppery?} finish of the Brizo Solna.

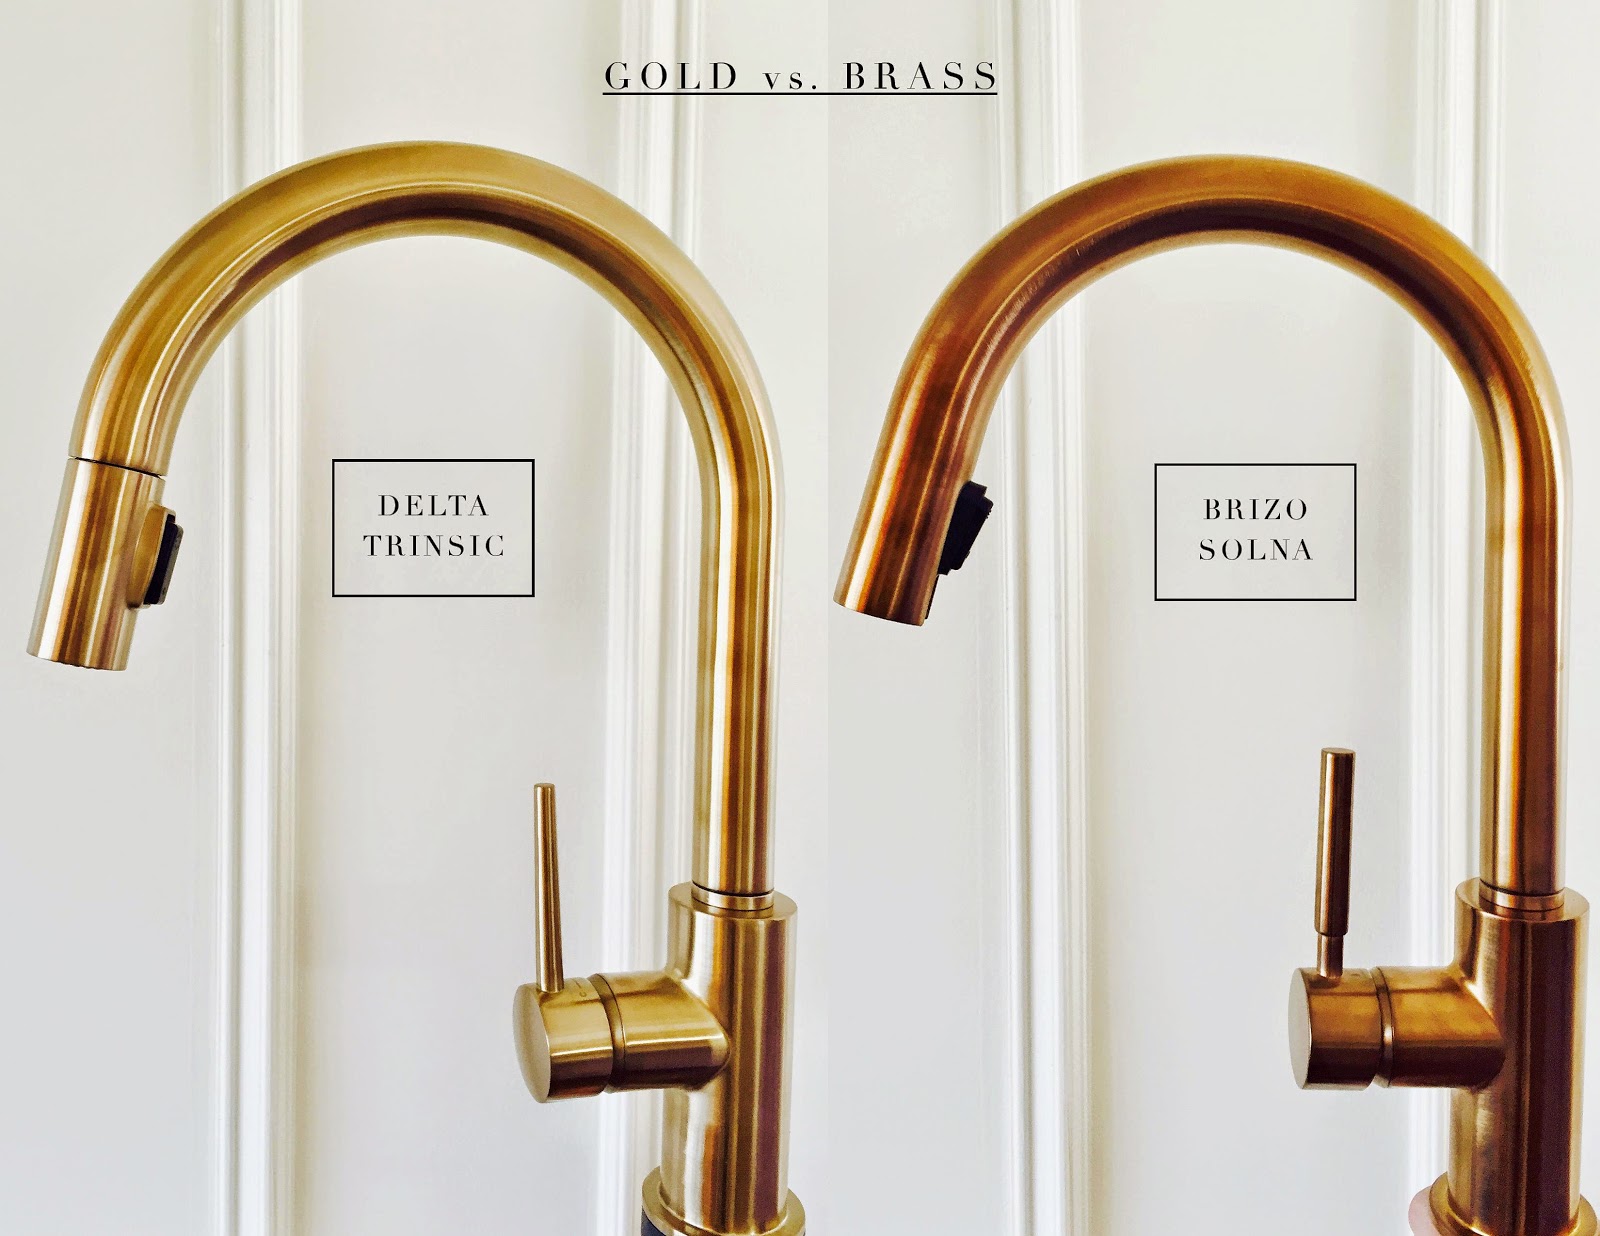
This is what I call a good problem to have, my friends. I love them both! But I want to hear from you. Which one do you prefer?

Here are the amazing Lewis Dolin pulls from Upper Canada Specialty Hardware that I will be working with:

As you can see, much more gold than brass. I really think the hardware makes the decision pretty clear, but I’d love for you to weigh in. Do you like mixing various tones and hues of metal, or do you prefer to keep it all in the family so to speak?

I have to tell you that Don, Ed and the team at Upper Canada Specialty Hardware have been an absolute dream to work with, and they’ve been instrumental in helping me to create a most beautiful solution to the ugliest problem in the laundry room using a phenomenal sliding door system. I seriously can’t wait to get it installed. More on that in the next couple of weeks!

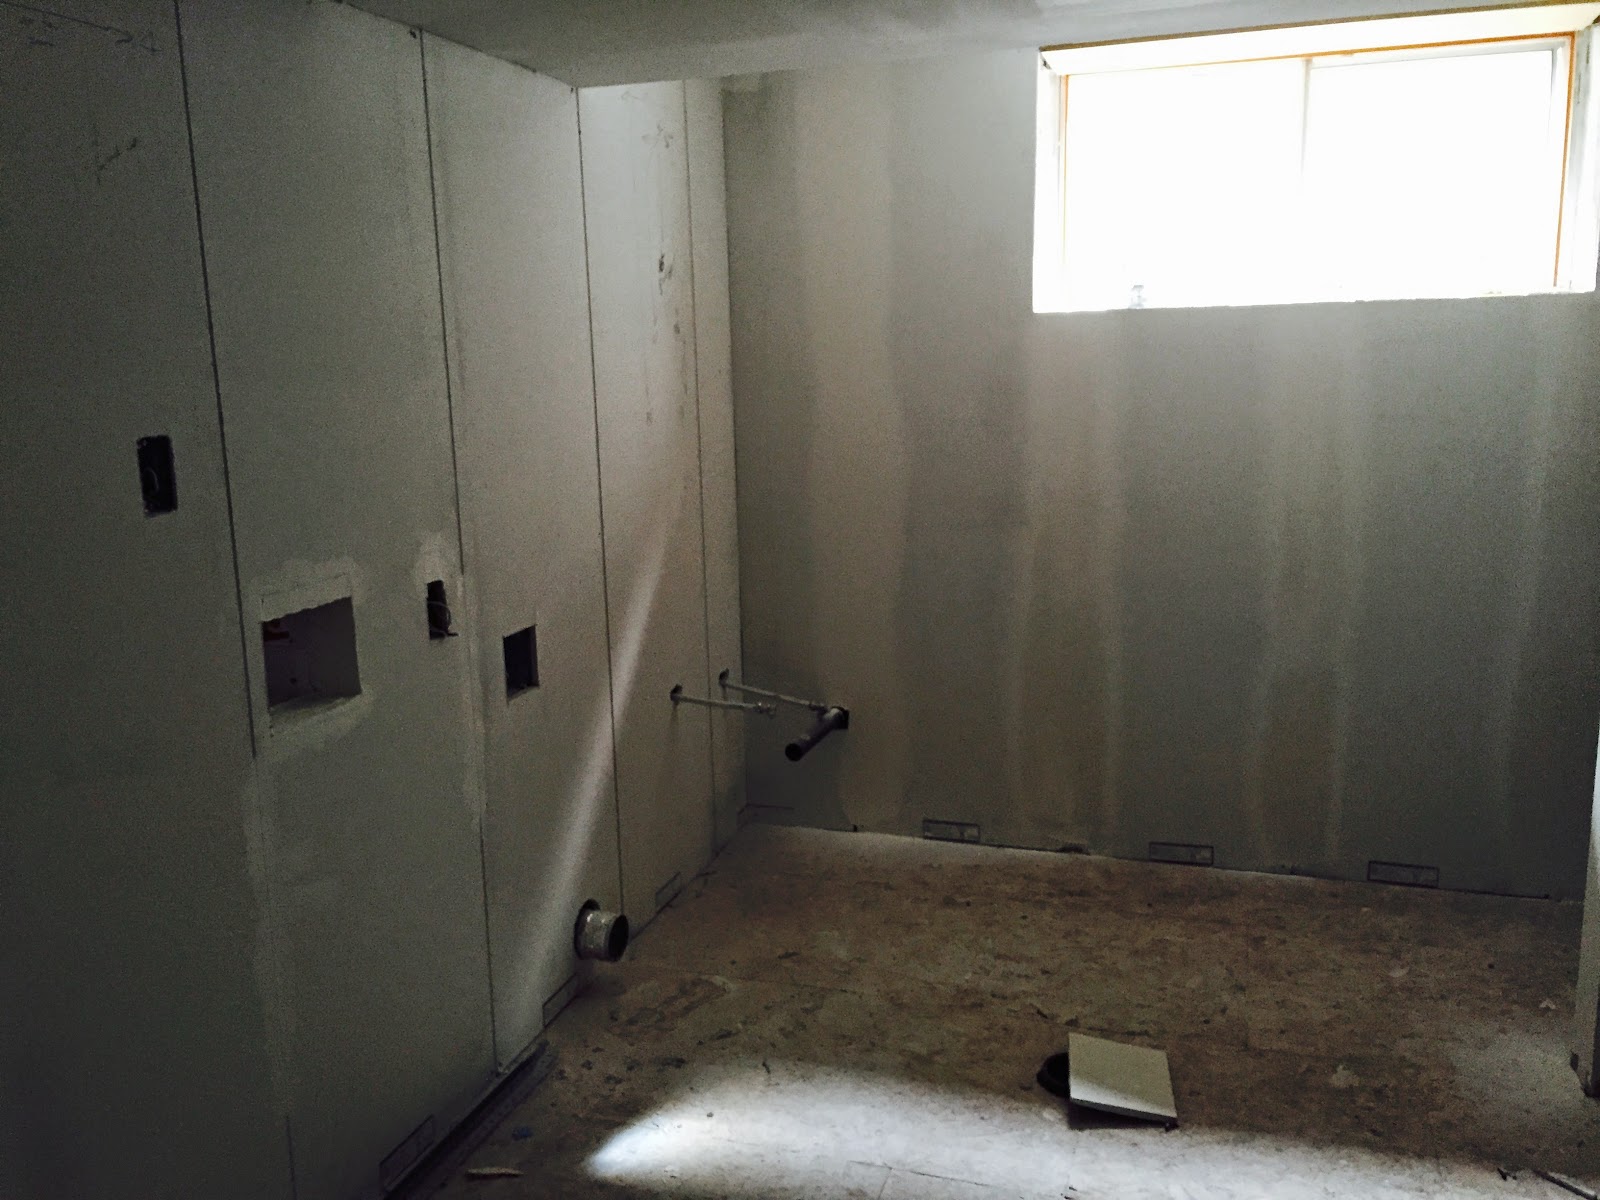
If you follow me on Instagram you will have seen the video I posted earlier this week showing how ridiculously easy the DriCore SMARTWALL system is to mud. We’ve just got a few seams left to mud, but here’s how the room looks right this minute with the ceiling drywalled and the DriCore Subfloor R+ and DriCore SMARTWALL systems installed:

I can’t tell you how excited I am to get to the pretty part! Here’s THIS WEEK’S TO-DO LIST:

* Finish installing our CREE LED pot lights
* Paint the ceiling and walls
* Install the track for the sliding door system from Upper Canada Specialty Hardware
* Seal the tiles
* Lay them out to ensure the pattern is correct and we have what we need
* Cut and install the tiles and let them set
* Grout the tiles
* Paint the MDF end gables
* Install end gables and base cabinets
* Get countertop templated

Sounds do-able with a wicked flu and only a week to do it all, right? SO much more to be done once we make our way through that list, but we are just taking it one week at a time, one day at a time. I figure I can rule the world from bed with my laptop and iPhone at my side, and the plan is to be back on my feet as of tomorrow so I can dive in with Graham into the tile installation.

Be sure to check out what the other designers and bloggers have been up to and let me know what your favourite projects are so far! Stay well and have a wonderful Spring weekend!

xo
s.

Coco + Kelley * Jana Bek * Autumn Clemons * The English Room * Vanessa Francis * Greige Design * Hi SugarplumI Heart Organizing * Jenna Sue Design * Stephanie Kraus * The Pursuit of Style * Julia Ryan * Savvy Home Simple Details * Simply Grove * 6th Street Design * Jill Sorensen * Swoon Worthy * Waiting On Martha * Kimberly Shlegel Whitman * and my friends and linking participants Lisa Canning and Abby M. Interiors. Go to Calling It Home to check out all of the 150+ Linking Participants for the April 2015 edition of the One Room Challenge!

By |April 16th, 2015|3 Comments

THE ONE ROOM CHALLENGE | Week Two Update

Hello friends and design lovers! How is it Thursday again already? Man, this week has flown by! I hope yours has been a bit less of a whirling dervish than mine. Mixed in with the flu passing through our household {it still hasn’t read its eviction notice properly}, we have been working hard at moving the needle forward on progress with the laundry room.

As with real life, it has not been without its challenges. The plumbing was a fairly tall order as we had to remove all the old copper pipes. Let’s just say it proved more of a chore than anticipated and we actually had to move the back wall in a bit to accommodate some of the “choices” made by the previous home owner that could not be changed without ripping up the concrete. That said, my super-hubs got it done and we were able to check that off the list. We are just waiting for the electrical inspection and then we can check that off the list as well, which will be great as I can’t wait to finish the drywall and get our Cree LED pot lights installed…but I’m getting ahead of myself.

Right now, we are still very much in the early stages of construction. The amazing DriCore Subfloor R+ is in, though, so although the space doesn’t look glamorous yet, it feels so much better. By that I mean it is so much warmer. 

The Subfloor R+ comes in square tiles that click together, making the installation super fast and easy, and amazingly it actually raises the temperature of the finished flooring by up to 5.6° C {10.6° F for all of my American friends}. That is so important in basements, especially when you aren’t splurging on radiant heat. Bye-bye popsicle toes, hello happy feet!

Hello cozy toesies!

The only thing to slow us down with finishing the installation of the subfloor was our vintage 1969 concrete foundation which is ridiculously hard and dense. The older the concrete, the harder it is, which wouldn’t be a big deal if we weren’t tiling. But tiling means securing the Subfloor R+ with tapcons drilled into the concrete to stabilize it so the tiles won’t crack. Let’s just say getting those suckers into the concrete was a little bit like trying to nail jello to the wall. We had to go up a size in tapcons before we could get them to stop snapping off at the halfway point. And by “we” I mean Graham. And by “snapping off” I mean making Graham lose his proverbial jello.

My involvement in said scenario was making the run to the Home Depot to get bigger tapcons when the first ones failed completely. That and offering lots of words of encouragement to the hubs as he wrestled the concrete into submission. Gratefully, Graham can now add “concrete tamer” to his resumé and our Subfloor R+ is totally stable and secure and ready for the tile to be laid.

We {aka Graham} have also been working away on installing the DriCore SMARTWALL system. Smart is an understatement. This product is like the superhero of basement refinishing, and it will make you feel like the superhero of your basement reno.

Of all the jobs involved in finishing this space, the drywall would be what Graham likes the least, mainly because of the mudding and taping. If you have ever tackled this task yourself, you will know that it is something of an art form. A very messy, very challenging art form. Looks easy, really isn’t, and looks terrible if you get it wrong. Not only that, but there are several time consuming steps involved: 1. Install insulation and vapour barrier, 2. Attach drywall to the studs, 3. Mud and tape the seams, 4. Wait for the mud to dry, 5. Sand that down, 6. Repeat the mudding with a feather coat, 7. Wait for that to dry, 8. Sand again… You get the idea.

Well, not so with the Smartwall system. Here’s a side view of the product so you can get an idea of the anatomy:

SMARTWALL is brilliant because it allows you to install your insulation and drywall all in one fell swoop, but that’s not even the best part! The panels click together {just like the interlocking Subfloor R+ system}, and the very small seams are then filled with a simple-to-use putty that takes the mess out of the usual experience of mudding. Hello! Happy, insulated, drywalled walls in a fraction of the time it would take to accomplish traditionally. Thank you DriCore!

We hope to finish installing the SMARTWALL panels over the weekend {remember that part about the flu slowing us down?} and I will be sure to share a photo of that stage of things next week.

In the meantime, I would love your input! I am trying to decide between two similar but different-enough-that-it’s-a-decision choices for my countertop. Both are amazing engineered quartz from Silestone, and both are in quiet grey tones. Weigh in with me? Which one do you like better?

The top one is called Lagoon, and the bottom one is called Helix. I like the subtlety of the tones in the Lagoon, but I like the movement in the Helix. What do you think? I feel like they both do a great job of replicating natural stone and I love that Silestone is perfect for a high-traffic laundry room with its stain resistant, scratch resistant, bacteriostatic technology. This is truly a win-win decision I have before me! Can’t wait to see where it lands. Cast your vote in the comments to help me finalize the decision!

That’s it for me this week. Be sure to go and check out what these amazing creatives are up to and get inspired by their progress:

Coco + Kelley * Jana Bek * Autumn Clemons * The English Room * Vanessa Francis * Greige Design * Hi SugarplumI Heart Organizing * Jenna Sue Design * Stephanie Kraus * The Pursuit of Style * Julia Ryan * Savvy Home Simple Details * Simply Grove * 6th Street Design * Jill Sorensen * Swoon Worthy * Waiting On Martha * Kimberly Shlegel Whitman * and my friends and linking participants Lisa Canning and Abby M. Interiors. Go to Calling It Home to check out all of the 150 Linking Participants for the April 2015 edition of the One Room Challenge!

I absolutely love the Moroccan-inspired wallpaper that Vanessa Francis is using in her bathroom update. The art addict in me is all over what is happening over at Waiting On Martha, and the pattern play of fabrics in Cassie’s design plan over at Hi Sugarplum is totally my cuppa. Which projects are getting your creative juices flowing? Can’t wait to hear from you all this week. Here’s to less flu and more follow through!

xo
s.

By |April 9th, 2015|5 Comments