/Foodie Fridays

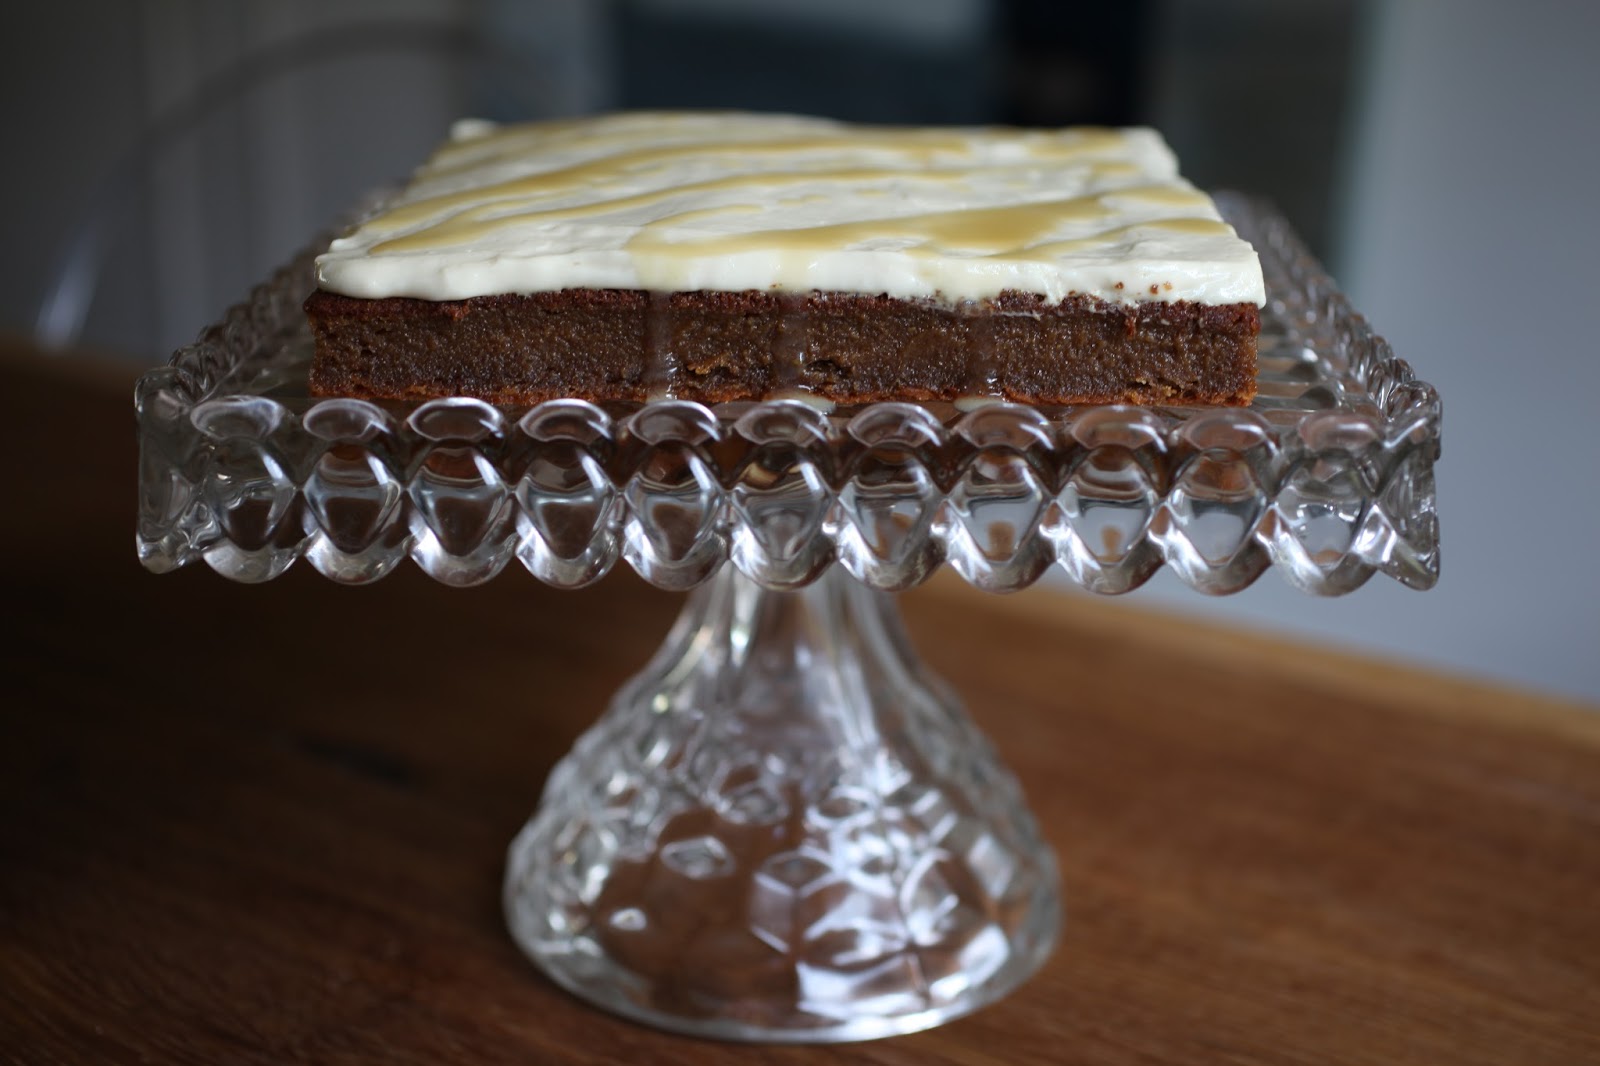
Gluten-Free Foodie Friday | Banana Torte with Salted Caramel Mascarpone Frosting

I know. I’ve got some ‘splaining to do. I’ve been MIA for a week and I’m so sorry! All will be revealed soon enough, but I promise it’s been for good reason. And I haven’t stopped thinking of you, even if I had to take a brief break from posting! In fact, I was thinking of you all just a couple of days ago as I was making this little sumpin’ sumpin’ for a lovely visit from English family this week.

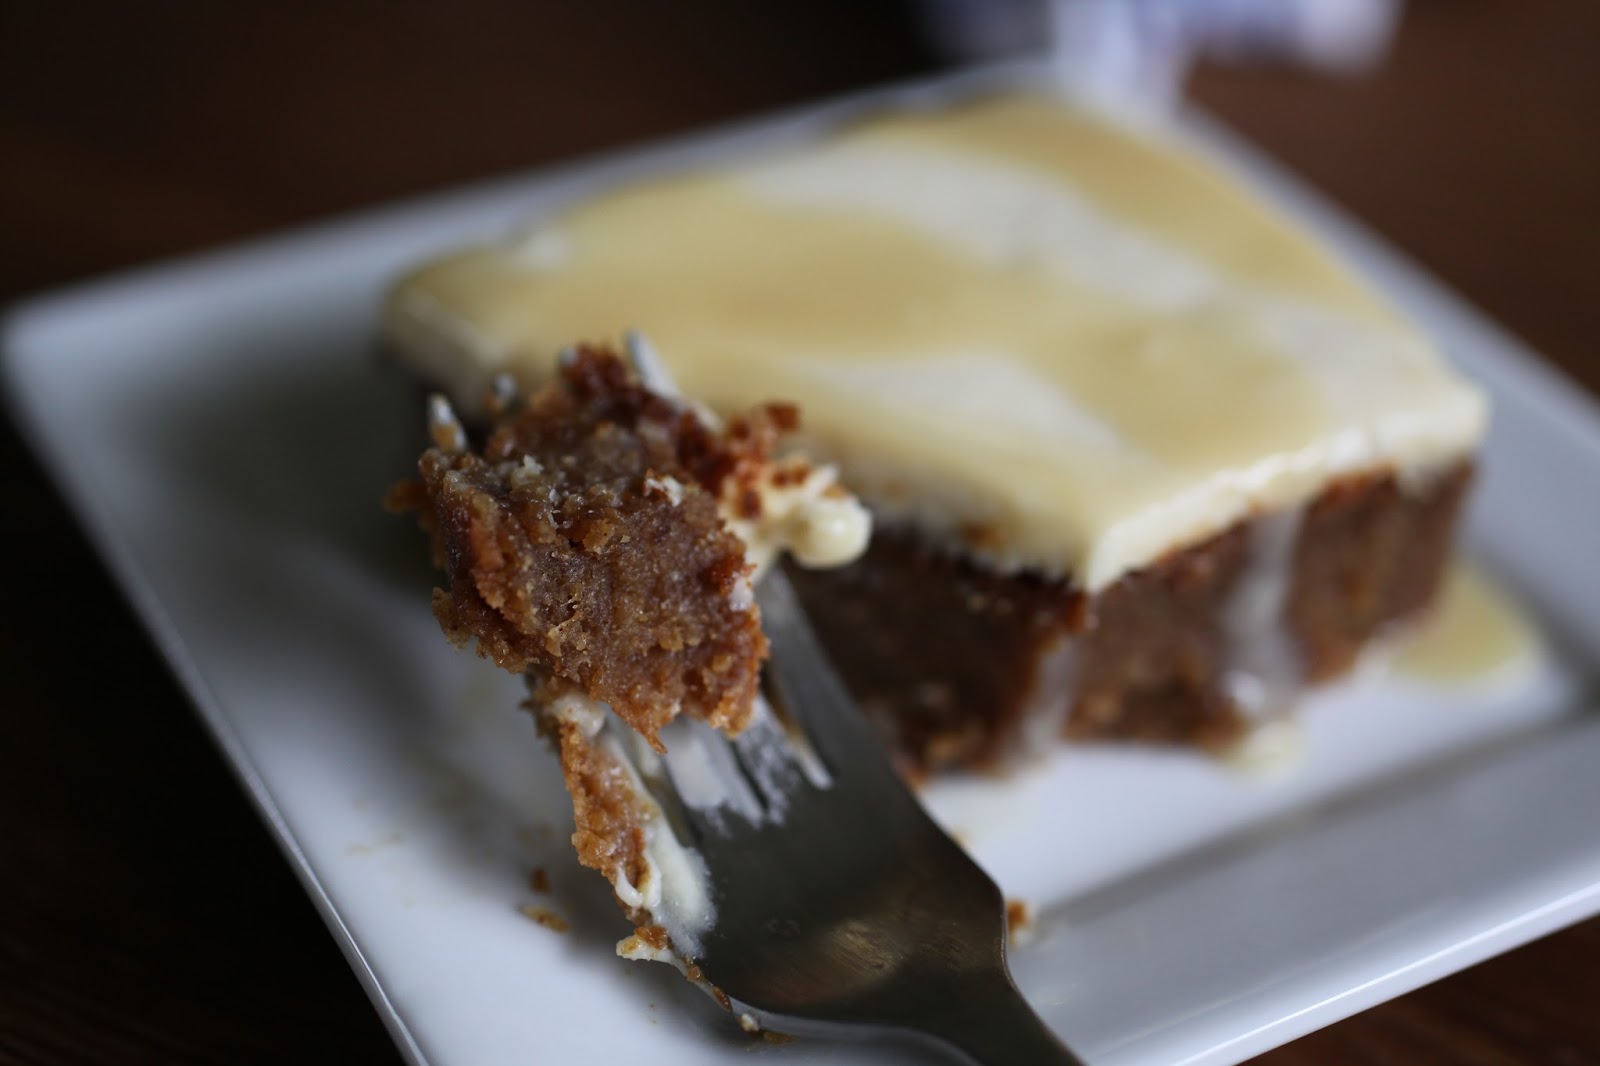
My husband’s favourite dessert has always been some form of banana cake, so I really made this one to please him as much as anyone else. But I wanted to satisfy my own love of contrast to enliven the tastebuds. I accomplished that {I think} with the natural sweetness of the bananas juxtaposed against a salty-sweet and creamy mascarpone frosting that one could really eat by the spoonful all by itself.
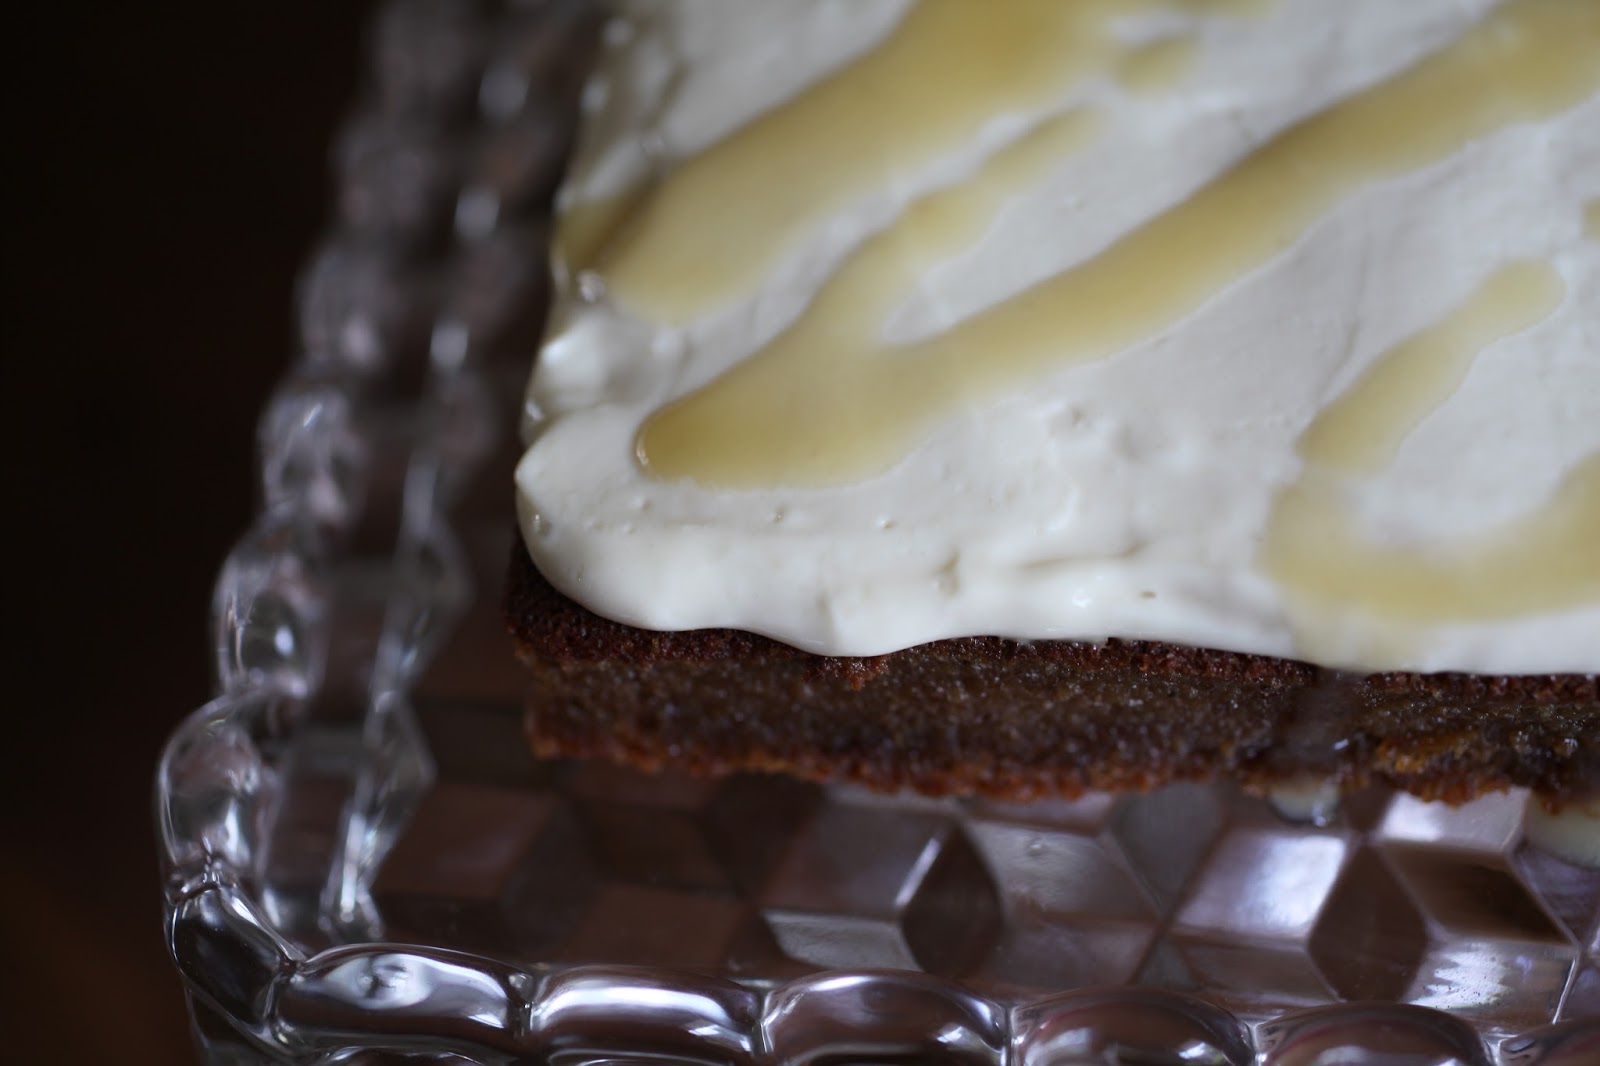
The cake itself is moist and dense and really more like a flourless torte in many ways, making it rich and delicious.
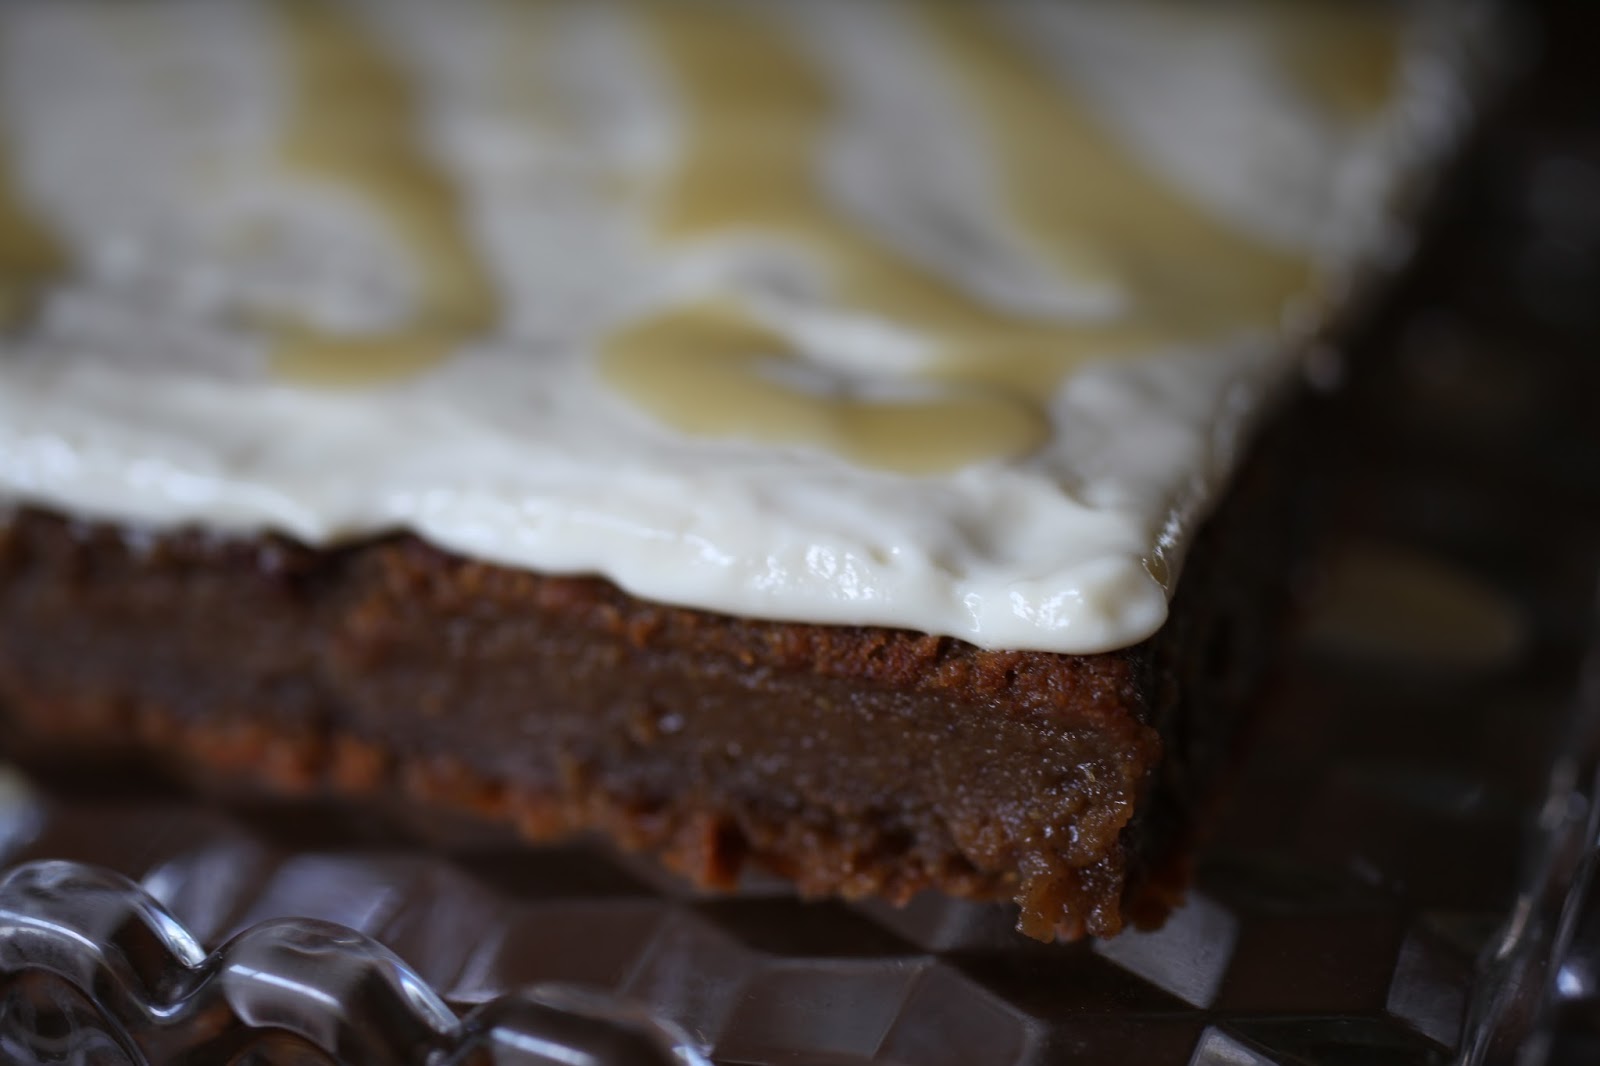
The frosting? Well, it’s a repeater for sure. In fact, I’m already dreaming up other desserts to make just so I can use this frosting again. Super yum.
Here’s what I did for the cake:
THE INGREDIENTS:
WET
5 mashed ripe bananas
1 c. fat-free Greek yoghurt
1 tsp vanilla
DRY
2 cups almond flour
1 cup tapioca flour
2 cups coconut sugar
3 Tbsp ground chia seeds
1 1/2 tsp baking soda
THE METHOD:
Preheat the oven to 350°F. Combine all of the dry ingredients together in a large bowl. At the same time, mix together all the wet ingredients in a stand mixer, then slowly add the dry ingredients 1 cup at a time until fully combined with the wet mix.
Pour the batter into a greased 9×9 inch brownie pan and bake for 45-60 minutes or until a toothpick comes out clean. Set aside to cool, then turn out onto a cooling rack to cool completely. I chose to trim the outside edges off of the cake for a perfectly clean edge. {Let’s be honest, we also just really wanted to try some of the cake before we served it!}
OK, now for the magical frosting:
THE INGREDIENTS:
4 Tbsp salted butter
4 Tbsp maple syrup
250 g mascarpone cheese
THE METHOD:
We love making homemade salted caramel sauce to pour over ice cream or just to use as a base when plating a fancy dessert. This time, I decided to use it to sweeten and flavour my frosting. It was an experiment, and let’s just say it did not exactly fail. Super simple, super delish. Simply combine the butter and maple syrup in a microwave safe bowl and microwave at 1 minute intervals, stirring in between. Usually at the 2 minute mark {depending on your microwave} you’ll start to get the gorgeous, candy-creating frothing bubbles that tell you you’re headed in the right direction. After the 2 minute mark, stir it and let it rest to see if it cools to the right viscosity. You want it to thickly coat the back of a spoon. If it’s not quite thick enough, try another 30 seconds. If you go too far, you’ll get maple taffy {not the worst mistake ever} and you’ll want to start again. Once you’ve learned the heat levels of your microwave you’ll find this super quick and easy to do.
Let the maple caramel cool in the fridge while you bring the mascarpone to room temperature. Once they are approximately the same temperature, whip them together with your stand mixture to create this gorgeously creamy, salty-sweet finishing touch.
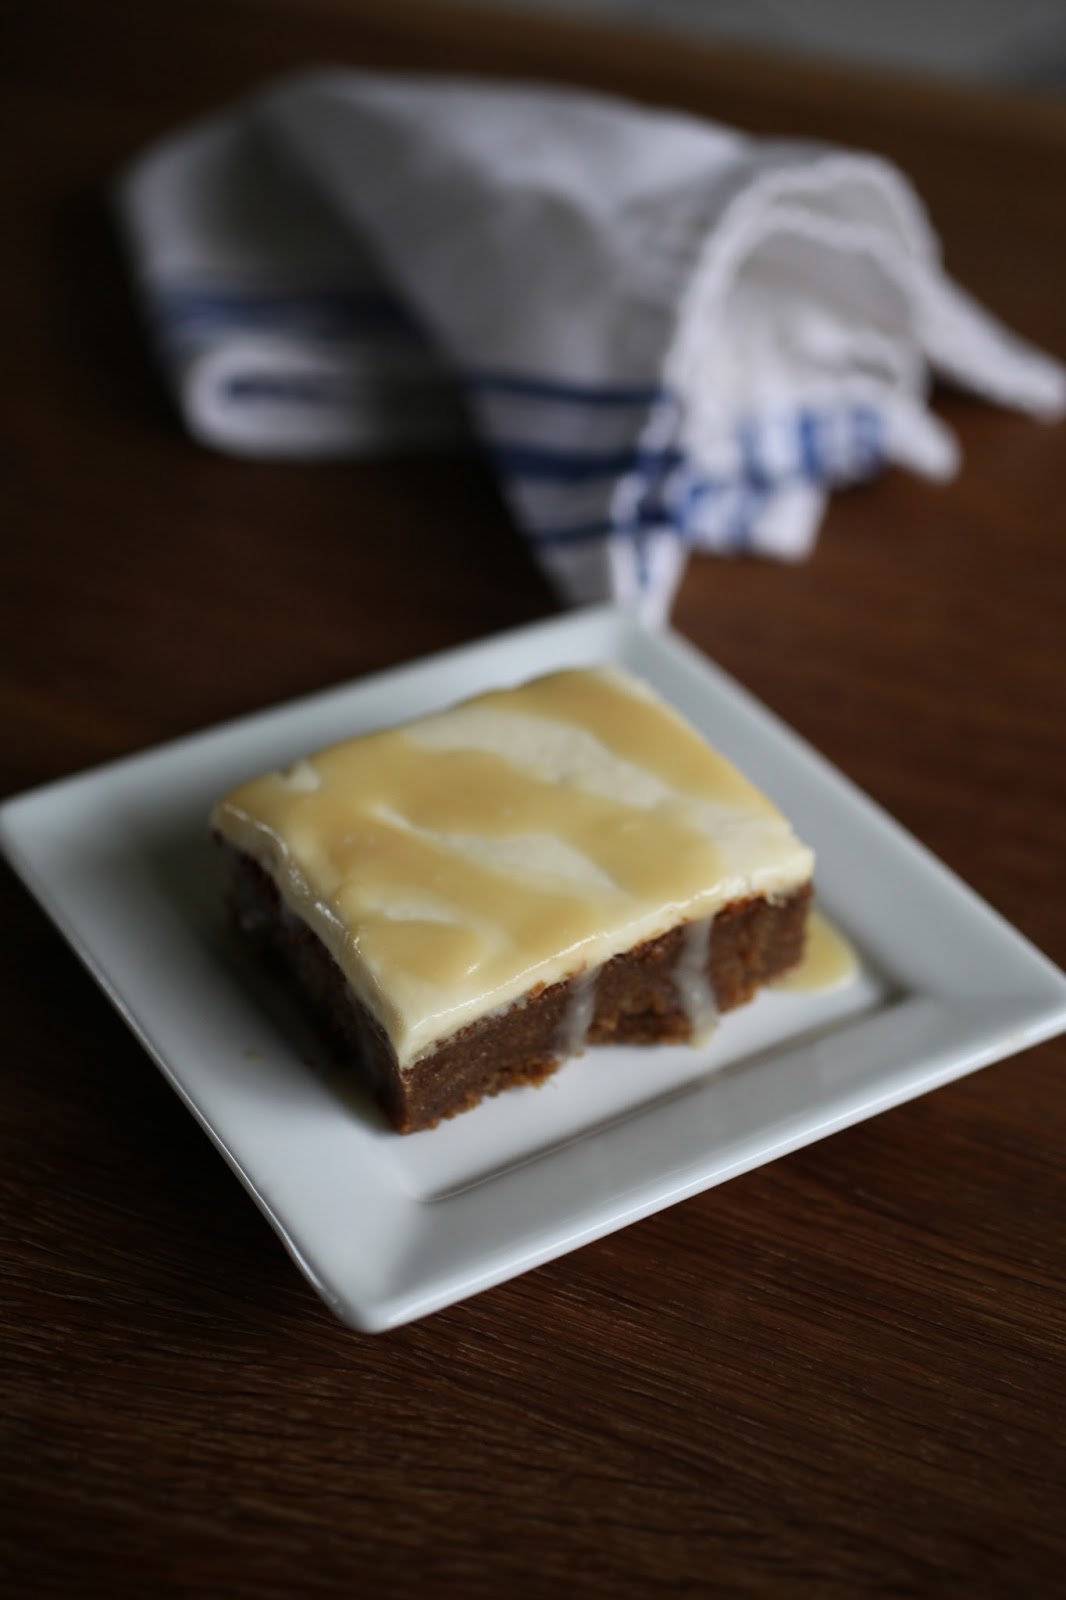
I decided to make another batch of caramel sauce to just drizzle over the top, and to make it more pourable I added in 3-4 Tbsp of cream after the 2 minute mark.
This dessert may look simple in its presentation, but it wakes up the tastebuds and says “Hey there. How you doin’. Yeah, that’s right. I am that good. Take another bite. You know you want to.”

I hope this finds you happy and well and surrounded by the ones you love as you head into your weekend. And I hope you can enjoy something salty-sweet, creamy and delicious as you savour the richness of such good company. After all, it’s really the people we love that make life taste sweetest.
xo
s.
By |June 14th, 2013|0 Comments

Foodie Friday | The Ultimate French Press by Espro

I am a coffee lover. Not an addict per se – one or at the most two cups in the morning is the maximum indulgence – but a lover of a really good cup. I much prefer quality over quantity in this department, and as such have long been a fan of French Press over drip brewed. The experience is a much richer, more aromatic coffee, but for years I’ve been wrestling with two problems: one, I regularly break the glass beakers; and two, I don’t enjoy the sludge in the bottom of my cup.

I have been searching for a double-walled stainless steel French Press for the last couple of years that would at least solve problem number one. I just hadn’t found one I loved. Well, to my great delight, I finally stumbled upon a French Press that in fact solves both problems with elegance and ease. Even better, the Espro Press is the creation of Canadian innovators. We are called the Inovation Nation for a reason! And to truly make them the hippest coffee kids on the block, co-founders  Bruce Constantine and Chris MacLean got it all started with a Kickstarter campaign.

The solution to problem one is self-explanatory, but how does Espro’s Coffee Press solve the problem of sludge in the bottom of the cup? 
With genius.
They’ve invented a micro-filter that is totally unique. Separated into two parts, it filters the coffee twice to allow all of the gorgeous body and flavour of the beans to emerge while leaving behind the grit.

The Espro Press is available in 3 sizes, but I love the 32oz and their genius fill lines, allowing you to brew either two or four cups at a time {or four to eight if you don’t use “bladder busting” sized mugs}.
 

Espro claims that their unique micro-filtration allows more of the natural oils from the coffee beans to emerge in the cup, so I decided to test it out. {Spoiler alert: they’re right}

I chose 3 different roasts from my local Whole Foods to see what flavours would come alive with my favourite new way to brew.

For my medium roast, I chose a single origin Ethiopian. Coffee is very important to the Ethiopian economy, with about 25% of Ethiopians deriving their income from coffee growing and harvesting.

This coffee is brighter and more acidic than I usually prefer, but I was wooed by the fruit-kissed, earthy roundness I experienced which was no doubt brought to the fore by Espro‘s micro-filtration.

For my medium-dark roast, I chose the organic Bel Canto Espresso.

A blend of heavy and nutty coffees from the Americas are mixed with a splash of Ethiopian beans for an elegant brewed cup of coffee. Of course this particular roast is amazing as Espresso. I like steeping it extra-long so it gets a bit syrupy and dramatic.

For my dark roast, I chose my go-to classic: the organic Italian Roast.

Just looking at these glossy, dark beans you get a sense of the hearty richness you can expect in your cup. This one was the most pleasant surprise because it was the roast most familiar to my palette. The rich, velvety depth of the roast was beautifully balanced by the sweetness and aromatics. Amazing.

My two top tips:
1. Choose a burr coffee grinder for a more even grind of your fresh beans, and keep the grind coarse
2. Steep the coffee for at least 4 minutes, stirring the beans into the water every 1-2 minutes, but letting them rest the last minute before you press.

Simply put, my daily coffee ritual will never be the same! Thank you, Bruce and Chris, for being such passionate innovators and for solving all our French Press dilemnas. Now all we’re left to do is enjoy connecting with good friends over a perfect cup.

xo
s.

By |April 26th, 2013|0 Comments

Foodie Friday | The Little Paris Kitchen

It should come as no surprise to you by now that I have an ongoing love affair with Chronicle Books. I discovered them last year while I was in San Francisco, and it was as if I had stumbled upon a publisher who had been quietly crafting beautiful volumes just for me. They most definitely have my number, and this latest discovery is no exception.

I confess this cookbook had an instant shortcut to my heart, parceque j’adore Paris. I have only been twice, but it is now the city against which all of my other travels are compared. It is the city where I imagine my most romantic getaways with my husband will forever take place. The architecture, the culture, the art, the people, the food. Lord help me, the food. Parisians know how to transform eating into an artform, from the simplest of unpretentious dishes to the most decadent in haute cuisine. From eating cheese from a local fromagerie {enjoyed with a nice bottle of red} in the gardens of Les Tuileries, accompanied by the melodious greetings of “bon apetit” as locals walked by, to indulging in gastronomic creations in restaurants, some of my favourite “food memories” are from Paris.

For those of us who are longing to recreate our French foodie fantasies in our own little kitchens here at home, Rachel Khoo – who didn’t speak a word of French when she courageously enrolled in the world-famous Le Cordon Bleu cooking school in Paris – has immersed herself in the language and art of French cooking and now translates French classics for real life foodies in her newly released cookbook The Little Paris Kitchen.

The “test kitchen” for Rachel’s cookbook was indeed a little kitchen in Paris. Tiny in fact. With just a two-burner stove and seating for “up to two,” Rachel began accommodating guests who came to experience her modern twists on classic French dishes from around the country. The 120-page volume is filled with modern and accessible recipes for quintessentially French home cooking to share with your family and friends.

Given that Spring seems to have finally sprung, I thought I would share a recipe that invites a bit of time outside working on the grill. As you already know, I love Coq Au Vin, and I can’t wait to try this uniquely fresh twist on the French Classic!

Serves 4 as a Main Course
Coq au vin on skewers

Cockerel stewed in red wine for several hours is traditional coq au vin. I thought I’d shake that
on its head and make a barbecue version with a red wine dipping sauce.

INGREDIENTS:

• 2 cloves of garlic, finely chopped 
• 1 onion, finely chopped
• a knob of butter 
• 4 small sprigs of thyme 
• 3 bay leaves 
• 2 cups red wine
• 1½ lb boned chicken legs, with skin on* 
• 5 oz lardons or cubes of smoked bacon
• 2 large carrots, cut into large chunks 
• 8 small new potatoes
• 8 small button onions, peeled and left whole 
• 1 tbsp red wine vinegar
• 1 tbsp cornstarch 
• 1 tbsp sugar 
• salt and pepper
• 8 small button mushrooms, brushed or peeled 
• 1 tbsp olive oil
• 8 barbecue skewers—if they’re bamboo, soak them in water for at least an hour before using
 
METHOD:
To make the marinade : Fry the garlic and onion in the butter until golden brown. Add the thyme and bay leaves and cook for another minute before adding the wine. Bring to a boil and simmer for 10 minutes. Leave to cool.

Cut the chicken into large chunks, place in a large plastic container with the lardons, and add the cold marinade. Cover and marinate in the fridge for at least 4 hours (best overnight).

Lift the chicken and lardons out of the marinade, then strain through a sieve. Measure 1 ¼ cups marinade, pour it into a pan and set aside. Put the carrots, potatoes and onions into a large pan of cold salted water and bring to a boil. Parboil for 5 minutes, then drain the vegetables into a sieve and hold under cold running water for 2 minutes. Leave to cool.

On a high heat, reduce the marinade by half before adding the vinegar. Mix the cornstarch to a thin paste with some water, whisk into the sauce, and boil for 5 minutes or until the consistency of heavy cream. Add the sugar and season with salt and pepper. Cover with plastic wrap, pressing it down in direct contact with the sauce. Keep the sauce warm until needed.

Thread the chicken onto the skewers, alternating with the lardons, parboiled vegetables and mushrooms.
Brush with the olive oil before cooking on the barbecue (or indoors on a griddle pan) for around 5 minutes, turning regularly. To check the chicken is cooked, cut a piece open—the juices should run clear, not red or pink. Serve with the sauce (reheated in a pan or microwave if necessary).

* Chicken legs have more flavor and tend to be juicier than breast, or you could use boneless chicken
thighs (skin on) instead. Breast meat will be fine too, as long as you are careful not to overcook it.

Preparation time: 1 hour 

Resting time: 4 hours–overnight
Cooking time: 20 minutes
Thank you, Rachel, for this delightful little cookbook from your delightful little Paris kitchen.
Bon apetit!
xo
s.

By |April 5th, 2013|0 Comments