/Fornasetti Nuvole

HOW TO CUSTOMIZE AN IKEA KITCHEN | LESSONS FROM THE DESIGN TEAM AT STYLE AT HOME

If there’s one thing I would say the amazing design team at Style At Home taught us at this year’s Interior Design Show, it’s that Paris really does hold all the secrets to a chic and gracious way of living. Walking into their award-winning customized IKEA kitchen booth felt like being transported into a grand French kitchen, where the boulangerie and bistro were both right at home. So today, I’m sharing a few design lessons we can take from Style At Home‘s beautifully customized space.


LESSON ONE: TAKE YOUR CUES FROM PARIS

Ask anyone where they want to travel and Paris is most likely near the top of their list. We’ve only been a couple of times and can’t wait to go back. Our dream? A summer in Paris with our kids. But in the meantime, why not bring Paris home?

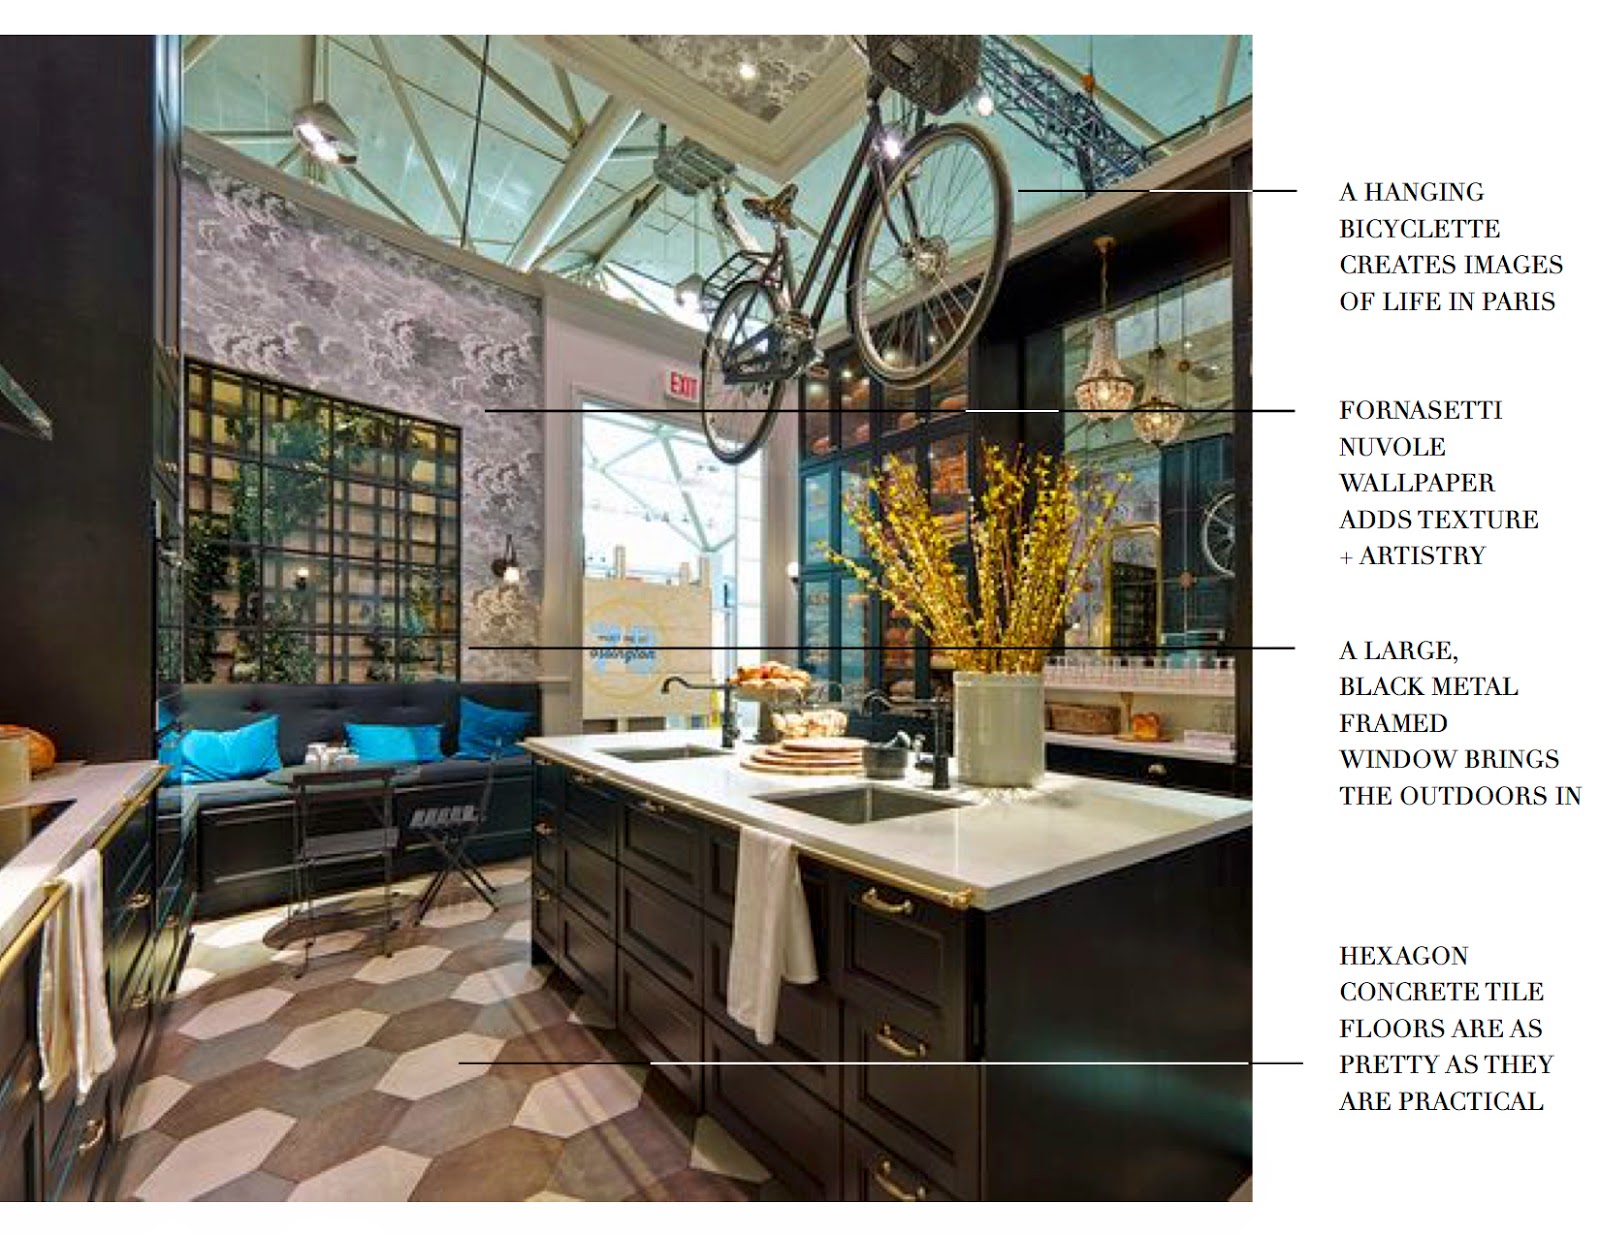
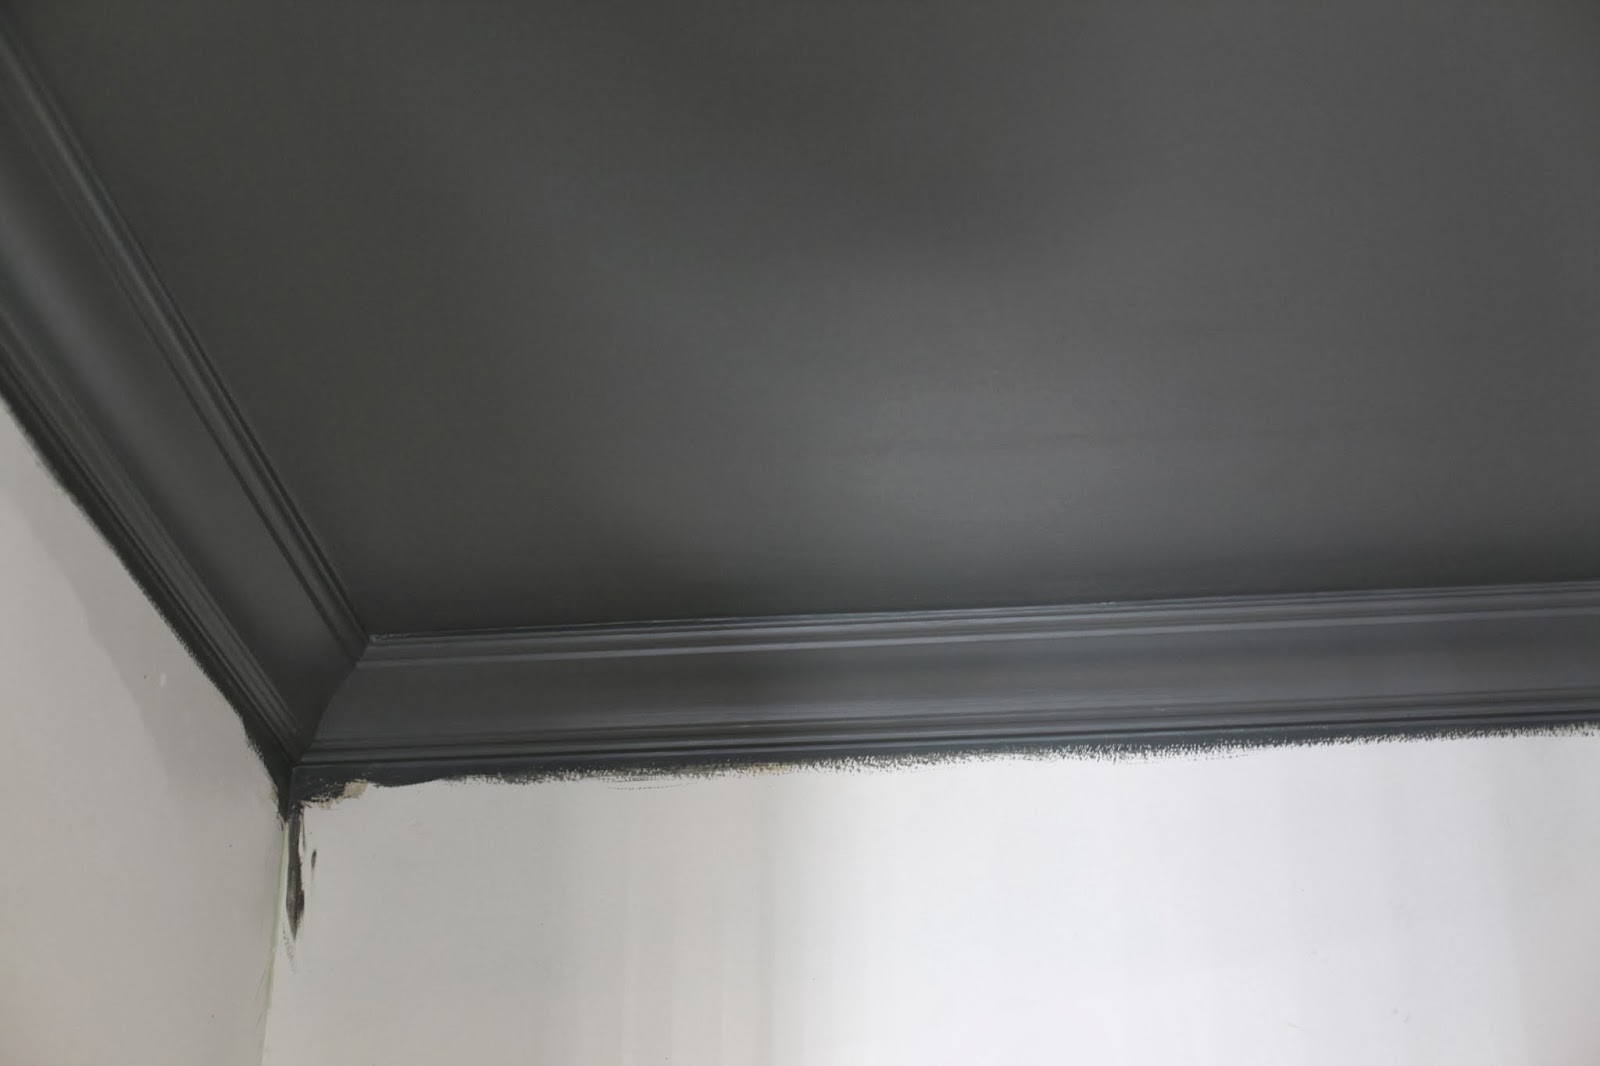
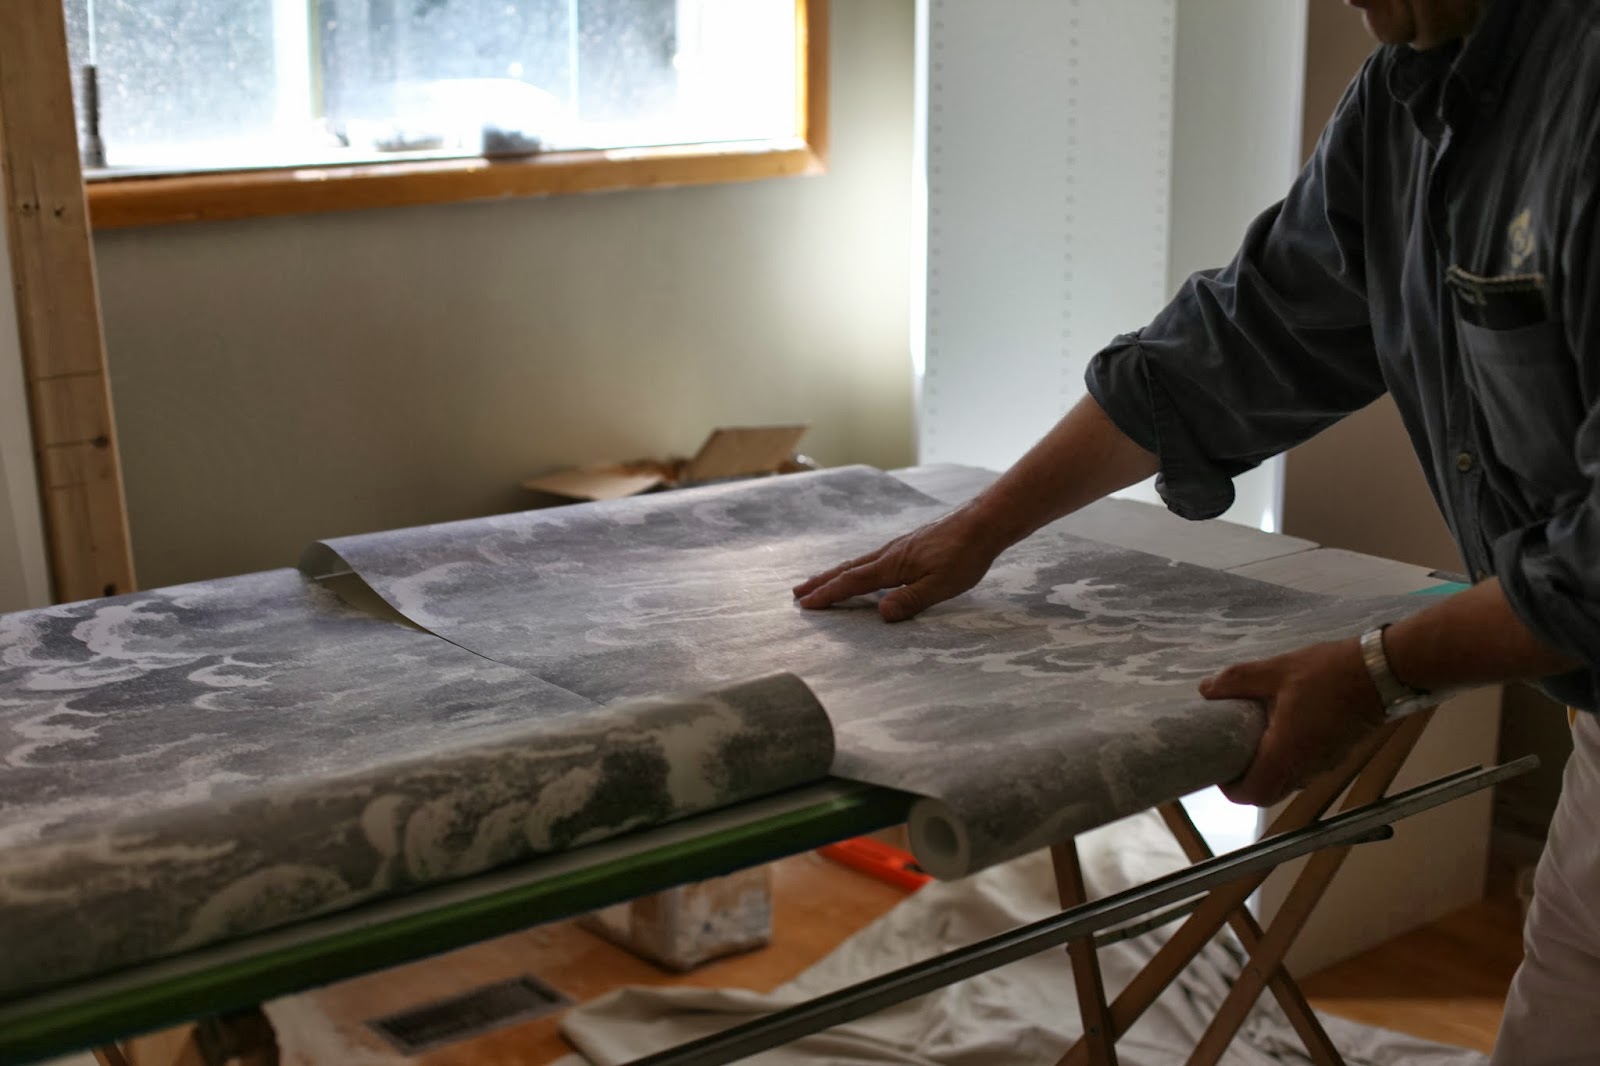
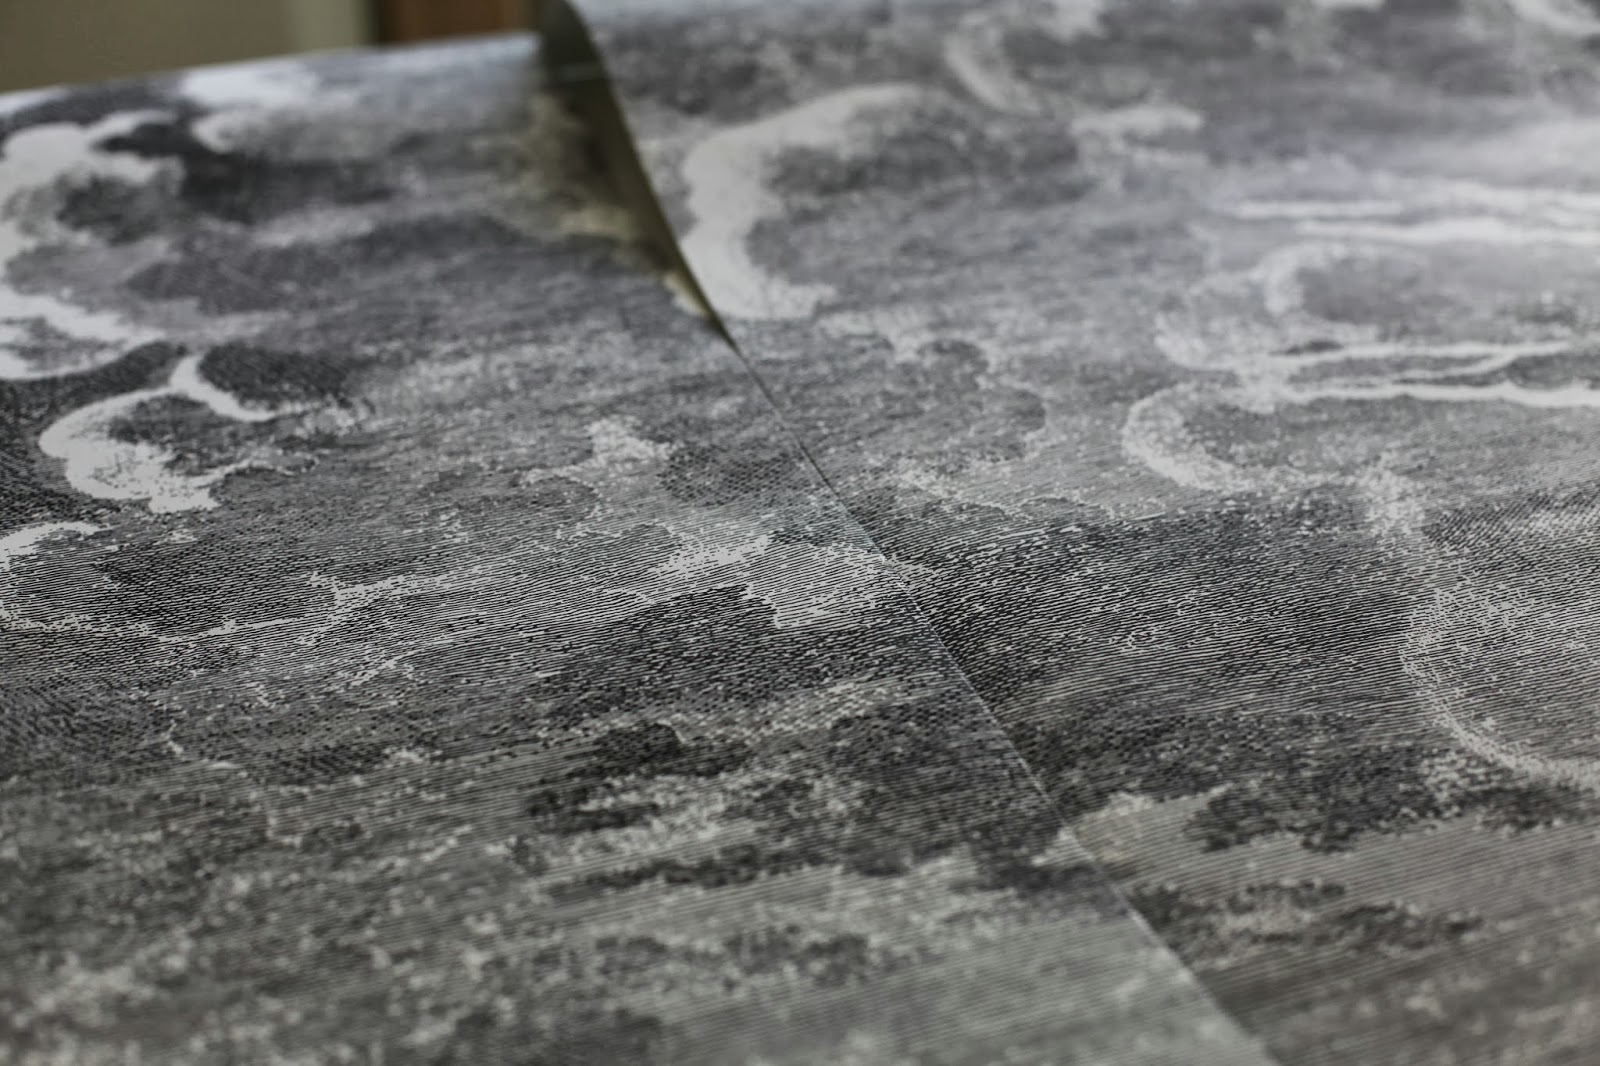
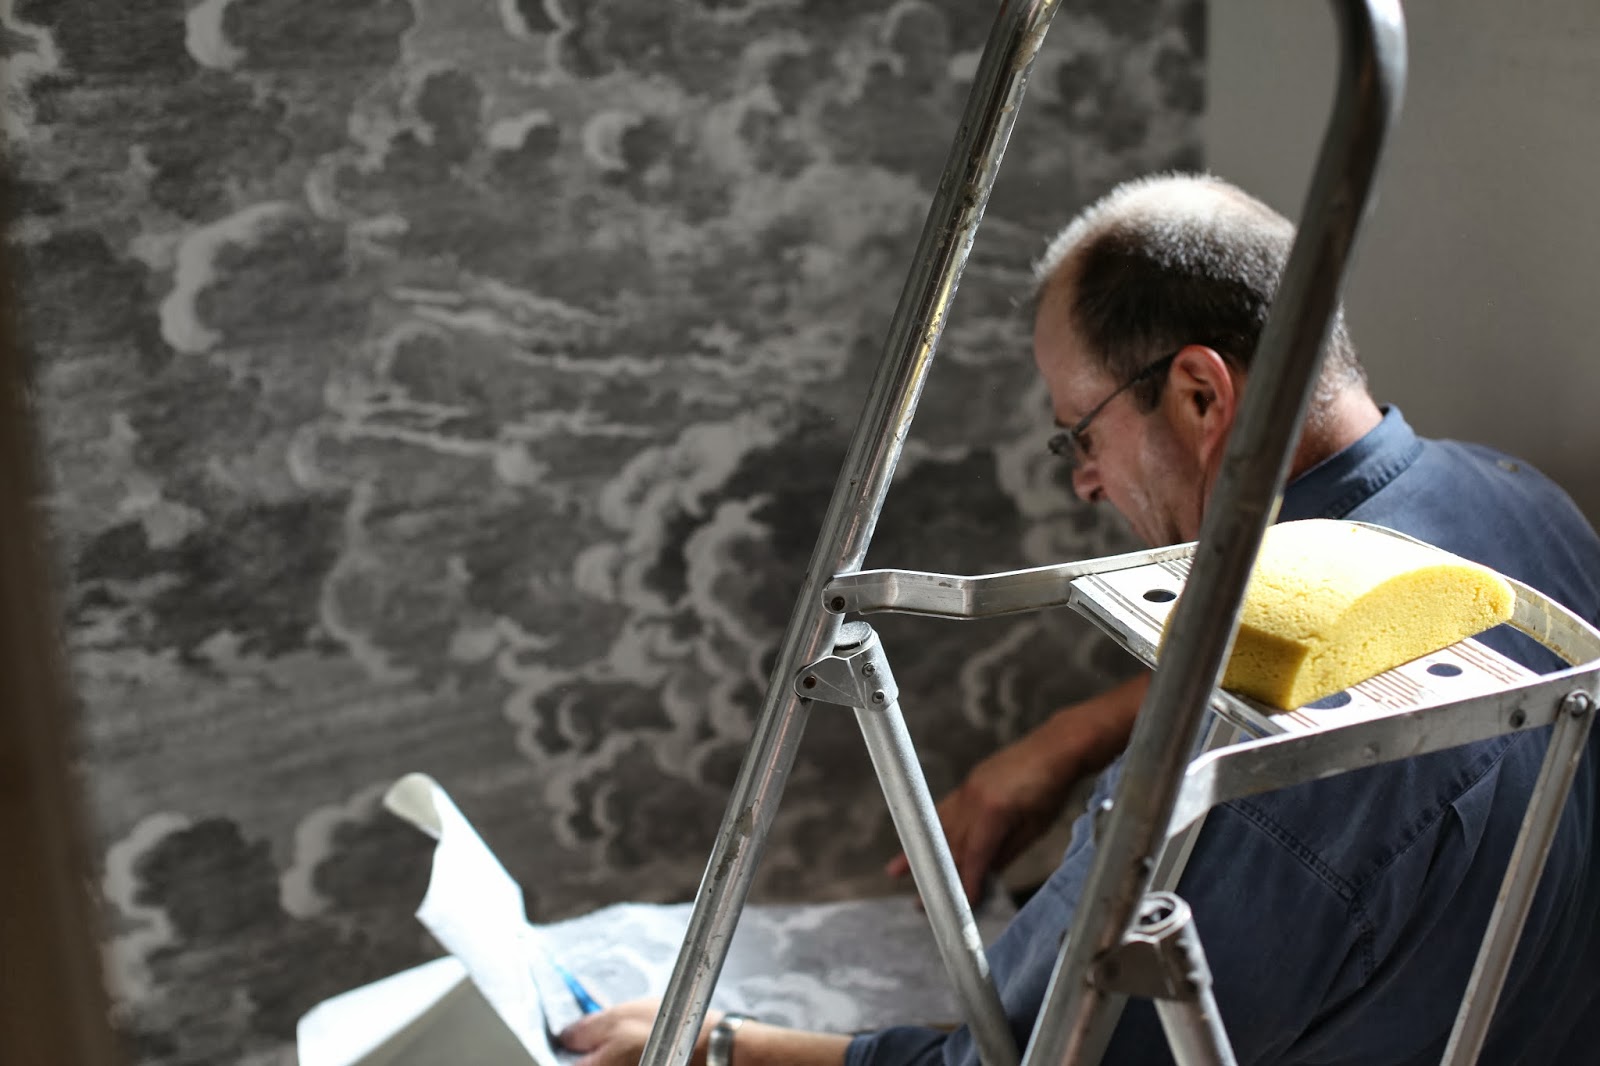
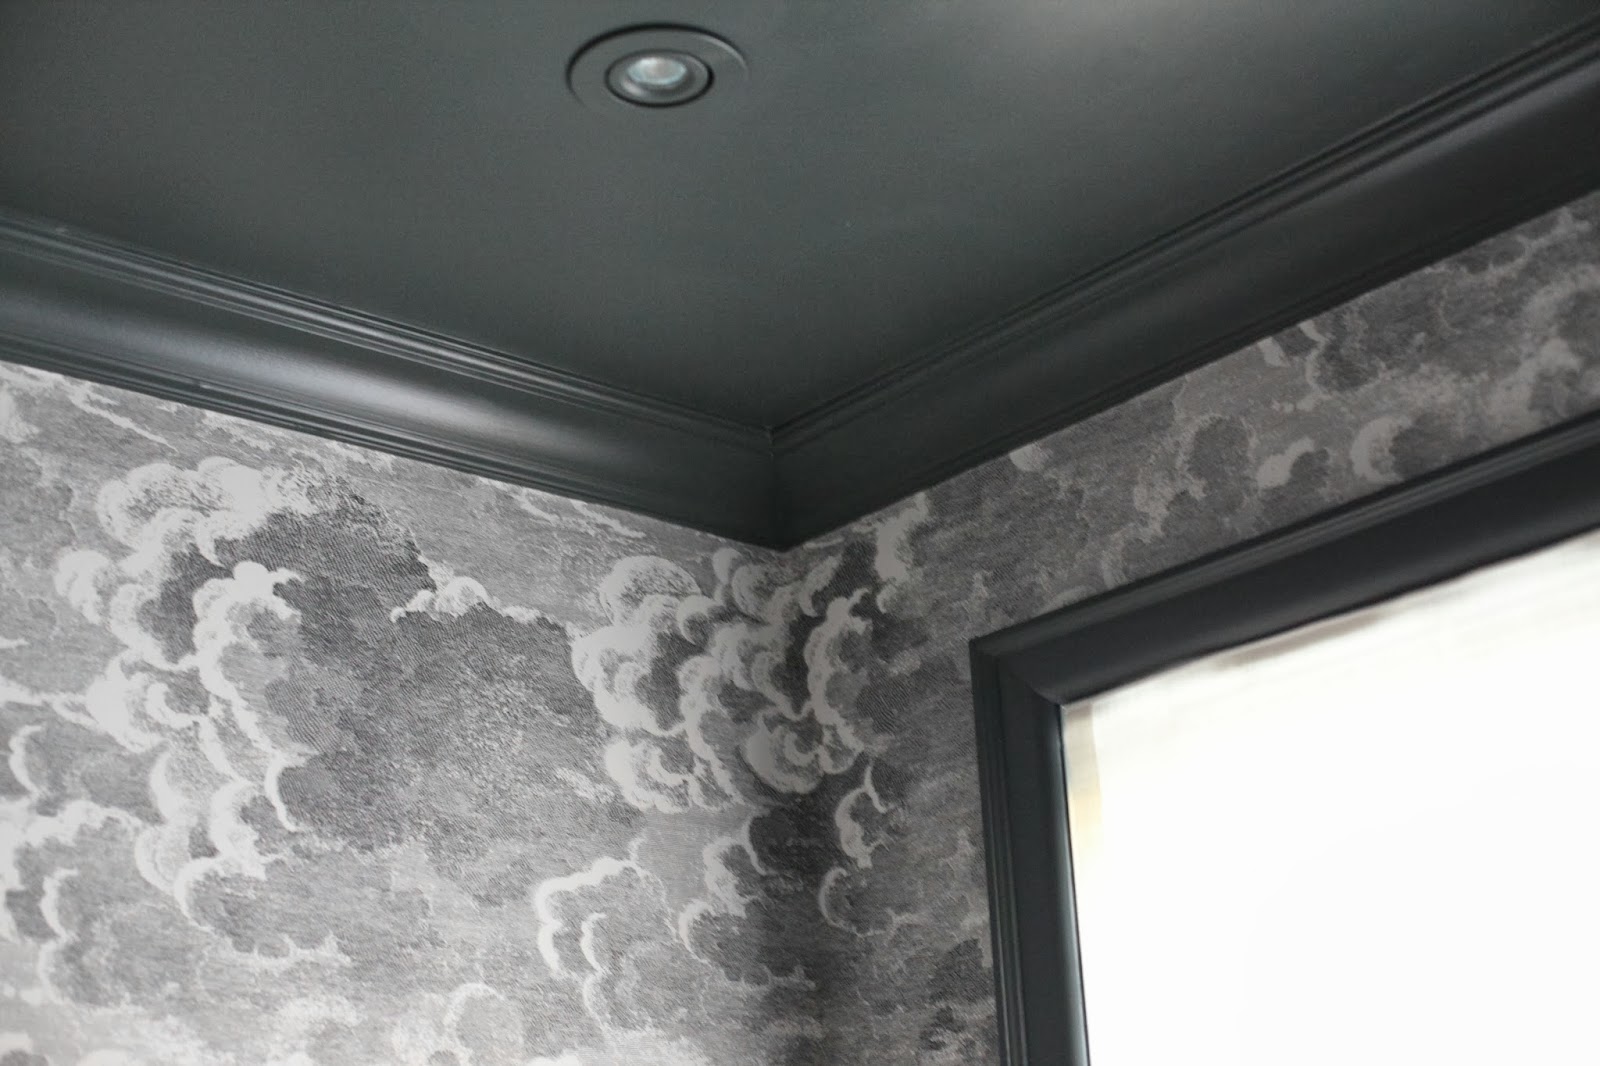
From the bicyclette suspended over the island to the large, metal-framed window to the hexagon concrete tile floors to {my favourite} the Fornasetti Nuvole wallpaper from Cole & Son, the touches of European wanderlust are everywhere in this kitchen. I feel both at home and compelled to travel all in one grand gesture, and that’s exactly how I want to feel in my own inspired space. I love the sense of playfulness and sophistication so easily married in this kitchen. Ça c’est parfait!


LESSON TWO: INTEGRATE AND CUSTOMIZE


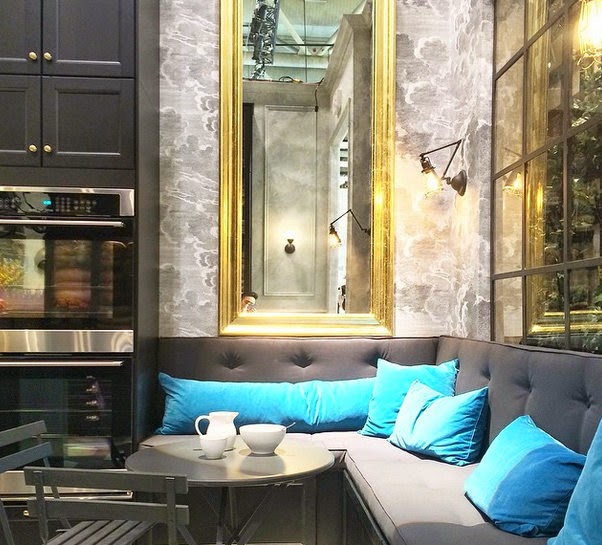
Image via @designmaze_tim on Instagram – go follow him!

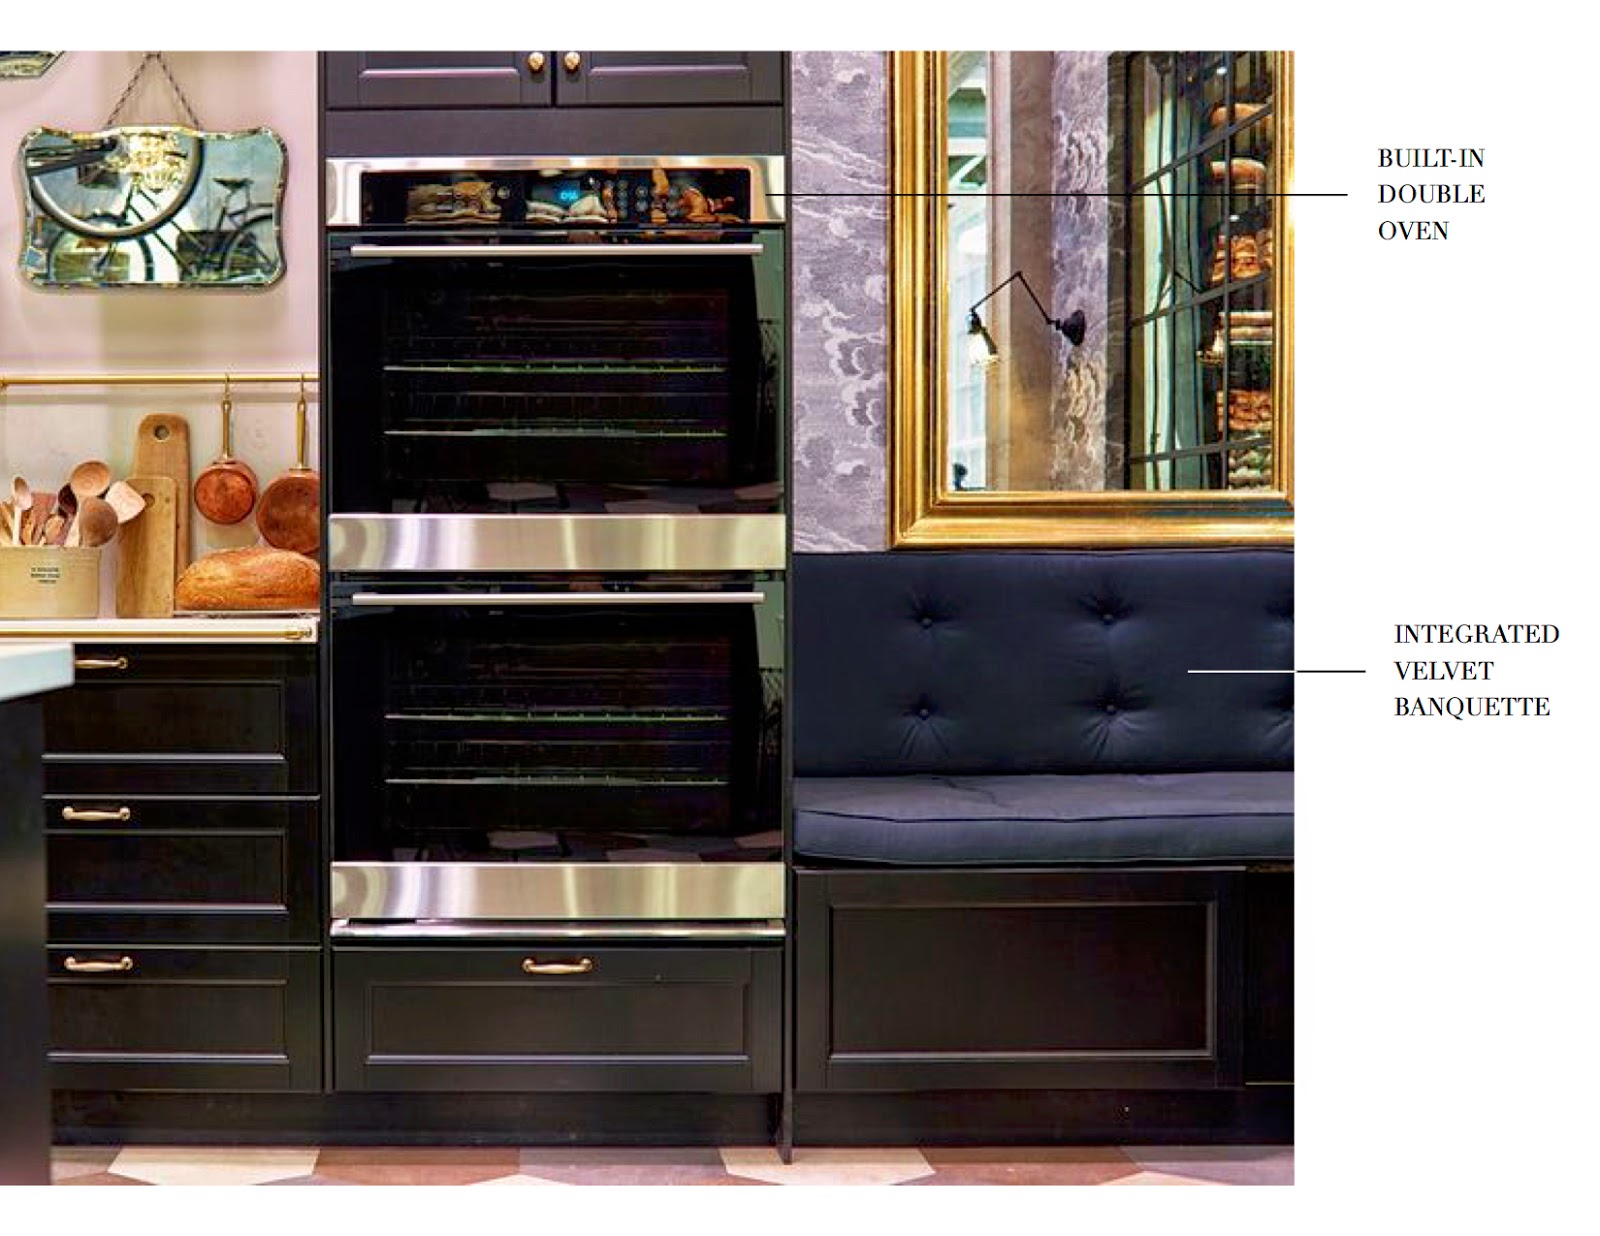
Integrating a custom-designed built-in banquette can make a kitchen and eating area feel larger and more functional. Rather than cutting kitchen cabinets short or living with the limitations of how many chairs will fit into a space, create more generous seating while giving the eye a simple focal point by designing a long and luxurious banquette. Not only will this maximize your space, but it’s also the perfect spot to lounge together and soak up some sun with your loved ones over a relaxed Saturday morning brunch!


LESSON THREE: USE VINTAGE BRASS ACCENTS + ARTFUL FINISHES

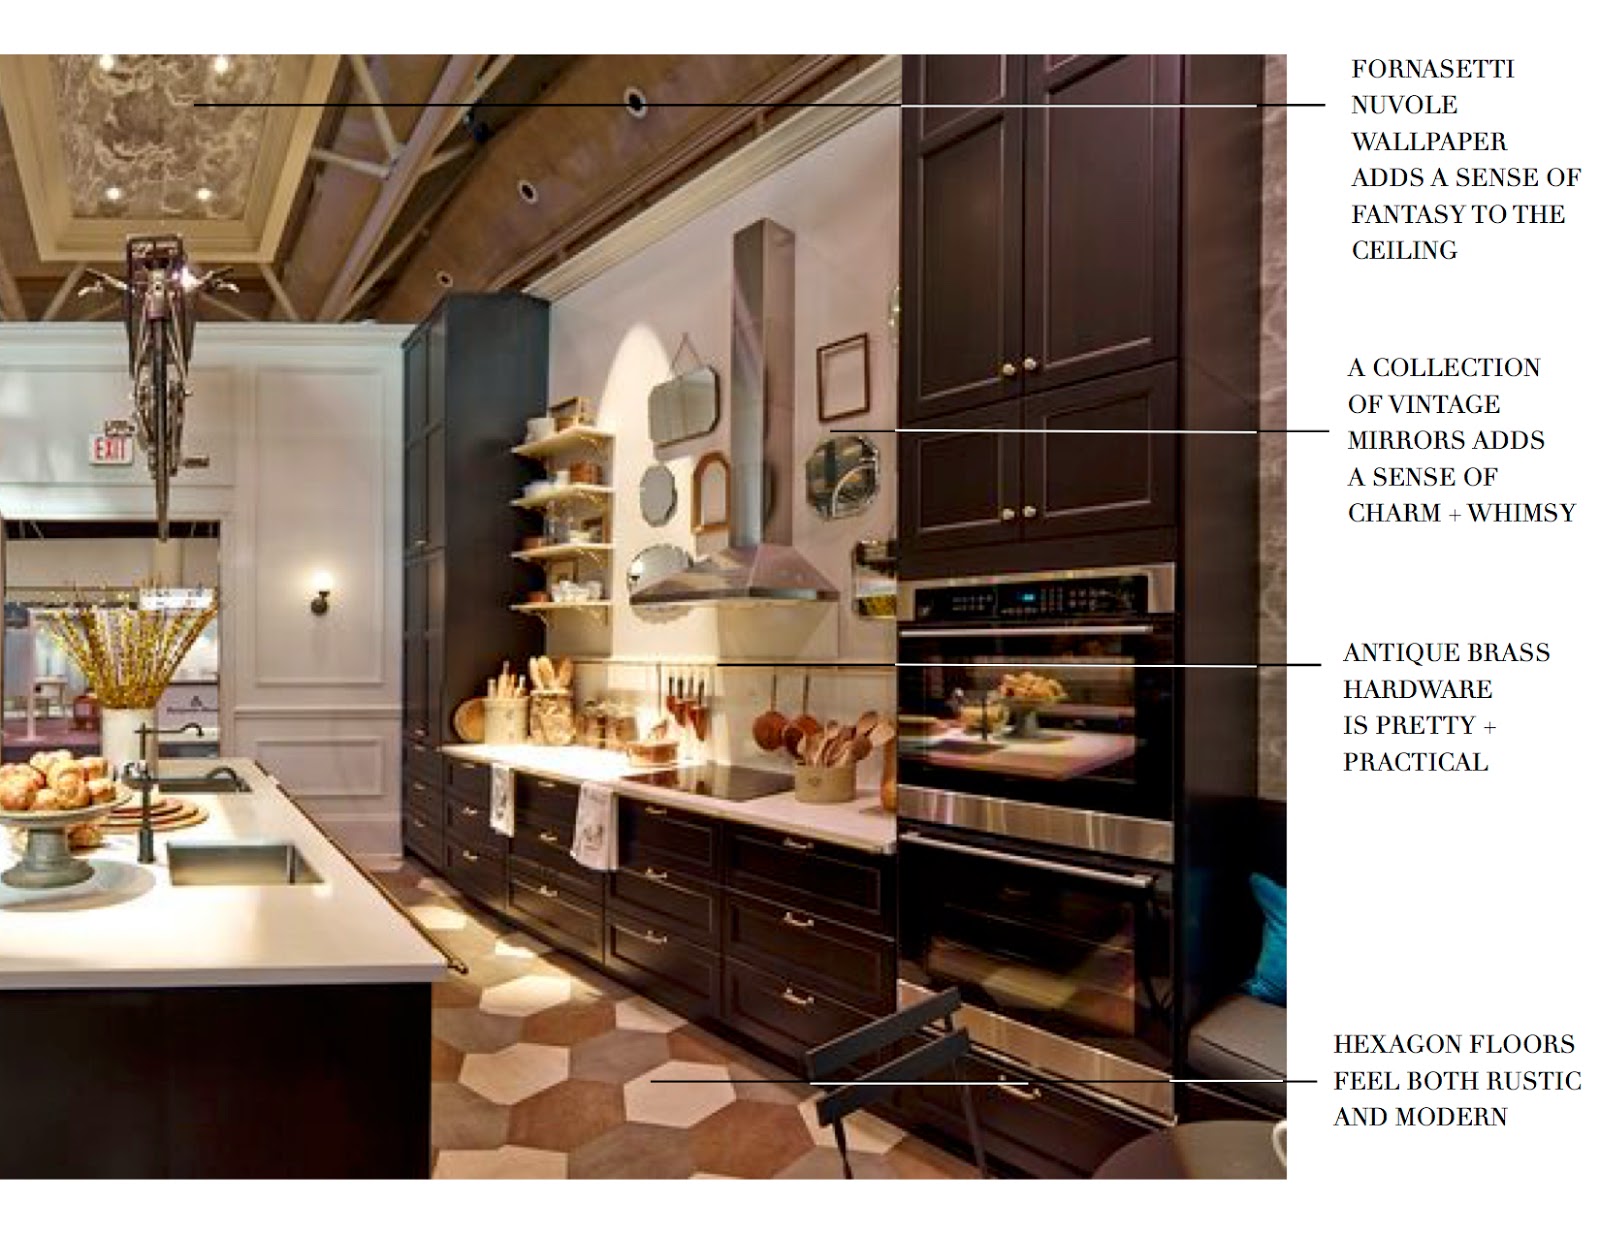
One of the first details that made me bite my lip was the antique brass rail installed along the front edge of the countertops on both the range side and the sink side of the kitchen. Not only does this conjure images of a busy French bistro in all its glory, it’s as practical as it is pretty, allowing you to have a towel at the ready to wipe up hands and messes at any moment. After all, real cooks make real messes, n’est çe pas?

I also adore how the design team at Style At Home chose to create an artful gallery wall of antique mirrors around the range hood. The curated sensibility adds a charm and whimsy that make a brand new kitchen feel like it might have been there for decades. Brilliant.


LESSON FOUR: USE JUXTAPOSITION TO MAKE EVERY ELEMENT SHINE

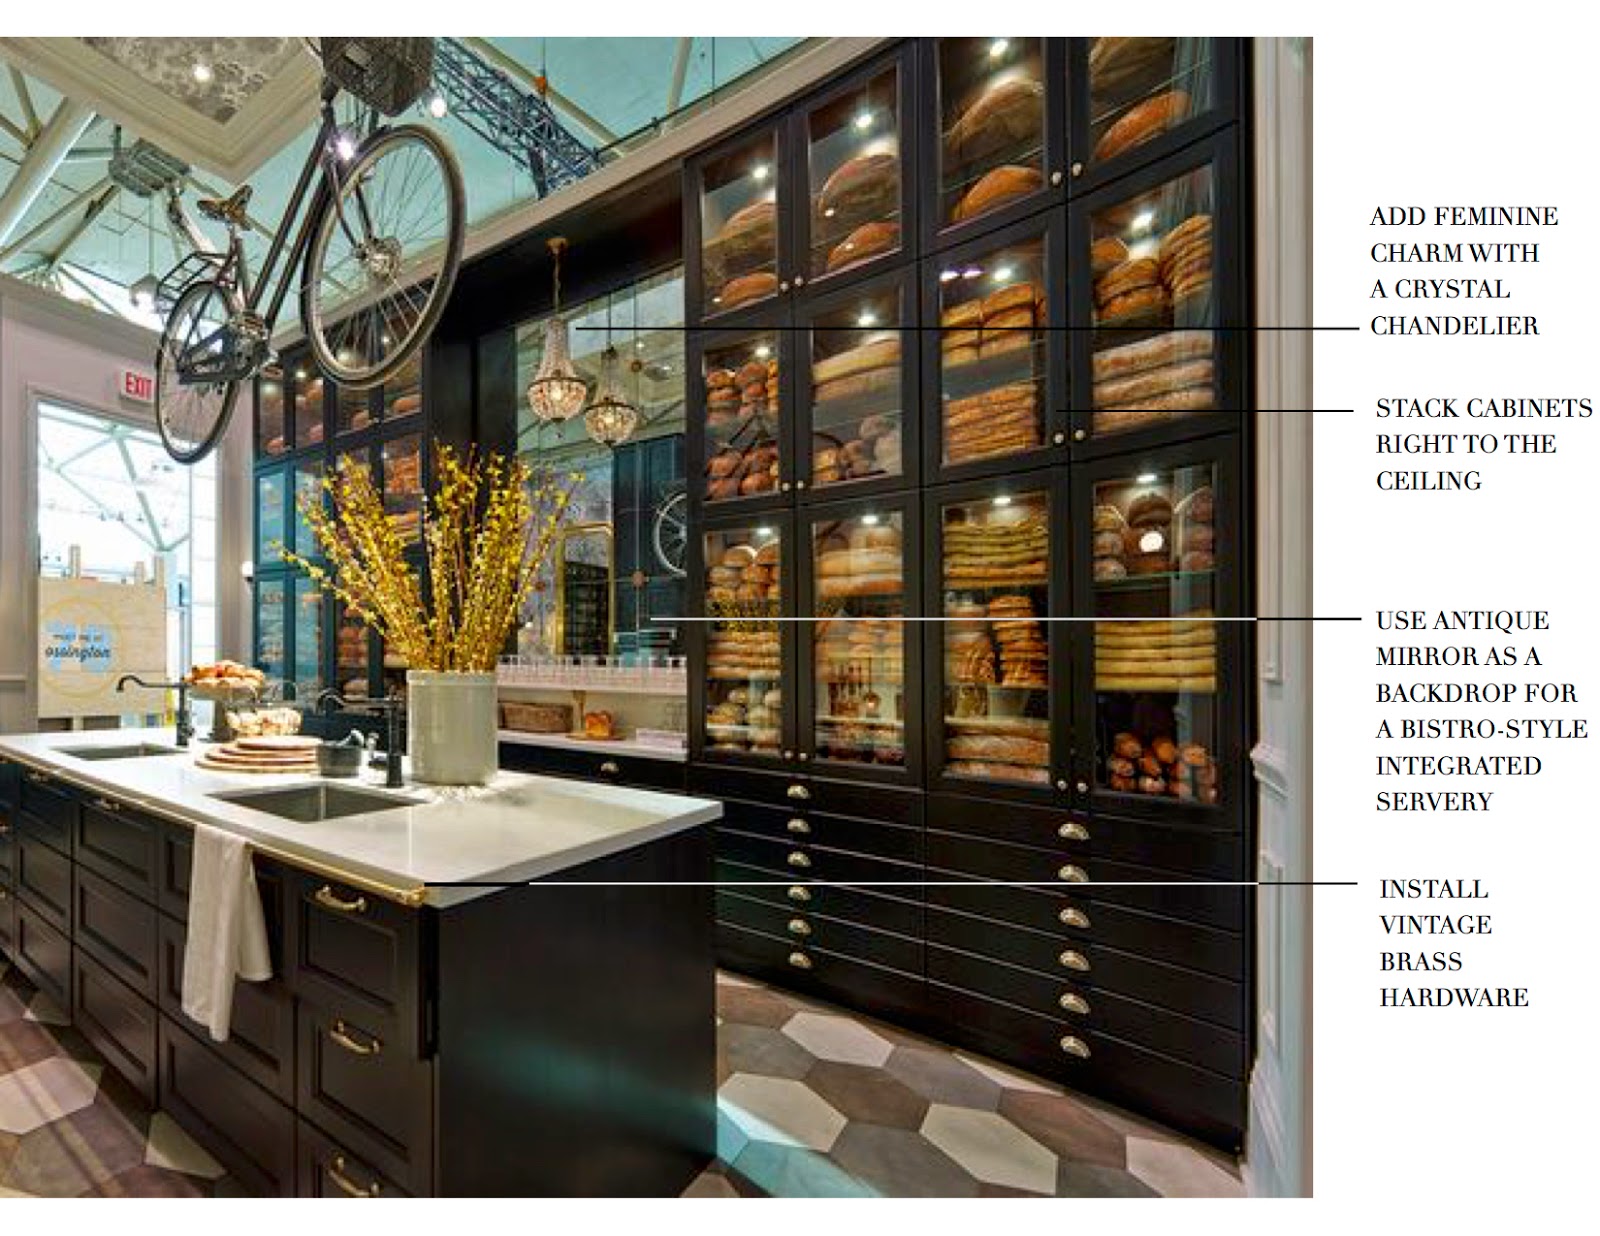
There were a lot of genius moves in this kitchen. One of them was to break up the dramatic full-height pantry wall with a built-in servery. Not only does it provide a practical nook for serving drinks to guests and cutting croissants for breakfast, but it also creates a balancing focal point on the wall opposite the range. The antiqued mirrored panels echo the statement made by the collection of mirrors installed around the range hood while also creating a sense of expansiveness and history in the kitchen. The crystal chandelier also nods at history and adds the feminine charm of a French coquette.

I don’t know about you, but I could move in at a moment’s notice – French press in hand – and I can assure you I would never want to leave. Many thanks to the team at Style At Home for the fuel to dream of bringing a bit more of Paris home again.

xo
s.

*All images via IKEA Canada except where noted.

By |March 4th, 2015|1 Comment

Project Ugly Duckling | Update: The Wallpaper Is Up! The Wallpaper Is Up!

I cannot begin to tell you how thrilled I am that we are rounding the home stretch. As you know, with Graham’s unexpected summer of constant travel for work {he was gone more than he was home!}, progress came to a near stand-still for awhile. But this week, 3 very exciting {and very good-looking!} pieces of this pretty puzzle came together.

ONE: the ceiling, crown, casings and baseboards were painted in a GORGEOUS Farrow + Ball semigloss paint. This incredibly handsome colour is called Down Pipe, a truly classic charcoal.

You may be thinking “A dark colour on the ceiling of a small space?” Yes. And as you will see, it actually makes the ceiling feel like it might just go on forever. It’s also the perfectly dramatic contrast I was looking for to frame out the etched wallpaper, and let me tell you, Farrow + Ball‘s premium paint goes on like a dream. I cannot thank the team at Farrow + Ball enough for sponsoring the paint for this project!

The beauty of painting your trim before the wallpaper is installed is that you only have to be careful cutting-in at the floor.

TWO: THE STUNNING FORNASETTI NUVOLE WALLPAPER WAS INSTALLED!

As a designer who bridges the worlds of luxury, custom design for my clients and DIY design-on-a-budget in my own little home, I know my place. This is one project that I was not about to take on – or have Graham take on – independently. When dealing with a hand-blocked, random drop, book-matched wallpaper that requires specialty paste and a great deal of expertise to install, you call in the big guns. Enter Leo from Queen City Decorating, who has over 30 years of experience and has been installing wallpaper for some of the major Toronto interior design firms since the last time wallpaper was popular.

I loved watching Leo’s process unfold as he matched up the incredible pattern of Fornasetti’s Nuvole etched mural of clouds. He labelled the rolls meticulously, and at least half of his time was spent in planning and preparation. A lesson for all of us!

For this paper, Leo applied the paste to the walls first with a roller. Not all papers are created equal, though, so this technique doesn’t apply in every situation. I cannot say enough about knowing when to call in the professionals, friends, and this is definitely one of those times.

Because this paper is book-matched and has a random drop, the feeling in this bathroom is now one of being surrounded by an endless, custom-etched mural of clouds. Do you not LOVE it??!! I’m seriously giddy, and I cannot thank the team at Cole & Son enough for their generous sponsorship on this project. You’ve truly made this girl’s “head in the clouds” dreams come true!

THREE: The custom-made linen roman blind that has been sitting patiently waiting to find its home was also installed. The gorgeous linen we used is from Kravet, and while you can see only glimpses of it in the above two photos, I promise to take some better shots for you once the vanity is installed so you can see the whole thing come together!

Oh yes, I nearly forgot! The custom vanity I designed is going in sometime in the next two days and the toilet has already been re-installed, so I do believe we will have a functioning bathroom by the weekend, folks! Lord have mercy, I’m so excited! I have definitely reached my quota of the use of exclamation marks here, but can you blame a girl?
There is definitely something inexplicably delicious about seeing a project come together, especially one you’ve been waiting for with longing, anticipation and a heaping dose of delayed gratification. While I hope Graham never has to travel that much ever again – because I miss him, not just because of project delays! – hitting the pause button may have made the final stages of this transformation even more satisfying. Hmmm. Feels like a life lesson, doesn’t it?
I know I’ve promised you a couple of recipes and I will follow up with one of two tomorrow! Tonight, I’m off to learn from the president of Hearst Publications about the world of design + lifestyle magazines {think ELLE Decor, House Beautiful, Harper’s Bazaar, Veranda} thanks to the kind invitation of my dear friend Lisa Ferguson. Feels like a bit of a “pinch me” week, really, as I had the distinct pleasure of meeting Brian Gluckstein last night! I’ll be posting an interview with him soon, so stay tuned!
xo
s.
By |September 26th, 2013|3 Comments

Update 5 | Project Ugly Duckling

It’s been awhile since I’ve given an update on the progress in the bathroom! Two reasons for that: ONE, we were lost in the land of drywall dust for quite some time and TWO: Graham has been traveling like a madman and barely home the last month, so progress has been slow. That said, we are nearly at the stage where the wallpaper can finally be installed!! Yippee!! I cannot wait to see this etched gorgeousness up on the walls.

Baseboards and crown are currently being installed by my man. Once they are painted, the wallpaper can finally shine in all its glory, and then this beauty can find its home floating on the wall of clouds.

I chose a natural Pau Ferro {unstained} for this vanity. I love all the movement and character in the grain. It’s dashingly handsome and all kinds of pretty all at the same time.

I’m pleased as punch at the custom drawers on the vanity which will make the most of the space available, jogging around the p-trap elegantly and maximizing the rest of the available drawer space. The top drawer does the same, so this elegantly simple vanity will offer a ton of practical storage while looking sleek and minimalist.

Lastly, the solid form sink and counter combo are sleek and simple and modern and will make cleaning up a breeze. I can’t wait to see this vanity floating on that wall! Cantilevered pieces are one of my favourite cabinet designs, and this will float 8-10″ off the floor for a weightless effect that will compliment the clouds perfectly. It should be visual poetry!

That’s it for now! There’s a small surprise coming in the hallway that connects the bathroom to the bedroom, and then there’s the bedroom itself…aka Project Debonaire Young Sir. Drywall is done there as well, so once this bathroom is finished it will be on to the to-do list for that space. Can’t wait to see it transformed! It’s going to be awesome.

xo
s.

By |August 27th, 2013|0 Comments