/kitchen

Gluten-Free Foodie Friday | Banana Torte with Salted Caramel Mascarpone Frosting

I know. I’ve got some ‘splaining to do. I’ve been MIA for a week and I’m so sorry! All will be revealed soon enough, but I promise it’s been for good reason. And I haven’t stopped thinking of you, even if I had to take a brief break from posting! In fact, I was thinking of you all just a couple of days ago as I was making this little sumpin’ sumpin’ for a lovely visit from English family this week.

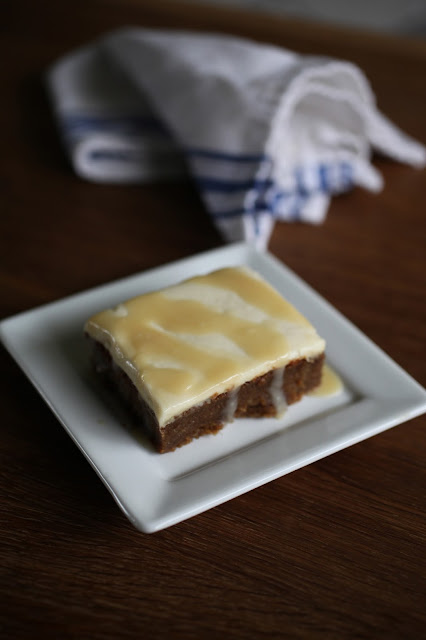
My husband’s favourite dessert has always been some form of banana cake, so I really made this one to please him as much as anyone else. But I wanted to satisfy my own love of contrast to enliven the tastebuds. I accomplished that {I think} with the natural sweetness of the bananas juxtaposed against a salty-sweet and creamy mascarpone frosting that one could really eat by the spoonful all by itself.
The cake itself is moist and dense and really more like a flourless torte in many ways, making it rich and delicious.
The frosting? Well, it’s a repeater for sure. In fact, I’m already dreaming up other desserts to make just so I can use this frosting again. Super yum.
Here’s what I did for the cake:
THE INGREDIENTS:
WET
5 mashed ripe bananas
1 c. fat-free Greek yoghurt
1 tsp vanilla
DRY
2 cups almond flour
1 cup tapioca flour
2 cups coconut sugar
3 Tbsp ground chia seeds
1 1/2 tsp baking soda
THE METHOD:
Preheat the oven to 350°F. Combine all of the dry ingredients together in a large bowl. At the same time, mix together all the wet ingredients in a stand mixer, then slowly add the dry ingredients 1 cup at a time until fully combined with the wet mix.
Pour the batter into a greased 9×9 inch brownie pan and bake for 45-60 minutes or until a toothpick comes out clean. Set aside to cool, then turn out onto a cooling rack to cool completely. I chose to trim the outside edges off of the cake for a perfectly clean edge. {Let’s be honest, we also just really wanted to try some of the cake before we served it!}
OK, now for the magical frosting:
THE INGREDIENTS:
4 Tbsp salted butter
4 Tbsp maple syrup
250 g mascarpone cheese
THE METHOD:
We love making homemade salted caramel sauce to pour over ice cream or just to use as a base when plating a fancy dessert. This time, I decided to use it to sweeten and flavour my frosting. It was an experiment, and let’s just say it did not exactly fail. Super simple, super delish. Simply combine the butter and maple syrup in a microwave safe bowl and microwave at 1 minute intervals, stirring in between. Usually at the 2 minute mark {depending on your microwave} you’ll start to get the gorgeous, candy-creating frothing bubbles that tell you you’re headed in the right direction. After the 2 minute mark, stir it and let it rest to see if it cools to the right viscosity. You want it to thickly coat the back of a spoon. If it’s not quite thick enough, try another 30 seconds. If you go too far, you’ll get maple taffy {not the worst mistake ever} and you’ll want to start again. Once you’ve learned the heat levels of your microwave you’ll find this super quick and easy to do.
Let the maple caramel cool in the fridge while you bring the mascarpone to room temperature. Once they are approximately the same temperature, whip them together with your stand mixture to create this gorgeously creamy, salty-sweet finishing touch.
I decided to make another batch of caramel sauce to just drizzle over the top, and to make it more pourable I added in 3-4 Tbsp of cream after the 2 minute mark.
This dessert may look simple in its presentation, but it wakes up the tastebuds and says “Hey there. How you doin’. Yeah, that’s right. I am that good. Take another bite. You know you want to.”

I hope this finds you happy and well and surrounded by the ones you love as you head into your weekend. And I hope you can enjoy something salty-sweet, creamy and delicious as you savour the richness of such good company. After all, it’s really the people we love that make life taste sweetest.
xo
s.
By |June 14th, 2013|0 Comments

Design Find | Built NY Origami Wine Tote

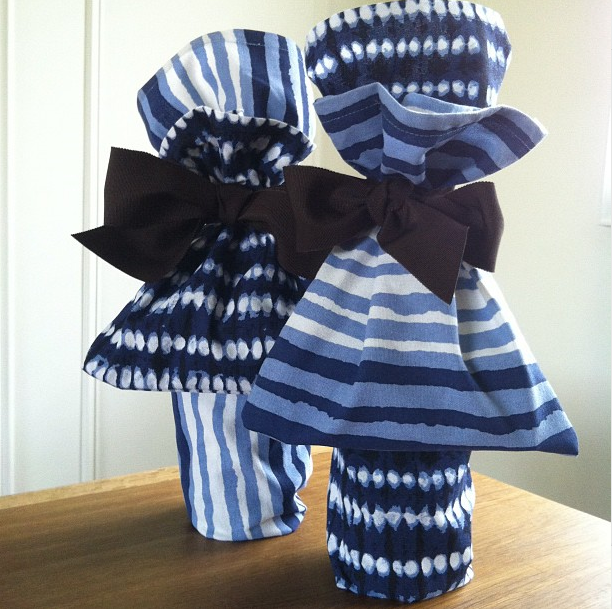
With the season for teacher’s gifts nearly upon us, I’m on the hunt for something fresh and unexpected. Last year, I gave my little guy’s teachers handmade wine and cheese bags – one for wine, one for cheese with an intentional pairing carefully nestled in each. They were a huge hit!

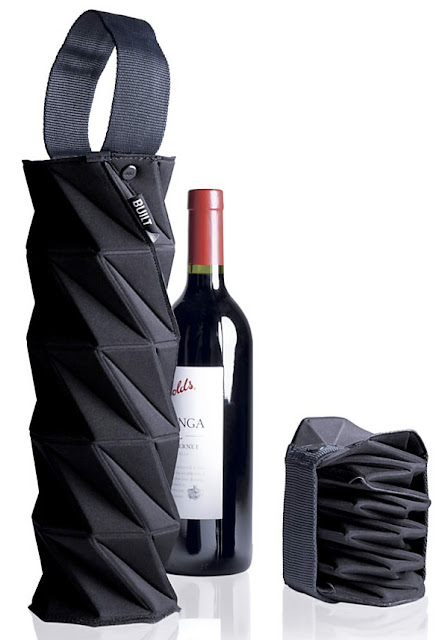
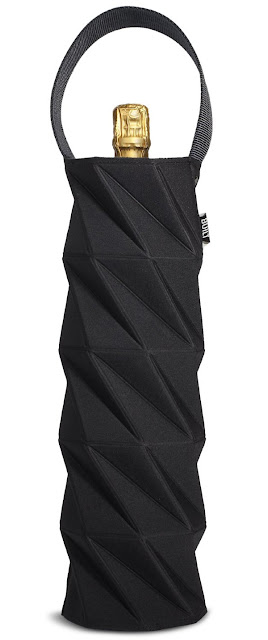
I still haven’t decided what I will give this year, but I’m in love with this brilliant design from Built NY.

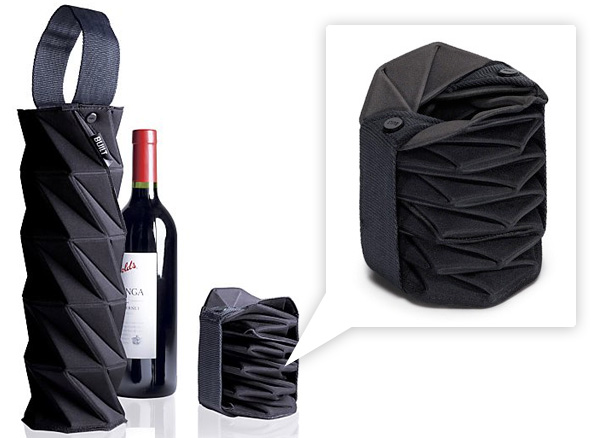
This re-useable wine tote is as practical as it is pretty. The folds of fabric aren’t just a design feature, they also protect your bottle of wine from bumps and bruises while you’re driving, making it the perfect gift for anyone who makes regular weekend trips to cottage country.

Of course, the fact that it folds up to neat-and-tidy, easily stored proportions is also brilliant. Feels like a “one for me, one for you” situation if you ask me!

Now I want to pack up a gourmet picnic and go for a drive in the country! Anyone want to join me?

xo
s.

By |May 29th, 2013|4 Comments

Gluten Free Foodie Fridays | Chocolate Brownies

Every good girl needs a vice, right? I don’t smoke and usually stop at one glass of wine {OK, sometimes two}. I eat pretty clean and just have one cup of coffee per day. So what’s my vice? Chocolate. Yes. I know. It’s not particularly shocking. It really just makes me like every. other. woman. on. the. planet.

Well, if you’re like me, you need variations on a theme. I have found one good brand of bar chocolate that {thank you, Lord!} is not sweetened with cane sugar as I’m allergic to the white stuff. And you all remember those glorious Honey Patties from Heavenly Organics, right? They are my mainstay sweet fix for SURE. But every once in awhile I want something that feels a bit more like a proper dessert. So…dissatisfied with the excessively dry recipes I had found for gluten free brownies, I decided to craft my own.

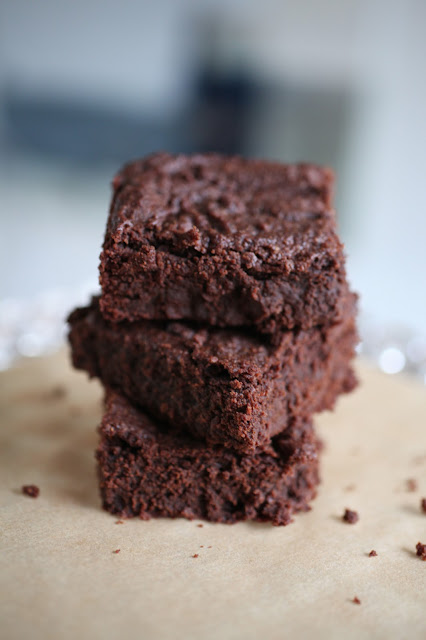
I really took one for the team here {translation: I probably put on 5 lbs in the “testing” phase} and tried several different variations before landing on this super simple yet decadent brownie recipe. My goal was moist and rich, and I’d love it if you would test them in your own kitchen and let me know what you think!

Here’s the simple recipe:

THE GLUTEN FREE FOODIE’S
CHOCOLATE BROWNIES
INGREDIENTS:
Dry:
1 cup raw cacao
1 cup coconut sugar
2 cups almond flour
Wet:
1 tbsp ground flax + 2 tbsp ground chia mixed with 6 tbsp boiling water and set aside
1 cup sweet potato puree
3/4 cup melted butter or coconut oil
1 tsp vanilla
Preheat the oven to 350 F. Start by mixing the flax, chia and hot water together in a small bowl and set aside. Next, mix all the dry ingredients together in a medium bowl. In a stand mixer, combine all the wet ingredients, adding the chia/flax mixture. Slowly add the dry ingredients one cup at a time while the mixer is still going.
Grease a 9×9″ brownie pan with either butter or coconut oil. Using a spatula, pour the mixture into the square pan and bake for 30 minutes or until a toothpick comes out clean. Allow them to cool {the hardest part!}, cut and serve!
I’d be thrilled to hear from you if you decide to try these out in your own kitchen! They’ve become a regular for us, and I really have to regulate how often I make them as it’s easy for the pan to disappear pretty quickly. Best made when you know friends are coming over to share them with you!
Wishing you a flavourful weekend.
xo
s.
By |May 3rd, 2013|0 Comments