/Project Nursery

Project Nursery Update | Creating a Feature Wall with Books + Art

“Children are made readers on the laps of their parents.”
Emilie Buchwald

I am a huge believer in the power of reading. Reading empowers, inspires, educates, enraptures and engages minds of all ages. Reading keeps us thinking, dreaming, imagining…reading has the power to transform, and reading together with our children allows us to create memories and a bond that will last a lifetime. It also sets them up for school with a natural love for language that is truly invaluable.
All this explains why my plans for the nursery were very much designed around where and how to create a feature wall of favourite books, and I’m truly delighted with how this little project has turned out!
The inspiration started with my favourite book publisher, Chronicle Books. I created a wish list of inspirational favourites featuring art and heart, whimsy and story in the way only the Chronicle Books library does. To my utter gratitude and amazement, Chronicle sent me all the books I had on my wish list as a generous gift for the nursery! It felt like Christmas morning opening the box to discover these charming and delightful volumes.
We bought three of these simple picture rails from IKEA to create the feature wall. Given that they come in a lacquered bright white, we started by painting them with a high-adhesive primer and then used my favourite trim colour – Sherwin Williams Creamy 7012 – to soften them and tie them in with the rest of the room.
To me, books are an indulgent opportunity to escape. They transport us into the adventure of our own imaginations through the imagination of the writer, taking us to quirky and delightful, familiar and foreign places, awakening our senses along the way.

“Children must be taught how to think, not what to think.” 

Margaret Mead

I decided to play with this theme of travel and adventure for the top picture rail using art and two decidedly charming and debonaire French plushies. You may remember these plushies from my registry post awhile back? Well, a globe-trotting artist friend of mine just happened to take a trip to Berlin {from whence they hail} and graciously served as our “immigration and naturalization companion” for these two sweet little characters who came home to play with us. 
These Frenchies – from the brilliant Berlin maker Nicole of Nikoki – add a sense of whimsy and charm that makes my heart truly happy. For now they will stay safely on the top rail of this feature wall until our future world traveler is a little older when we will no doubt have countless picnics with Pierre Le Bear and Jean-Luc {an elephant who hails from Provence} complete with baguette and red wine and much merriment and adventure.

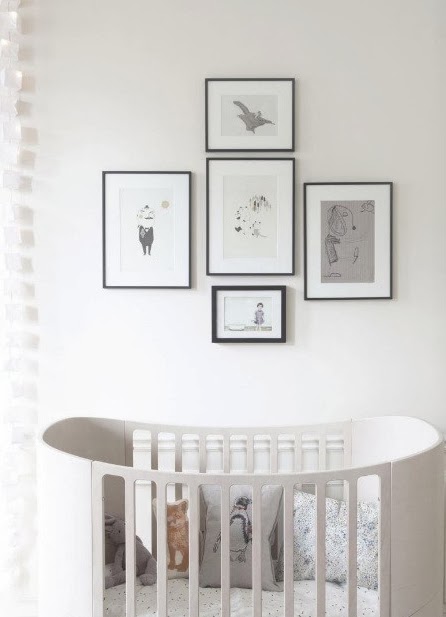
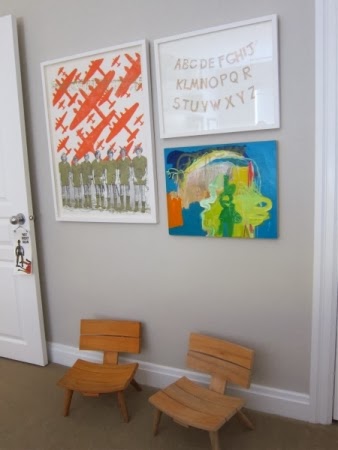
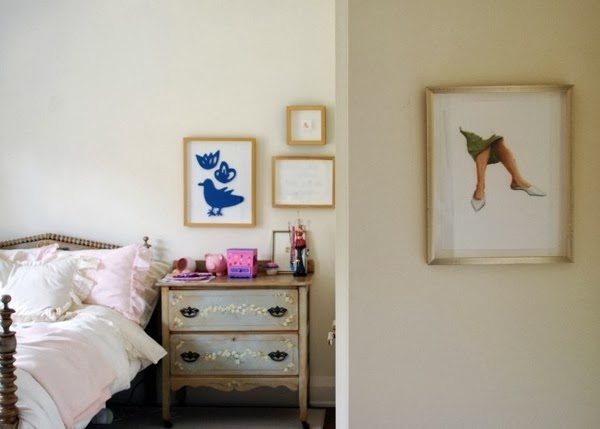
The art is a mix of 3 pieces that I have picked up along my travels. On the right, an oversized postcard we picked up on our last trip to England on a visit to the London Eye. Floating it over the mat in a simple frame from Pottery Barn elevates it to the status of display-worthy, and I love the sketched simplicity of it.

In the middle is my favourite piece in the trio, a Paris print that I found on Etsy, hand painted and then printed by the lovely and very talented Kim of Albie Designs. After I had purchased the print through Etsy, Kim blew me away with her unexpected generosity and refunded me the cost of the print as a gift for the nursery!! Kind and amazing people are everywhere, and it is such a delight to have been blessed by one such soul in the very talented and incredibly kind Kim.

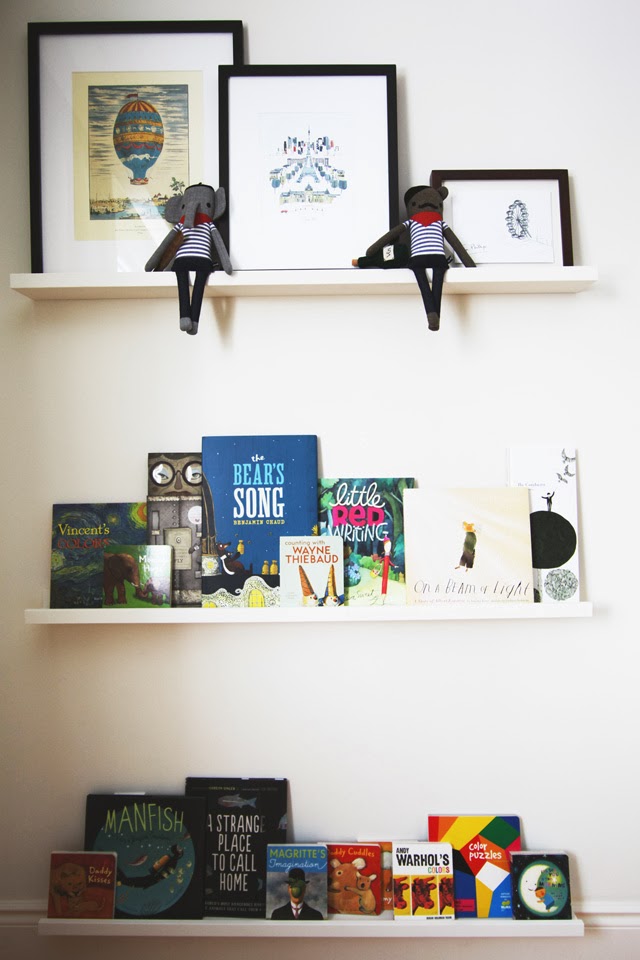
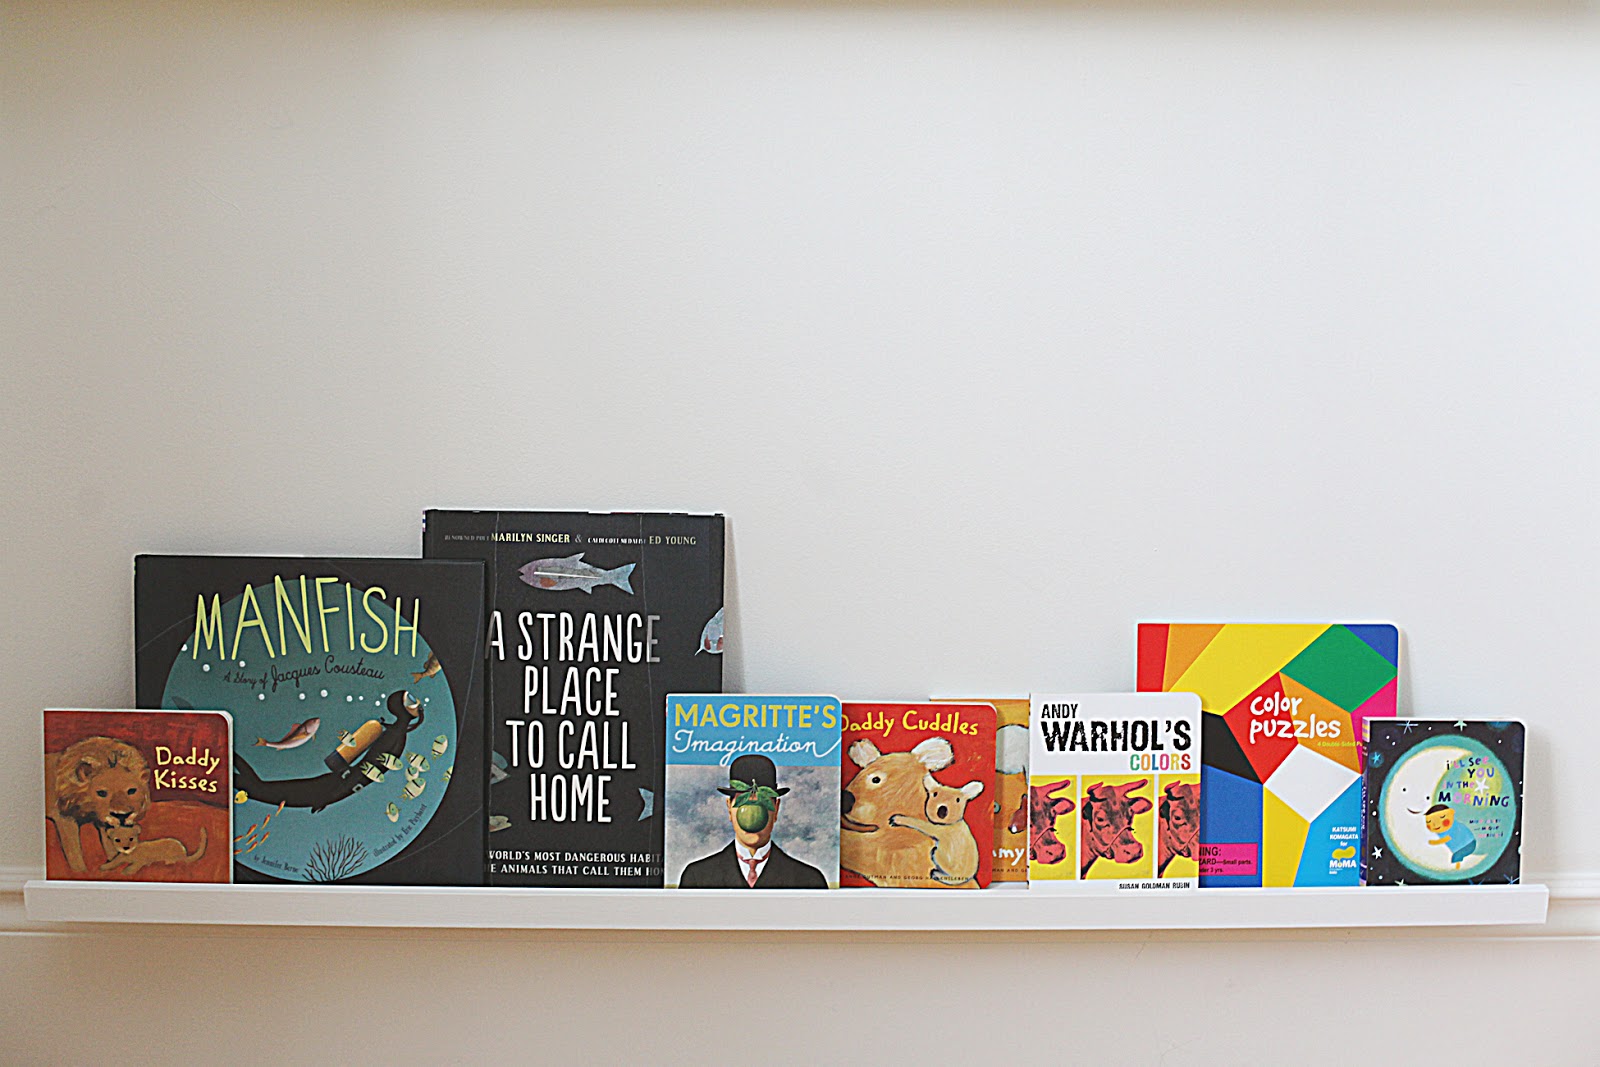
On the left, a hot air balloon print that I bought at a liquidation warehouse for $5 {for two!} rounds out this little grouping and says “let’s fly away together.” I hope we will travel the world in real life as a family as this little man grows up, but I know that no matter what, we will be travelling the world together through these inspiring books and countless hours spent reading in this sweet little corner of our universe.

All that is left to complete this charming little nook is the swivel-glider chair from CR Laine, which is on its way! I can’t wait to get that in place and – more importantly – to be holding our sweet baby boy in my arms and whispering inspiring stories and fabulous adventures into his ear for years to come.

There are many more updates to share on the nursery as things really are coming together. Assuming he holds out a bit longer I will share more with you very soon!

xo
s.

By |January 6th, 2014|2 Comments

Project Nursery | A Before And Almost After | The Story of a Dresser Re-Invented

I’m sorry for being rather MIA of late. The truth is, I’m 3 weeks and 2 days away from my due date and my to-do list seems to be getting longer rather than shorter! This whole having a baby right after Christmas business makes for a lot of to-doing to get done. It’s a magical combination of the typical pre-Christmas to-do list and the typical pre-baby to-do list, with a heaping dollop of renovating two bedrooms in our “spare time” as the icing on top! A recipe for an ever-growing list of things to get done, to be sure.

The good news is, things are getting done. I feel like we will make it by the skin of our teeth, but I’m hopeful that most everything on my to-do list will in fact be accomplished before this little man makes his grand entrance. The truth is, once he’s here the things that are left undone will be undone for awhile, and my guess is we won’t care one bit because we’ll be so enrapt with our charming and insanely snuggly bundle of joy.

All that to say, we are working hard at getting this boy’s nursery finished before the big day! Noah is in his room and it is really coming together…I promise to share that with you soon! Just a few more things on that to-do list left before we’re ready for a ta-da.

In the meantime, here’s our most recently accomplished project for the nursery. In the interest of saving some dollars for his college fund, we took on a little DIY for the babe’s dresser/change table and I thought I’d share our progress with you today.

I found this mid-century modern office cabinet on Kijiji for $120. I had been searching for quite awhile for a piece that could function as both dresser and change table. His room is not particularly large, and I wanted something that felt warm yet clean and contemporary. While this piece wasn’t perfect in its original state, I immediately saw its potential and knew I could transform it into something much more fabulous.

Here’s what I liked about it:

  • For $120 I got solid wood drawers. Amazing!
  • I love the 8 drawer configuration for organizing clothes and even storing extra diapers. This will be great when he’s little for all those tiny sleepers and onesies, but it will also grow with him. Think neatly organized sock and underwear drawers – a mama’s organizational dream!
  • The dimensions are perfect for the room, and at 44″ wide it provides a generous surface for a growing, wriggly baby boy to have his bum changed about a thousand times per day. At 34″ high without the change table topper and change pad, it will give me a work surface that will finish at about 36″ high. That is exactly the same as a back-friendly kitchen counter height. The height of your change table is such an important consideration, mamas! Don’t make yourself bend over more than you have to, especially for things like diaper changes, because you’ll be doing a lot of it! Save your back and smile more often! {Our new motto.}

What I didn’t like about it:

  • Those original steel legs remind me of an IKEA cabinet – too sterile.
  • The original melamine top is just plain unusual and definitely ugly –  a remnant detail highlighting that this was once a piece of office furniture. Given that the sides are exposed wood, it really lacks a visual sense of flow and continuity. The melamine is also chipped and worn and simply has to go.
  • The handles feel too commercial to me. They’ll do in a pinch, but they’re not what I envision.

So with that list of make-over musts, here’s what we’ve done with it so far!

It’s a subtle change on the one hand, but it takes this piece much more in the direction I’m aiming for! Graham used 1″ slabs of inexpensive MDF to create a waterfall surround {with mitred corners, of course}. I primed and then painted out the MDF panels in Sherwin Williams Creamy 7012 {a warm white that is softer and not as bright as this photo implies}. We then removed the drawers so we could attach the freshly painted panels to the original cabinet from the inside of the wood frame. This created a very stable base that then allowed us to remove the original legs. We then finished the new waterfall surround with another coat of paint and voila! A new lease on life for this solidly built and practical little 1960’s office clerk. It’s like we got her out of her penny loafers and bought her a great pair of heels, don’t you think?

So what’s left for this little makeover? Graham is going to build a change table topper for me similar to this:

{Image Source}

Every good outfit needs great accessories to finish it off, so I’m also planning to change out the hardware. {Yes, that means it’s still on my to-do list.} I have a rather fresh idea that I’m hoping I can implement, and if that fails I’ll be sourcing some pre-made in-stock handles over the holidays.

I just got word that the swivel glider chair will ship from CR Laine this Friday, so I’m pretty giddy about that! Can’t wait to see this handsome Sunbrella fabric on that gorgeous chair. It will be just as pretty as it is practical.

In the meantime, we still have panel moulding to install and the rest of the walls to paint out in the Sherwin Williams Creamy 7012 to create our calm and soothing envelope for the room. And then a used crib to paint, picture rails to install, artwork and drapery panels to install…not to mention the last of my to-do list for Christmas and finishing Noah’s room. Oh yes, and then there’s this small matter of a baby to deliver!

In the midst of all the seemingly growing lists and demands and the ever-present pressure of the holiday rush, I keep reminding myself of this:

{Image via Shauna Niequist}

What really matters is not the to-do list, but the people I do life with. And in honour of them, I’m working hard to trim down the list to carve out time to just be together. No agenda. No tasks to get done. Just time savouring the amazing gifts we have in each other.

I hope you’re able to do the same, and that this last week or so before Christmas is one that paves the way to a meaningful and happy holiday for you and your loved ones.

xo
s.

By |December 18th, 2013|2 Comments

Decorating a Nursery with Groupings of Original Art

I must apologize for not posting this last week as I’d promised. Real life got all kinds of “real” and…well…you know what they say about best laid plans. But it’s Monday morning, the sun is shining, and there is a fresh and happy week ahead of us! What better way to start that week than with some inspiration on how to use original art in your nursery design?

The lovely Patricia from Art Interiors sent me some wonderful inspiration images showcasing pieces from their gallery installed in children’s rooms, and let’s just say I’m in l-o-v-e. I know I might sound like a broken record here, but I really do believe in carving out room in your decorating budget for original art whenever and wherever you can. Original art has the ability to transform a space from pedestrian and boring to personal and dynamic in a way that little else can. Just feast your eyes on these inspiring spaces and you’ll see what I mean!

This first nursery {above} feels quiet, sophisticated and perhaps a little bit quirky; whereas this second children’s room {below} feels bold and fun and unexpected.

This little girl’s room {below} is all kinds of charming, and the solo piece that greets you as you enter suggests she will grow up into a very interesting and sophisticated lady.

I’m totally crazy for the grouping in this sweet baby girl’s nursery {above}. The diversity and juxtaposition of the pieces creates such an interesting sense of story, and the pieces they have collected can easily be built upon and rearranged over time.

Is it just me, or does the art totally make these spaces come alive?

Not only did Patricia send over some inspiration of art groupings that have already been installed in children’s rooms, but she also kindly pulled together three fresh groupings for us – all created with a baby boy’s nursery in mind – to get the creative juices flowing using pieces that are currently available at The Festival of The Smalls.

Grouping Number One {above} is a delightful mix of hip and fresh with a healthy dose of vintage throw-back for good measure. I particularly love the hockey player by Patrick Lajoie {left} and the hipster playing with the viewfinder by Kelly Grace {top right}.

Grouping Number Two is given a more modern edge with the photograph by Emilie Rondeau {left}. My favourite piece in this grouping is the cyclist by Sara Caracristi {bottom left}, but I love the play of colour and texture that keeps the eye moving and engaged amongst all the pieces in this dynamic grouping.

Grouping Number Three {above} is really a marriage of the first two. Anybody remember Marigold? Oh my goodness that takes me back! And the vintage Fisher Price record player {top right by Kelly Grace} was seriously one of my all-time favourite toys when I was a kid! The abstract colour-blocked piece by Richard Herman is fresh and lends a modern edge to the nostalgic vibe of some of the other pieces.

Today’s visual design lesson really builds upon last week’s 3 Tips For Buying Original Art: buy what you love; start small and build over time; and be open to diversity! As you can see from the groupings above, an interesting mix will add energy and intrigue to a space in refreshingly unexpected ways. And remember what we learned from the gents at Madcap Cottage? Gallery groupings are totally where it’s at.

Can’t wait to get working on my groupings for Project Debonaire Young Sir and Project Nursery. Goodness, I have so much to do! But believe you me, the art groupings are already floating around in my head like happy little dreams. Just have to get the spaces ready so I have fresh walls on which to hang the art!

Wishing you a happy Monday, brimming with inspiration and fresh perspective.

xo
s.

By |November 18th, 2013|0 Comments