/Restoration Hardware

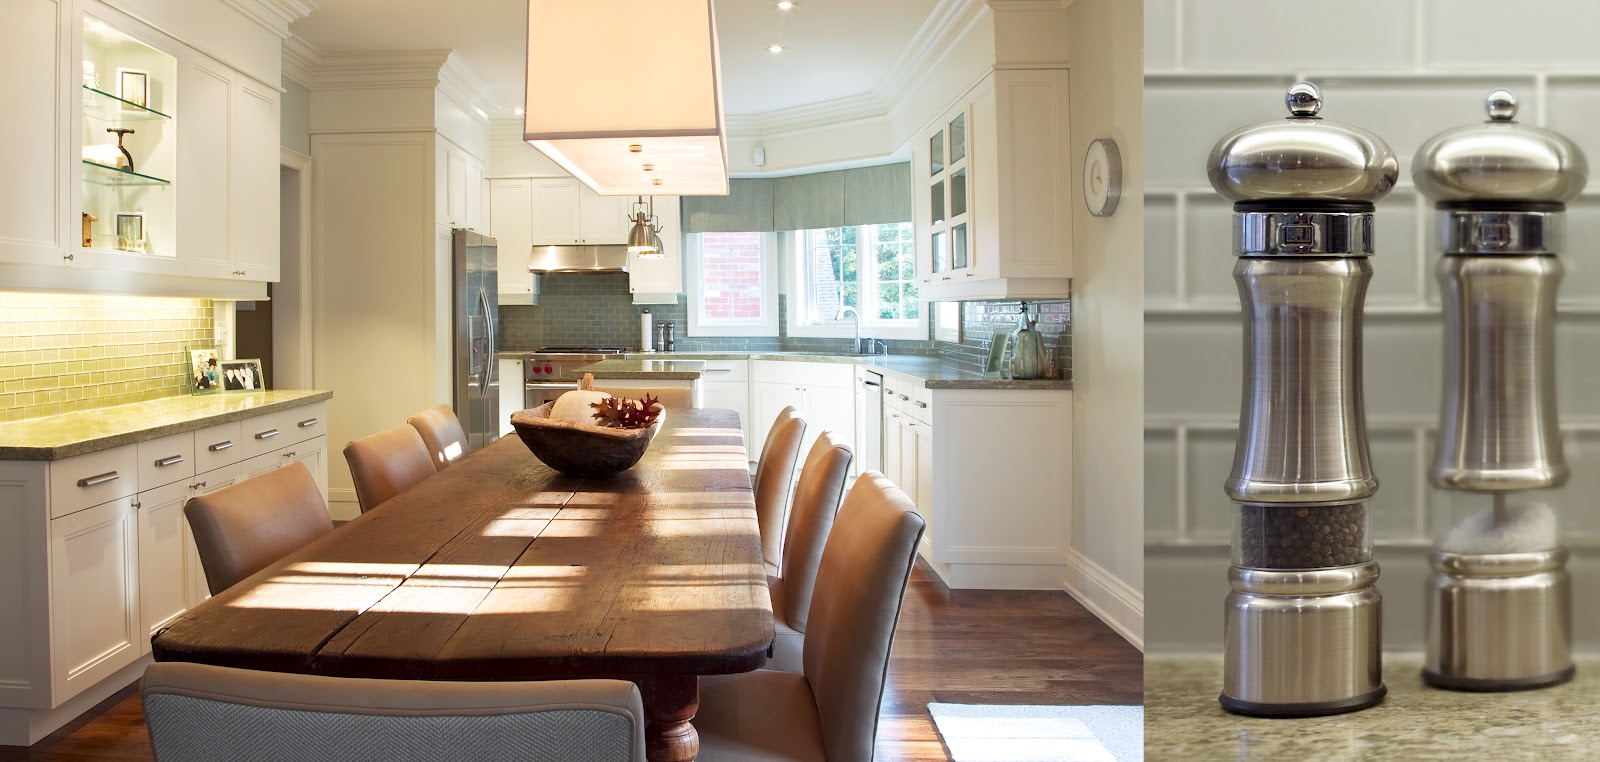
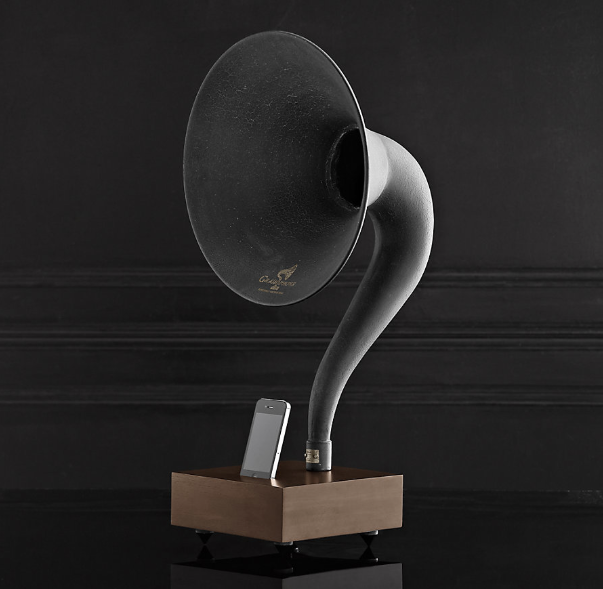
When Sculpture Meets Sound | The iPhone Gramaphone

As you probably all know by now, I am a big fan of music. I’ve played the violin since I was two and have been a singer/songwriter for most of my life, so my ears have been tuned to decipher the delicate details that make a recording special. That’s why when my love of good design and my love of music combine, I get really, really excited.
Remember a few weeks ago when I shared the beautiful, Italian-designed iPhone Megaphone? The gorgeous ceramic sculpture’s simple, organic shape had us all swooning. But it’s hard {if not impossible} to find in Canada and the US, and shipping from Italy… Well, it just might not get here for Christmas!
I must confess that I’m not particularly fond of “substitutes.” I’ve always been a “real thing” kind of girl. But the wonderful news is that today’s design find is in fact no substitute at all. It’s the real thing, and the story behind it will no doubt win you over just as it has me.
Friends, meet the iPhone Gramaphone.
Not only is this a beautiful product, the story behind it is wonderful. Here’s just a bit of the lovely tale of the man behind the sculpture and sound.
Sometimes serendipity succeeds where school falls short. Matt Richmond could have traveled any one of several roads. His passion for the saxophone might have led to a career on stage, had the act of studying music not taken the fun out of playing his instrument. After shifting his focus to microbiology, he found that hours spend in the library overshadowed his love for tinkering in the lab. And finally, while industrial design tapped into his life-long desire to know how things work – “Since I was a kind, the first thing I’d do when I got something new was to take it apart” – his graduate studies deconstructing toasters and hair dryers proved not nearly as interesting as the modern furniture he began collecting on the side.

So ultimately, Matt left school and devoted himself to furniture design. But it wasn’t until he walked into an antique store near San Francisco that all of his interests and aptitudes finally – and brilliantly – converged.

“I found this old Victrola horn that had a shape I really loved and I thought, ‘How cool would it be if I could use this with my phone?’ I held up my phone to the opening on the speaker, and I could immediately tell it was something that would work.”

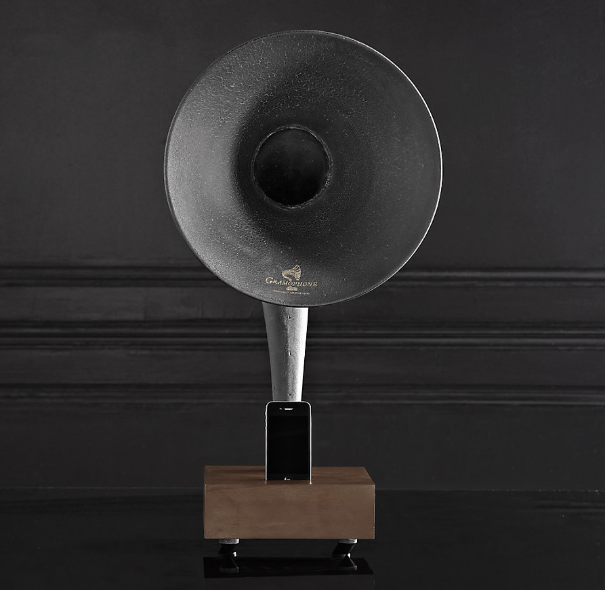
He crafted the base for that first horn – a clean-lined piece of hardwood, carved with a slot for his phone, a hole for the horn, and an internal channel to conduct sound from one to the other, with no plug or battery required. The result was elegantly simple, and amazingly functional – a witty juxtaposition of vintage and modern technology that brought something new to each. A sculpture that made music.

Everyone who saw the original wanted one of their own. Soon, by virtue of word of mouth and the Internet, Matt had more orders than he could possibly fill. After handcrafting nearly a hundred, Matt refined the design and determined exactly the combination of horn shape and wood type that works best, and that would allow him to replicated it on a larger scale.

{words by Laura Cavaluzzo}

Enter Restoration Hardware, the iconic home furnishings purveyor who will make all your Gramaphone Christmas wishes come true by bringing Matt’s brilliant design to market on a larger scale.  Based on that very first horn that Matt found in an East Bay antique store {a Magnavox metal speaker from the 20’s} the base is crafted from solid walnut and the metal horn offers bright, balanced, full-range sonics. The horn is of course directional, so you can keep the sound subtle and in the background or point it into a corner and fill the entire room with music.
“There’s something about listening to a record on an old phonograph,” says Matt, “it doesn’t have the fidelity of a CD or MP3, but it evokes a feeling. It’s about eliciting a feeling.”
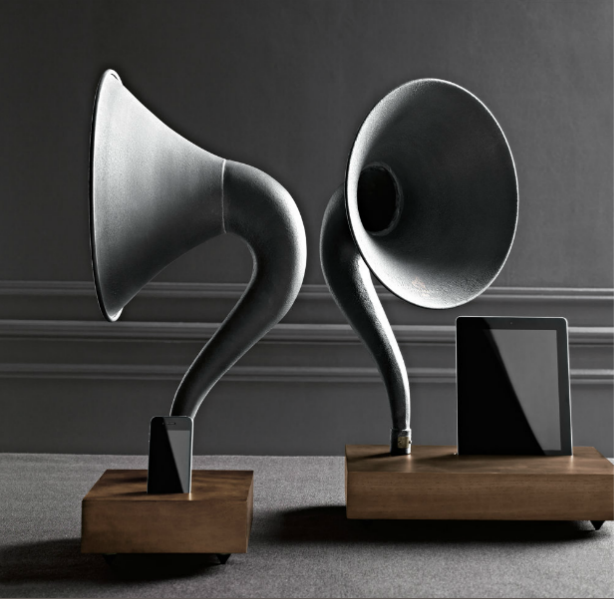
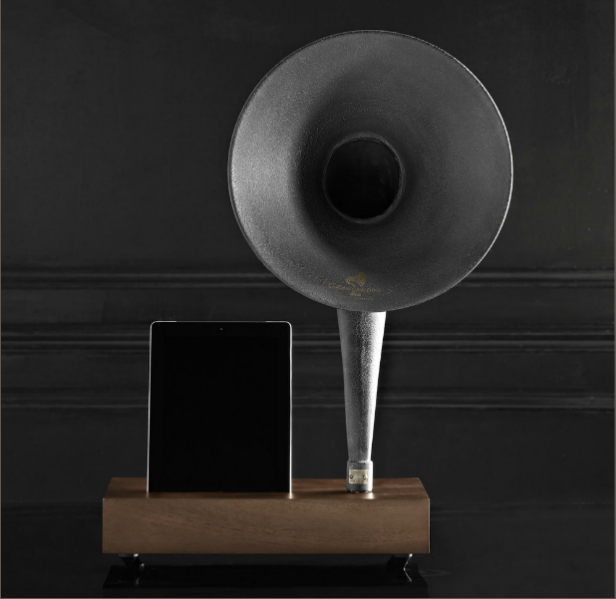
Matt’s story is for all of us late bloomers. It’s for those of us who have taken a winding path to finding ourselves. It’s a reminder to keep dreaming and creating and inventing and trying. And his beautifully designed product is for all the audiophiles on our Christmas lists this year. Available in an iPad version as well, my guess is it will be the most talked-about gift under the tree.
xo
s.

By |November 16th, 2012|0 Comments

Kitchen Confidential: Replace or Reface?

After sharing the TOP 10 LIST for planning your kitchen renovation yesterday, I thought I’d share an interesting project I did with the loveliest of clients a couple of years ago.

Kitchen update following PHASE 2

I’ve had the privilege of working with this client over a number of years, actually. When they first purchased this home, they weren’t ready to do a full redo on the kitchen but they REALLY hated their countertops. We sourced some gorgeous Ming Green granite, paired it with a sparkling yet classic back-painted glass subway tile for the backsplash, and created a very lovely kitchen refresh for Phase 1 of this kitchen renovation (sorry…no image of Phase 1 available!).

A few years later, my client was ready to build off the work we had already done. The cabinets were functional, but the door profile was very dated. The 80’s home also had unsightly bulkheads above the cabinets and the overall look of the kitchen was still unfinished. Clearly it was time for Phase 2.

Rather than removing the cabinets and wasting the investment they had made a few years earlier with the ming green granite counters and back- painted glass subway tile backsplash, we chose to simply reface the kitchen cabinets instead of replacing them. We chose a double-step Shaker profile for the doors and end gables. We also added two new beveled glass doors to lighten and brighten the feel of the kitchen. We then hid the unsightly bulkhead by installing a frieze mould, frieze board and a substantial crown moulding around the top of the cabinets to finish the look of the kitchen and offer a much stronger architectural presence. This design choice was possibly one of the most transformative changes to the kitchen, as it gave the space a completely custom built look. The doors were custom sprayed in a controlled booth while the face frames of the cabinetry, the frieze and the crown were all professional sprayed with lacquer on-site for a flawless finish.

We then installed these gorgeous pulls and coordinating knobs from Restoration Hardware in a brushed nickel finish for a classic, sophisticated look.

Duluth Pulls from Restoration Hardware

We updated the lighting with two new pendants over the island and this gorgeous rectangular drum shade chandelier from Restoration Hardware. (You may remember this light fixture from my own dining room!)

Rectangular Shade Pendant from Restoration Hardware

The chandelier anchors a STUNNING antique harvest table from Quebec. It is surrounded by chairs that I had custom upholstered in a combination of a Kravet bone and tan herringbone weave on the outside backs and a buttery soft tan leather on the inside back and seats. Truly delicious!

I hope this kitchen’s two stage renovation has inspired you with the possibilities of what can be done! The final budget for the kitchen was 1/4 to 1/3 of what it would have cost if we had ripped out all the cabinets and replaced them, but I think the end result is simply beautiful.

xo
s.

By |July 24th, 2012|3 Comments

For the Detailistas: My Dining Room

So as it turns out, I am not alone. I believe that details are a love language, and it appears that you do too, as many of you have already been asking about details from a couple of my first posts! Remember the post about my garden peonies? Well many of you Detailistas out there noticed the art and furniture in my dining room and wanted to know more…so it is of course my pleasure to oblige! Here is the photo that started the questions:

And here, my lovely friends, are the answers! First, the ART! (that’s always my favourite place to start)

This piece by Kathleen Weich came to us from Art Interiors a few years ago now. I love the palette, the texture and the movement in it. Here are a few close up shots so you can see more of the delightful details:

We engage with this piece every day, and it speaks quite elegantly to the other art we have in the space. I think it makes the dining room quite special with its modern and sophisticated statement.

Next, the chairs! These Louis Ghost chairs – designed by Parisian designer Philippe Starck in 2002 – are an iconic design classic from Italy’s Kartell. They are a truly modern twist on design history: a reinvention of the classic Louis XVI armchair now done in this transparent lucite, a material invented in 1931 by Dupont. These chairs have been called a postmodern triumph of technical innovation and historical style. If you’ve been to visit Versailles, they should feel familiar to you (minus the ornate, small-scale print fabrics and gilded woodwork, of course).

For me, they are a perfect juxtaposition against my classic panel moulding and my clean-lined, contemporary, live-edged white oak dining table. The panel moulding carries across the shared dining room and living room wall, breaking it up and giving it the dimension it needs to frame and define each space. At a cost of $70, it was a great investment! Now here’s the table:

This live-edge, solid European raw white oak table actually came from Crate + Barrel! It fits the space perfectly and we love the raw wood…or at least we do now. When the table first arrived, the almost dusty looking raw wood finish made me giddy. I loved the quiet, driftwood-coloured palette and the organic simplicity. Then we ate at the table. No matter what meal we ate, we left indelible “evidence” behind in the form of grease marks and stains. No amount of scrubbing would remove them. I was losing my mind! Rings and drip marks on this perfect slab of nature would not do!

First, I had my furniture maker sand it and put on a coat of water-based finish. We got about a week out of that before this very thirsty table once again began to absorb every stain.

My next move was a stroke of genius if I may say so myself. I decided to go with the “if you can’t beat ’em, join ’em” rule of life, pulled out a beautiful Tuscan olive oil and poured it all over my table. I let it sit for a couple of hours, wiped up the excess with some paper towel, et voilĂ ! My beautiful table was circle-and-drip-free and restored to it’s simple perfection. Now we oil it every few months. The oil soaks into the thirsty wood but prevents other grease and finger marks from making me crazy. Sanity restored!

Last but not least, this simple, rectangular drum-shade light fixture came from Restoration Hardware. I’ve used it on a few design projects for clients and find it to be very harmonious. It casts a beautifully distributed, even glow on the table due to the frosted acrylic base and the large rectangular linen shade. Its clean lines and simplicity don’t fight the art, the paneling or the furnishings while still complimenting the proportions of the room and anchoring the table quite nicely.

So there you have it! The details for all you Detailistas out there. Hope this provides some inspiration for your next design project.

xo
s.

P.S. Feel free to post your questions and comments in the comments section below each post. I’d love to get our dialogue off of FB and onto the blog so we can share it with everyone!

By |June 27th, 2012|10 Comments