/Sarah Walker The Curated House

About Sarah Walker The Curated House

This author has not yet filled in any details.
So far Sarah Walker The Curated House has created 396 blog entries.

“Ocean” Master Ensuite – Part 2 – Cabinetry

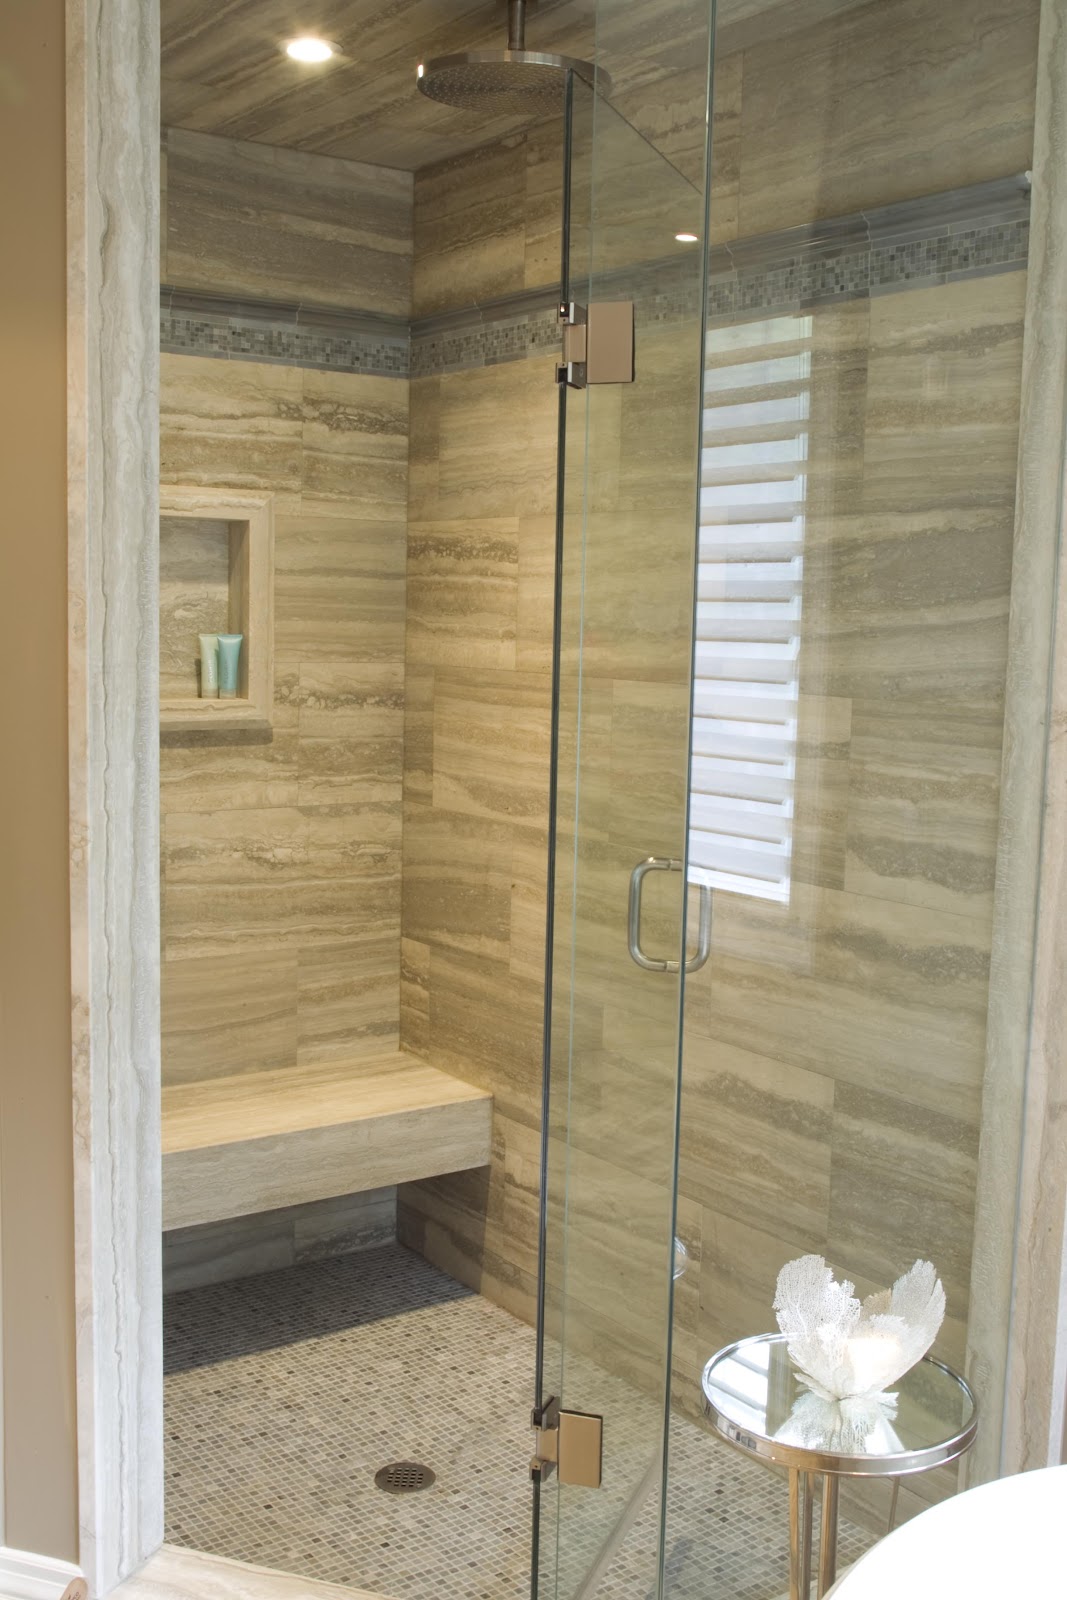
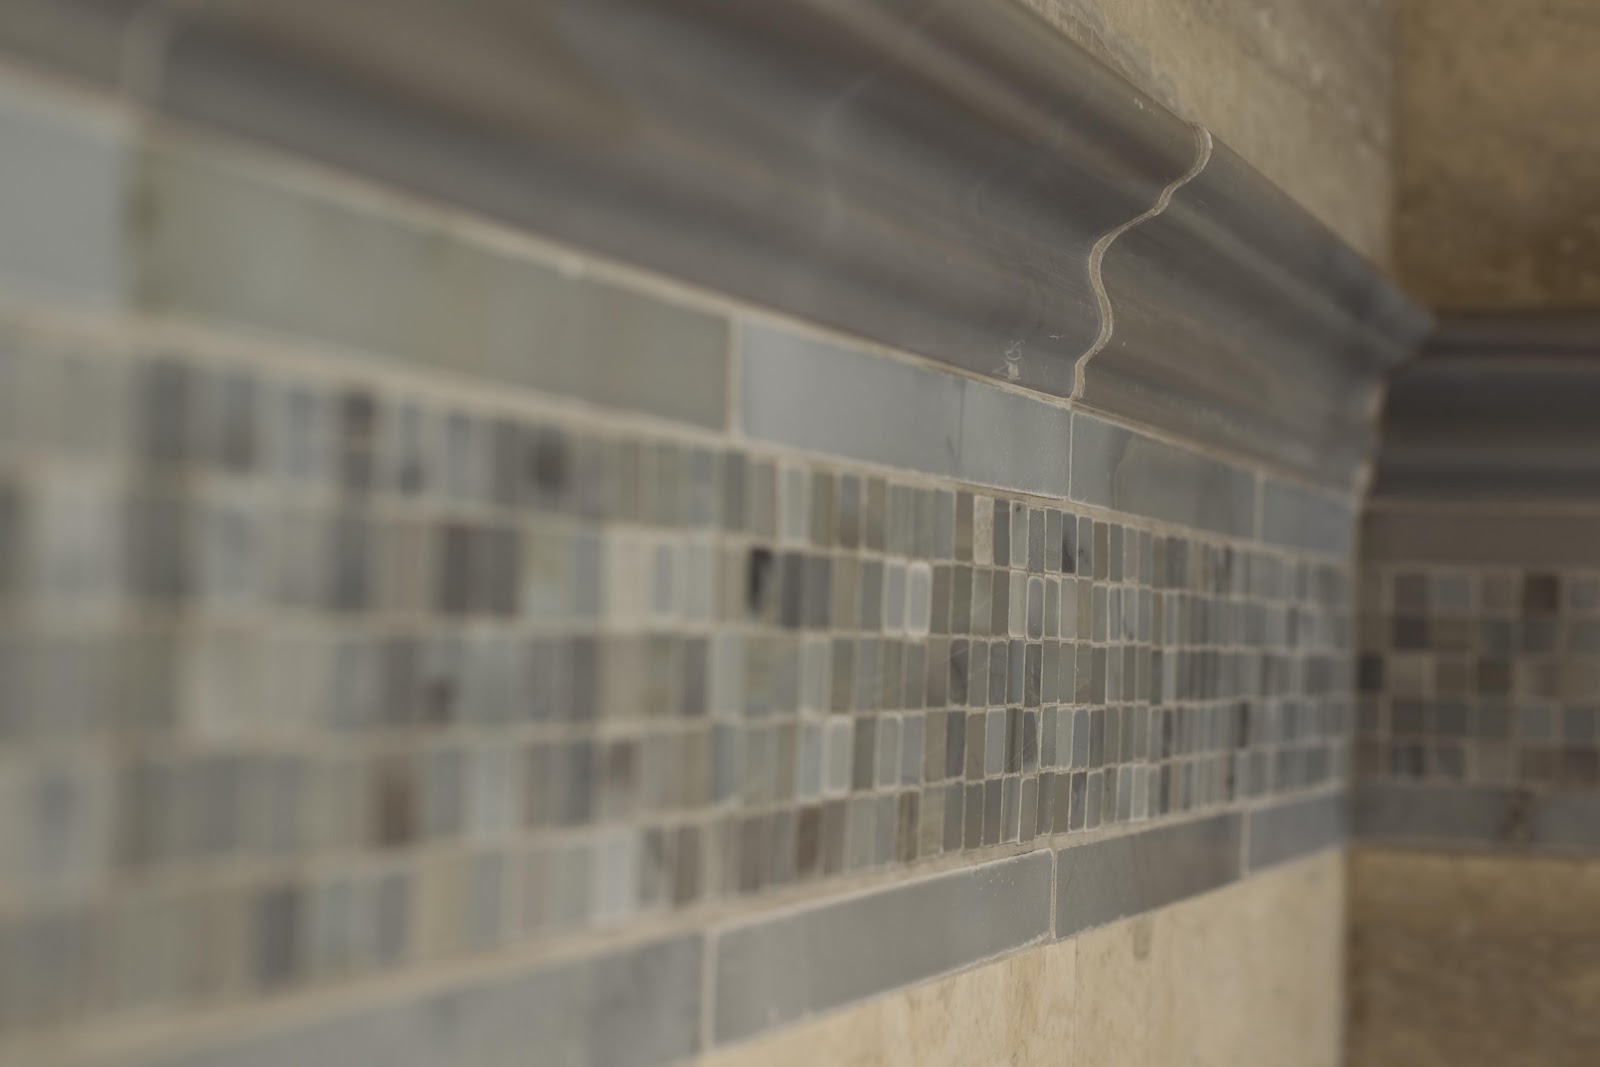
Yesterday I shared Part 1 one of one of my favourite clients’ bathroom renovation projects, revealing some of my secrets to creating interesting texture with the use of tile. Today I’m excited to share with you the cabinetry design and the 2-way fireplace “big reveal.”

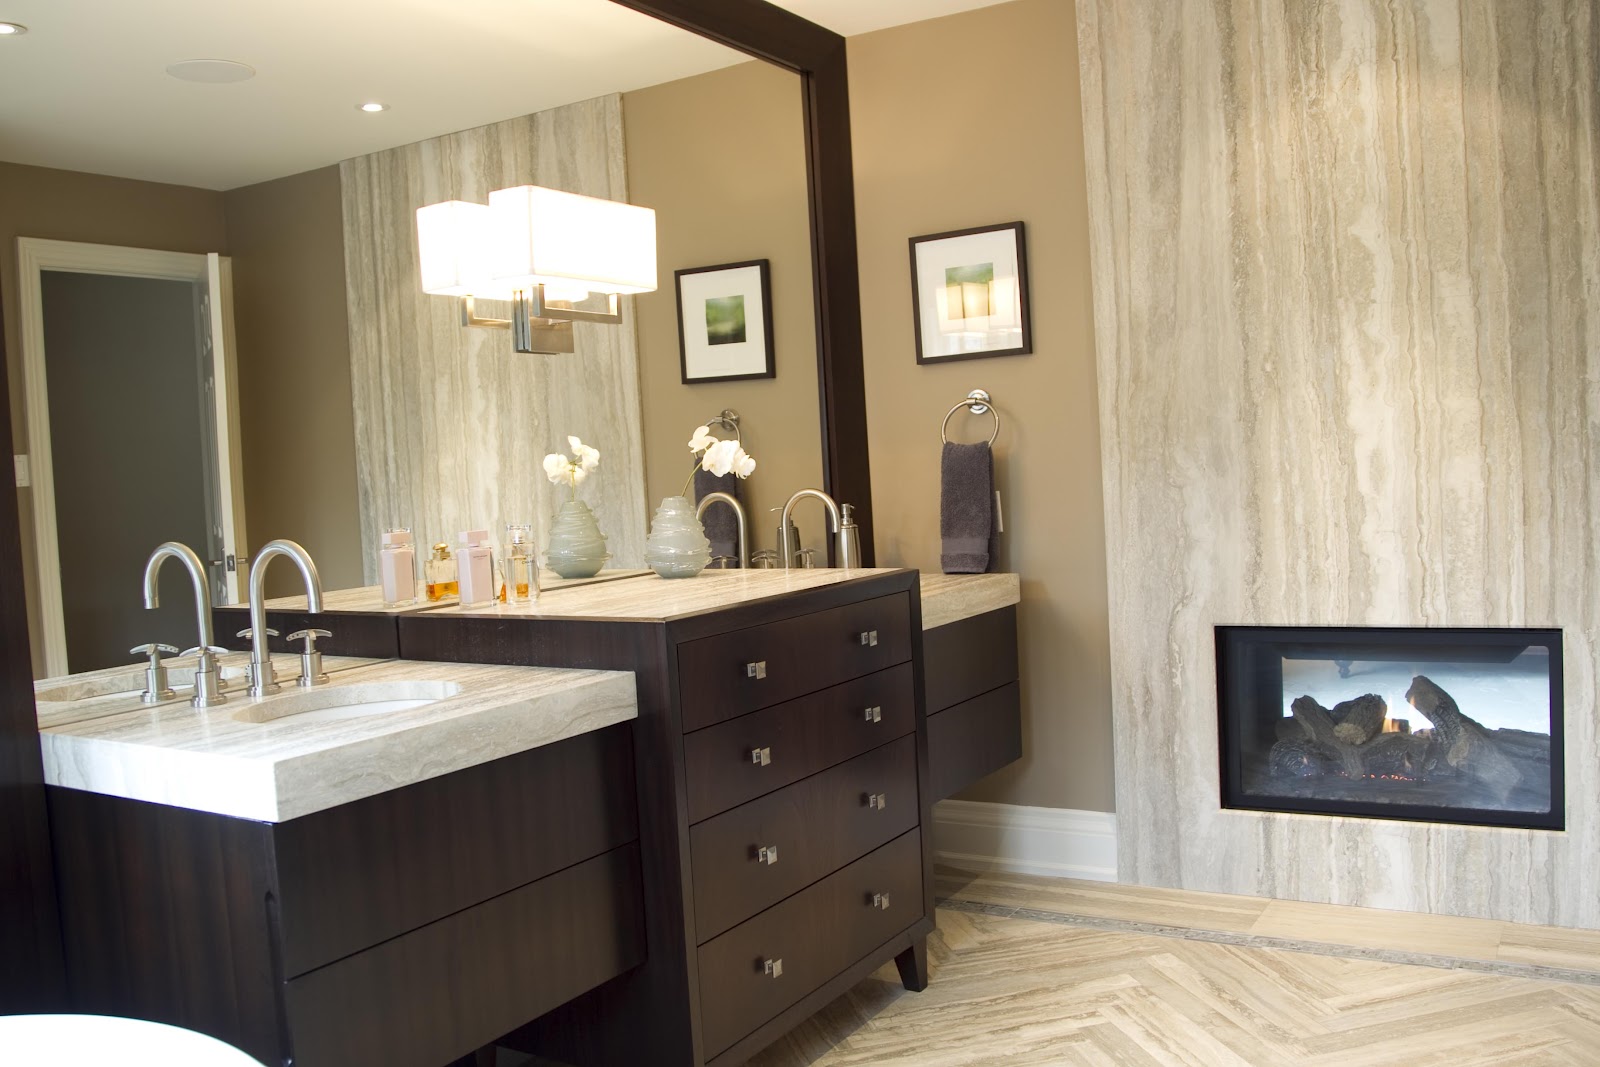
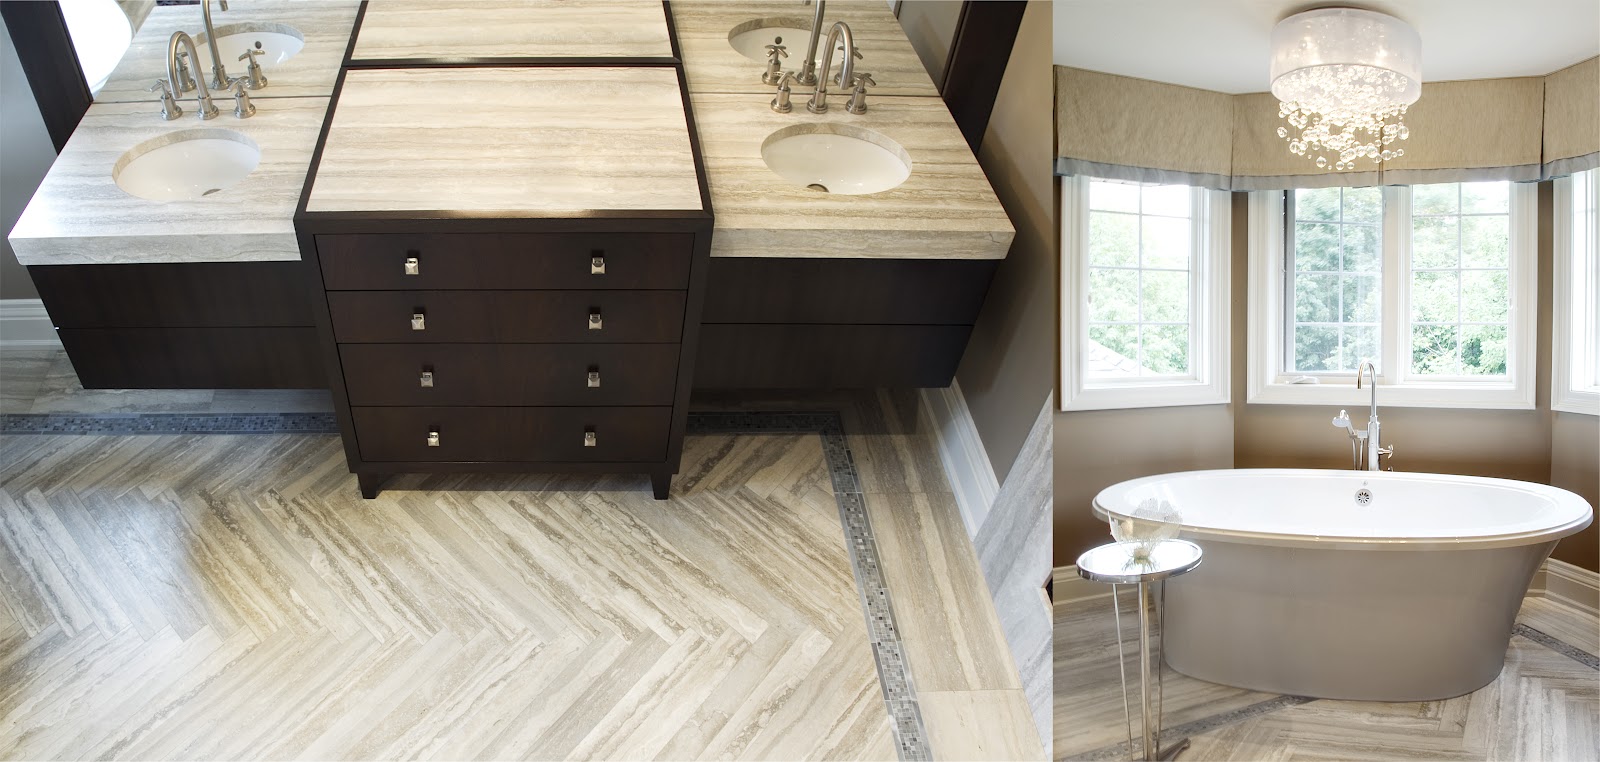
As I said yesterday, my goal for the cabinetry was for it to have a very “furniture-like” look and feel while still being extremely functional for this bathroom application. I wanted to distinguish the “his and hers” sinks and break them up with the centre cabinet. Also on my creative designer’s “wish list” was to create a floating effect, with at least one element of the cabinetry cantilevered from the wall.

I also wanted the mirror to be dramatic, so in this case I designed a beveled 5″ mahogany frame that wraps around the entire vanity – floor to ceiling – and graphically defines the vanity area. The vanity feels like it is floating on the mirror itself, creating both a dramatic and sophisticated effect in the space.

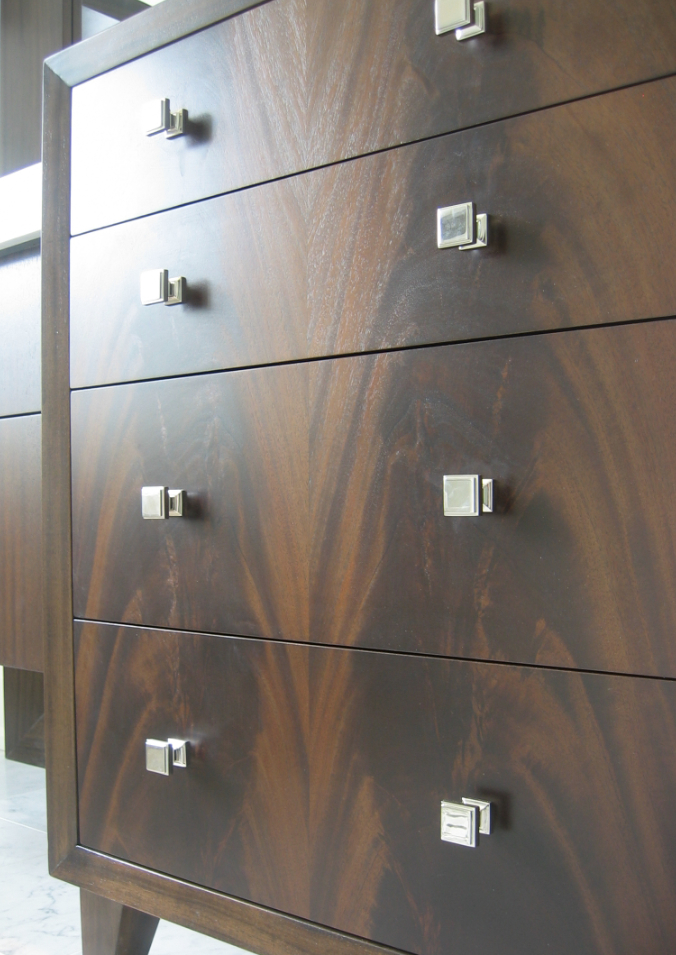
I decided to face the centre drawer cabinet in crotch mahogany – one of my favourite woods for creating an artistic swirl of texture courtesy of nature herself. This cabinet also has a beveled face frame to tie in the details of the top (with the stone damper inset) and the larger scale bevel on the mirror frame.

Even the fireplace has a beveled edge around the face of the opening! No detail was left untouched.

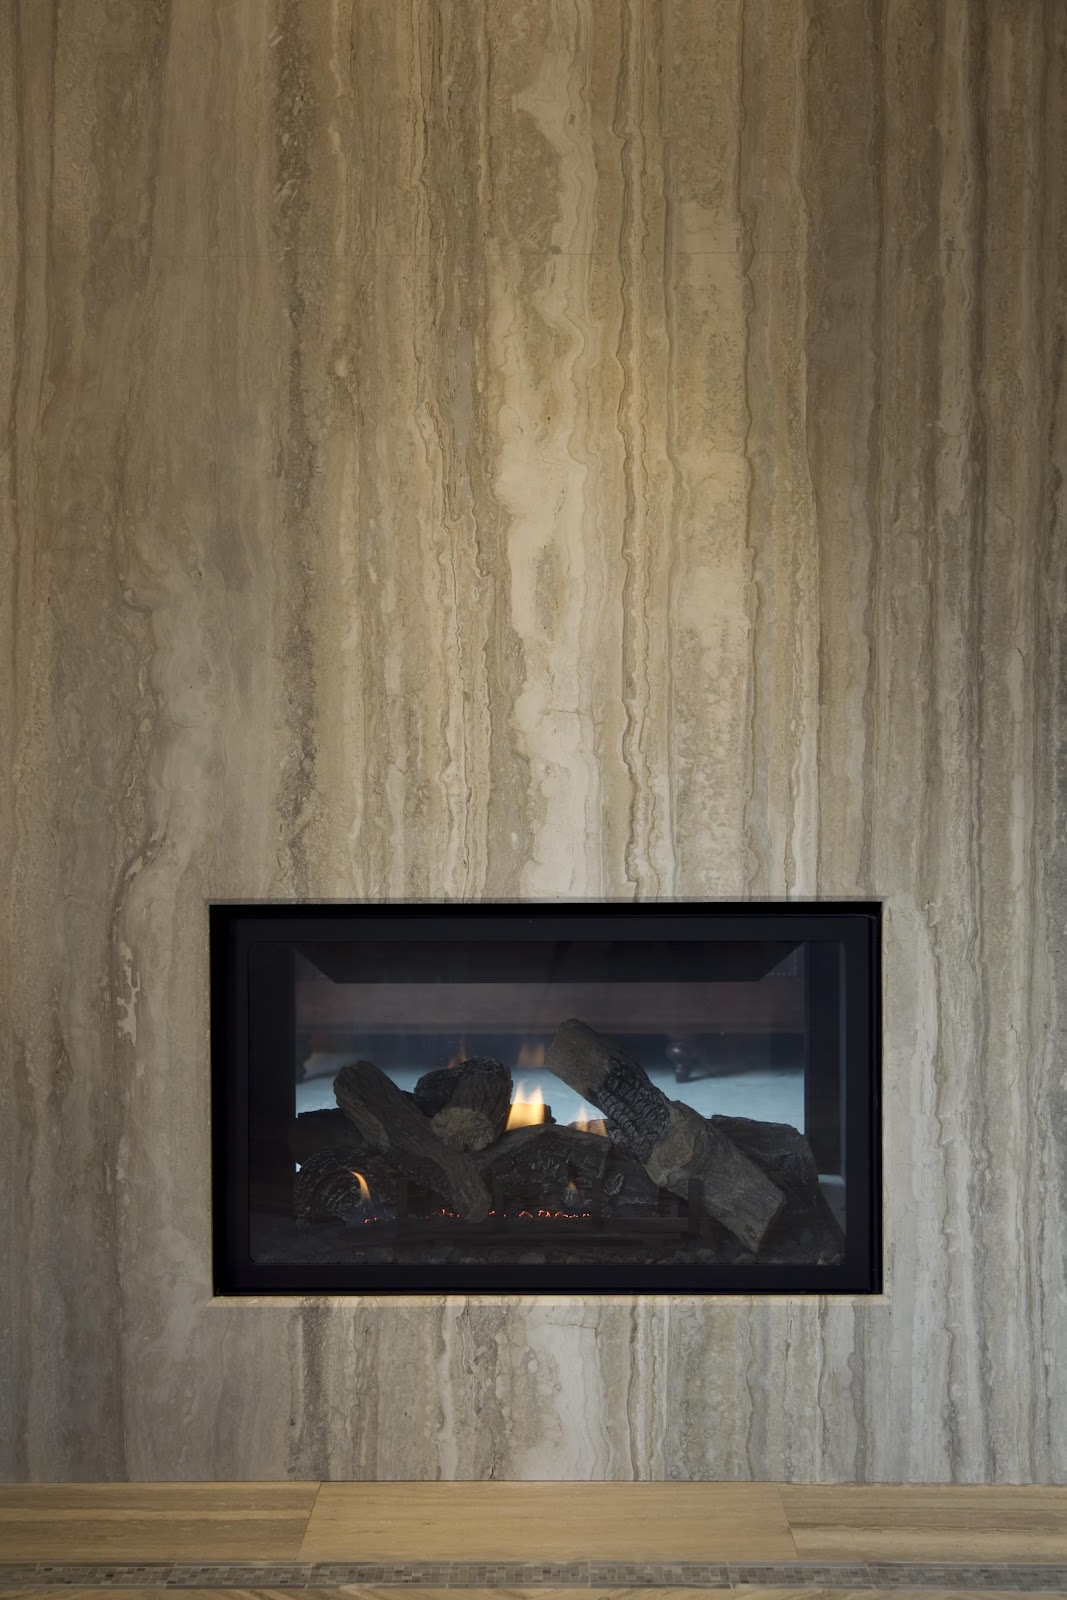
Story time: Installing this floor-to-ceiling slab of vein-cut travertine was NO. SMALL. FEAT. In fact, the fabricator wound up doing it for us twice as they broke the slab on the way into the house the first time. {Design lesson: When renovating, expect the unexpected and the delays to go with it! The end result can still be spectacular, but remember to take your patience pill on stone installation day!} The end result is really breathtaking, and speaks so beautifully to what is on the other side.

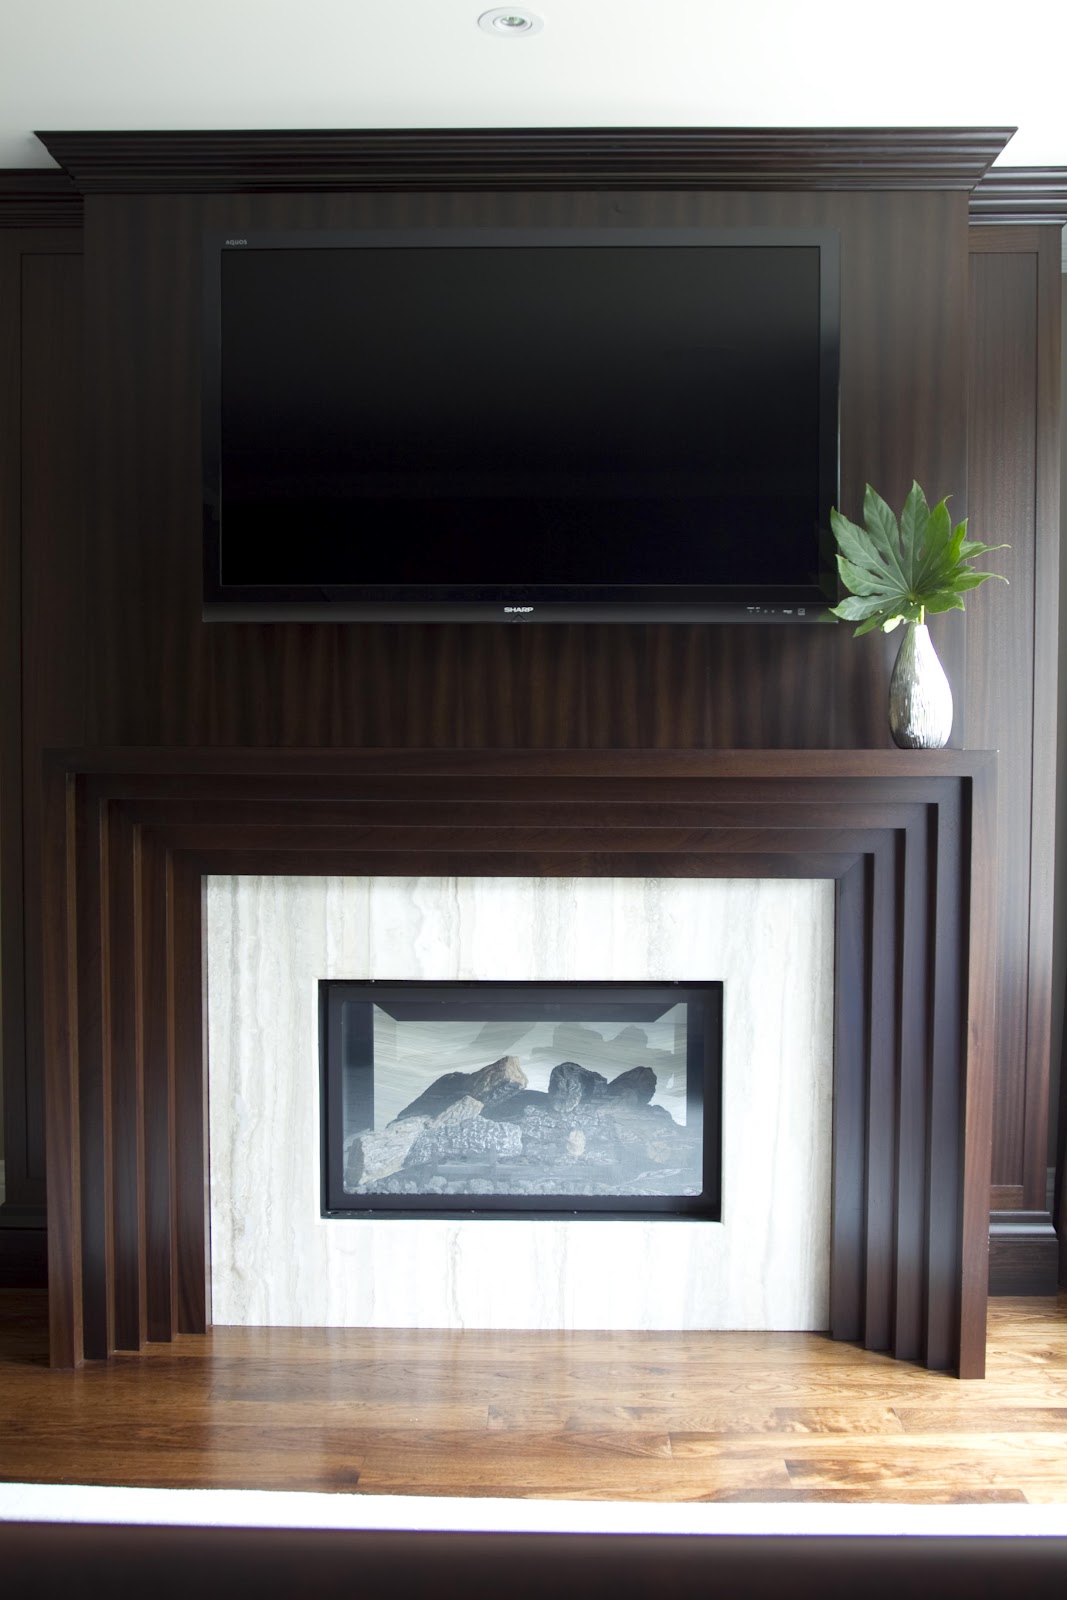
I think this is one of the most beautiful fireplace surrounds I’ve yet to design. Inspired by the clean, sophisticated lines of the Deco period, I designed this waterfall, stepped mahogany mantel to sit proud of a paneled Sapele or ribbon-stripped mahogany wall.  This focal point in the Master Bedroom is powerful, grounding and extremely elegant.

I hope you’ll take away some inspired ideas for your next bathroom from this project. This one is truly a reflection of my motto: Beautiful process, beautiful product. SO loved working with this client!

xo
s.

All photos courtesy of Jordan Fretz

By |July 4th, 2012|1 Comment

“Ocean” Master Ensuite – Part 1 – Creating Texture with Tile

Today I thought I’d show you a stunning master ensuite that I had the privilege of designing for the loveliest of clients. She’s a woman with exquisite taste, is thoughtful and kind, and she trusts me implicitly {read: THE BEST}.


This was a renovation project, and as such, the floor plan wasn’t really up for negotiation. Moving the plumbing stack for the toilet would have just been too costly, and that was really the only change we would have considered (swapping it with the shower). Thankfully it was a generous space to start with and we were content with the placement of all the key elements. Our biggest change in the end was to add a 2-way fireplace…but I’m getting ahead of myself.

Regardless of whether you are renovating or redecorating, I always say you should start from your inspiration point and work your way out. As you’re coming to learn about me, I start with art whenever possible, but with a bathroom I start with the tile and the vanity design. Tile is not just tile anymore, my friends. Tile is an opportunity to work with colour and texture in some really inspired ways, especially if you think outside the box.

In the case of this bathroom, “outside the box” was about how we used the tile that captured our hearts: a Vein-Cut Ocean Travertine. We fell in love with it for its quiet, watery palette, but my creative imagination was already one step ahead with the excitement of what could be done with it.

What I love about the Vein-Cut stone is the linear grain structure. While it still has some natural swirl and variation, it has a much cleaner, more contemporary feel than Cross-Cut stone. This worked beautifully for this Master Ensuite where we wanted a warm but modern feel to the space.

Rather than just lay it straight, I chose to have the 12″ x 24″ tiles cut into 2.5″ wide planks (like hardwood flooring planks). I then designed a tile carpet, and the inset of the carpet was carefully crafted out of these 2.5″ x 24″ planks to create a stunning yet subtle, beautifully textured herringbone pattern. (Confession: I am addicted to all things herringbone!)

I designed the herringbone tile carpet to be bordered with a combination of 5/8″ x 5/8″ moonstone mosaics (5 rows) and then on either side of that, a single strip of 5/8″ x 6″ moonstone to create a clean finish. The remaining outer portion of the floor was set with uncut 12″ x 24″ tiles.

The photo above shows you one of my favourite details with the vanity. We used the same travertine in 1 1/2″ thick slab for the countertops (double the standard thickness of 3/4″). I wanted the vanity to feel like a furniture piece, so I decided to set the stone down into the top of the centre, raised drawer section to mimic a leather damper on an old fashioned desk. The beveled wood edge that slopes off from the stone inset is a simple but extremely elegant detail.

The placement of the tub over the border edge of the tile carpet really makes the tile carpet feel like an area rug in the middle of the space. I love this effect. It takes the plumbing fixtures and cabinetry to a whole new level while anchoring each element, tying them together as with an area rug in an elegant living room.

This photo shows our grouping of 3 small pieces of art leading into the bathroom (all from a series by David Gillanders via Art Interiors). For this project, the art was one of our finishing touches rather than our starting point, but the watery, blue-green palette is just perfect for the tile’s inspirational story line. I love how these 3 smalls connect so beautifully with the quiet colour and texture of the tiles.

Not to be forgotten, the shower was yet another opportunity to showcase tile in an interesting way. I made use of the linear grain on the walls to create a greater sense of depth by using the grain horizontally to push the eye away. The shower floor is a tumbled version of the same 5/8″ x 5/8″ mosaic. Always go for tumbled on the shower floor whenever possible – it has better grip and you won’t find yourself slipping as often! I absolutely love the beautifully framed and beveled shower cubby and the cantilevered solid stone shower bench (in the photo above). The floating effect of the bench mimics the “his and hers” floating sink cabinets on the vanity. This repeated floating element plays well off of the watery, suspended feeling of the colour palette. It takes the cliché of “spa bathroom” to a whole new level of sophistication in my book.
 

The shower’s tile inset reflects the border on the main floor’s tile carpet with the addition of a chair rail in the natural polished moonstone. So delicious you could almost bite it! I love the dimension the chair rail gives this shower detail.

Tomorrow I’ll share a bit more about the vanity and reveal the amazing 2-way fireplace we created. It’s a stunner! Can’t wait to share it with you.

xo
s.

All photos courtesy of Jordan Fretz

By |July 3rd, 2012|1 Comment

A Cherry Good Tree – Braised Lamb Shanks with Cherry Sauce

HAPPY (belated) CANADA DAY!! What a beautiful long weekend we’ve had to celebrate our home and native land. I think it’s going to be a pretty spectacular summer!

In honour of this good earth we call home, I thought I’d share some of her harvest from our own back yard. We bought this little home of ours 4 years ago this coming September. We were motivated to move to this part of Oakville in large part because of the mature trees. As it turns out, this particular neighborhood was once an orchard. Apples and pears (the Cockney slang for “stairs,” though in this case I’m referring to the actual fruit) can be found scattered on lovely old trees in backyards for blocks. As luck (or grace) would have it, our particular yard is home – not to a crab apple or gnarly pear tree – but to one very large, very lovely cherry tree. Being the arborists (read: neohphytes) that we are, we did not realize we had this treasure in our literal backyard until our first Spring in this home when our tree came into breath-taking full bloom.

 
Gorgeous, black, ripe and juicy Bing Cherries are truly one of my all-time favourite Canadian delights, so we were pretty much beyond ourselves when we gathered our first harvest that Spring. Last year, we had our first year of blooms with no fruit (still not sure what happened), but this year the harvest was SPECTACULAR. Truly the best yet. I think we may have picked as much as 10 pounds of cherries from our very own backyard. Pretty terrific if you ask me. Here’s a shot of just one of the several bowls we filled with this early summer’s harvest:
In addition to gorging ourselves on this ruby goodness straight from the tree, the abundance of fruit  inspired an abundance of cheesy puns: “What a cherry good tree!” “I love you cherry much,” “This was a cherry good meal,” “See you cherry soon!” etc. Basically think of any opportunity you can imagine to swap out “cherry” for “very” and we took it. I blame it on being drunk on these Bing Beauties. Cheese and cherries go well together, right?
Once I recovered from OD-ing on groan-worthy puns and freshly picked cherries, I decided that this was the year to work on some new recipes to make the most of this delectable fruit. So, inspired by the lamb shanks I had at 1000 Tastes of Toronto, I created today’s recipe for some truly inspiring and heartwarming friends who came to visit us last weekend. The verdict was that it was cherry, cherry good. (Sorry…had to squeeze in one more pun to round out the cheese plate.)
BRAISED LAMB SHANKS WITH CANADIAN BING CHERRY SAUCE
Ingredients:
12 lamb shanks
flour for dusting
salt + pepper
2 Tbsp Grapeseed Oil for braising
2 large Vidalia onions, finely chopped
1 large carrot, finely chopped
A handful of fresh rosemary
4 cloves of garlic, crushed
6 oz good Balsamic Vinegar de Modena
10 oz good red wine (I like a nice Australian Shiraz for this one)
1/2 pound or more of Organic Canadian Bing Cherries, pitted + halved
Method:
Pre-heat the oven to 300° F. Season the shanks with salt + pepper on both sides and then dust with flour.
Heat grapeseed oil on high heat and add lamb shanks to braise on both sides (2 mins or less per side). 
{A quick aside: I use grapeseed oil rather than olive oil for braising. It is considered one of the “good fats” as it has a high concentration of unsaturated fat, is low in saturated fat and is cholesterol-free just like olive oil, but it has a much higher flashpoint. This means that it doesn’t start smoking until 419° F (i.e. SMOKIN’ hot) and doesn’t absorb into the food as much, thus not changing the flavour and also reducing the fat absorbed into the dish. In simple terms: it’s the healthiest choice for frying and it works really well. I love a good extra virgin olive oil for salad dressings, but I always stick with grapeseed oil for frying, braising and sautéing.}
Once you’ve braised the lamb shanks, they should look something like this:
Remove the shanks and add the chopped onion and carrots. Cook 10-15 mins on med-high heat until the onions have softened and are translucent. Add the rosemary and crushed garlic and cook for a few more mins. (I left the rosemary on the stalks and just removed the stalks from the sauce after I pulled everything out of the oven – easy peasy once it’s cooked). Add the balsamic vinegar and the wine and bring to a simmer to reduce. Pour the sauce into your roasting dish and add back the lamb shanks, layering them so they look something like this:
Cover with parchment paper and place the lid on the roasting pan. Roast in the oven for 2-3 hours at 300° F. Remove from oven and transfer shanks to a serving plate. Cover with tinfoil to keep warm and let rest. Meanwhile, transfer the sauce of onions, carrots, balsamic and wine to a sauté pan and add the cherries. Sauté on high heat for 2-3 mins until the cherries have softened a bit but still retain their shape and some of their firmness.
Serve with Cauliflower Purée (recipe to come) and steamed French Green Beans. Plate by serving the Cauliflower and green beans and then creating a bed of the cherry sauce and finishing with the braised lamb shanks. The meat fairly falls off the bone, and the slightly tart sweetness of the cherries is the perfect compliment to the earthy goodness of the lamb. Dee-LISH!!

Hope you’ve all savoured a great weekend and – for those of you north of the border – I hope you’ve taken time to celebrate all the best of what it means to be Canadian! More cherry goodness to come in the days ahead… Happy Monday!
xo
s.
By |July 2nd, 2012|1 Comment