/Framed & Matted

ONE ROOM CHALLENGE: FALL 2015 | WEEK SIX – THE BIG REVEAL!


We made it! I honestly feel like we could rename the One Room Challenge “Survivor: Designer Edition.” Crowbarring your own space in alongside client work and completing it start-to-finish in 6 weeks? Well, as my lovely friend Lisa Canning said last week, it feels a bit like having a baby. While you’re giving birth you’re like “Why am I doing this again?” and when it’s all done you’re totally blissed out on the afterglow. Here’s to the bliss, friends, ’cause this baby is OUT!

I’m so thrilled with how everything came together in the end. The balance of dark and light, cool and warm, and the mixed layers of texture make this room both sophisticated and inviting – the essence of liveable luxury. The gorgeous Zena Holloway Angel print from Citizen Atelier is absolutely breathtaking in her pride of place, flawlessly finished with a Framed & Matted gallery frame. I find her truly mesmerizing! I love how the metalic silver linen drapery from Kravet frames her with a radiant glow.
Gratefully, the CB2 Crane Floor Lamps {see above} arrived at the 11th hour, and I love them. Lighting game is on fleek. I decided to repurpose a pair of end tables I already had and I think the caged brass bases create just the right airy feel next to the luxe Kravet black velvet tufted sofas. They also play beautifully off of the custom rift-cut oak coffee table which I love pretty hard.
I added a custom solid wood helix on the other side of the room to balance the wood tones and the warm against the cool of the black velvet {see below}, and I’m thrilled to finally have a piece that I’ve designed for clients over the years in my own home. I’m a lover of wood in its natural glory, and this piece {though you can’t see it very well} is pure poetry with it’s mind-bendingly torqued shape. I’ll be sure to post a shot of it on Instagram this week so you can get a better look.
I am thrilled with how the Thibaut ikat wallpaper turned out, especially given that we successfully installed it ourselves! It’s the perfect warm and textured backdrop for the art, like the gorgeous David Graham White piece you see above. 
I’m also thrilled at how the canvas-stretched mural from Anewall turned out when resined with Art Resin. If you missed the tutorial on how to do this yourself last week, you can check it out here!

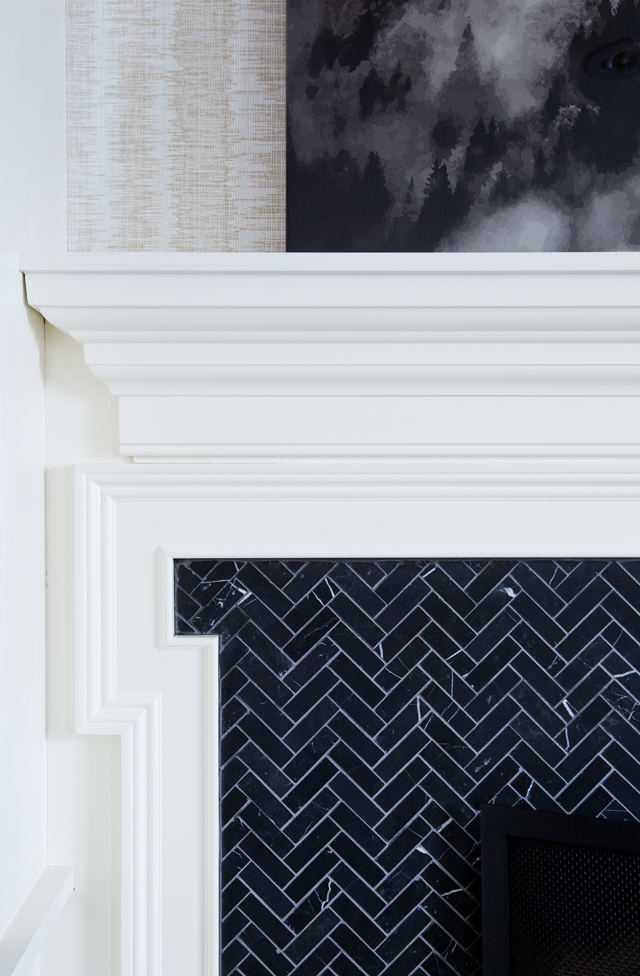
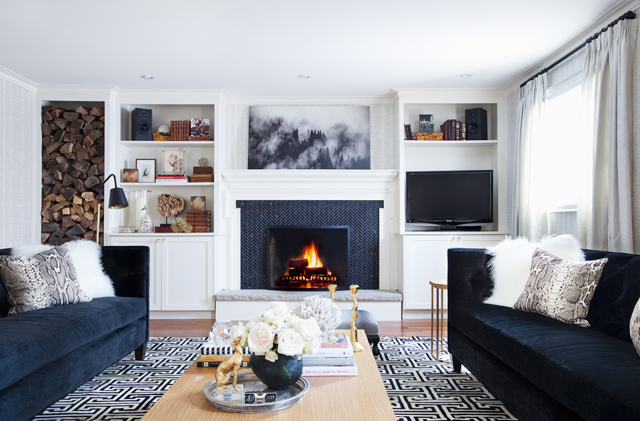
In the hands of my amazing furniture maker, the Metrie mouldings definitely transformed our fireplace surround and mantel into a thing of elegance and beauty. Add to that the custom herringbone mosaic tile from Creekside Tile and a black curved fireplace screen from Anvil & Co and it’s a pretty huge transformation from the before.

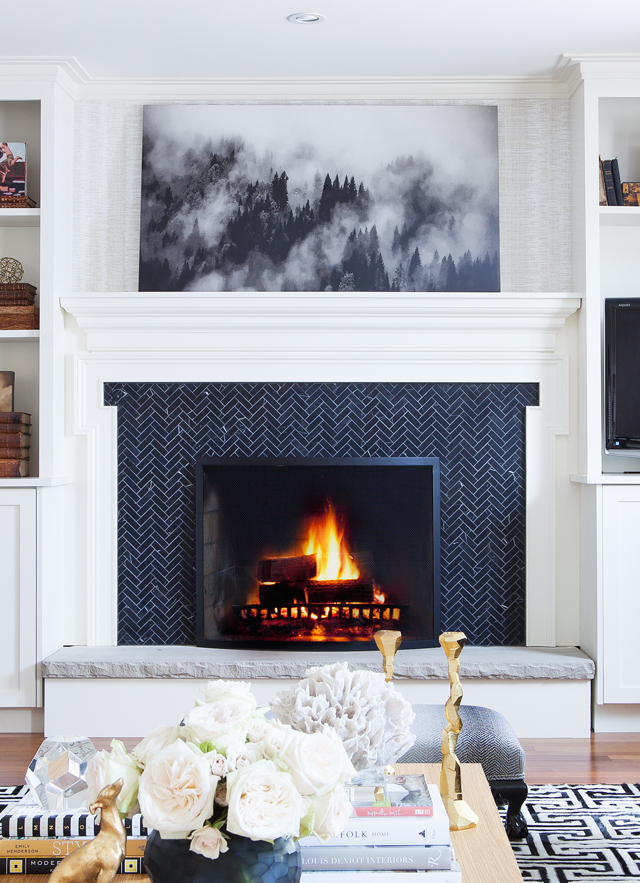
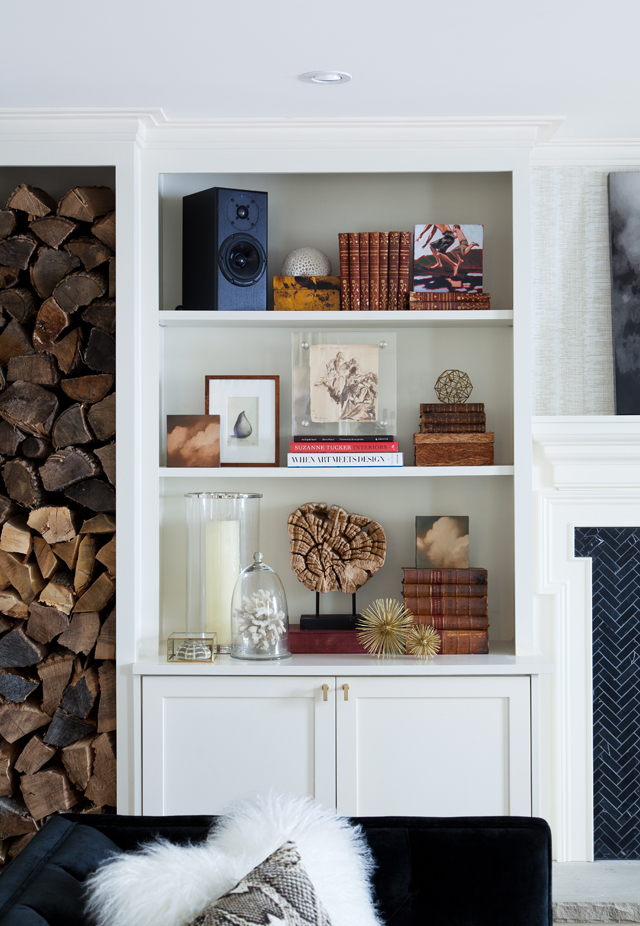
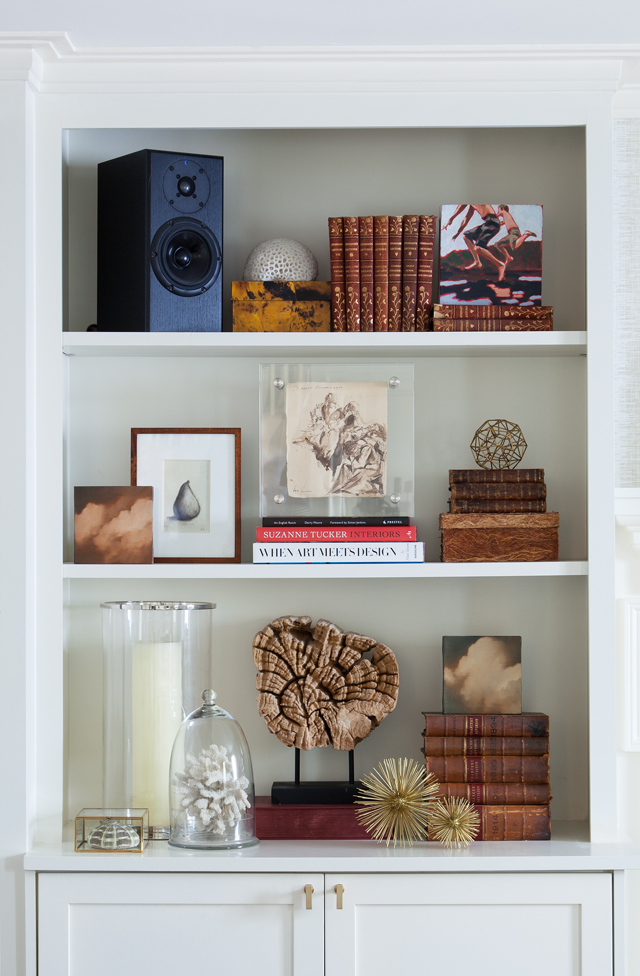
I’m quietly delighted with how the shelf styling turned out. For me, styling a bookcase is a labour of love that is as much about curating your story as it is about making things pretty. I tend to add, tweak, edit and repeat until I get something I’m happy with, and I was zhushing this bookcase in little bits as we worked on the room over the last few weeks to get it just right.

The subtle yet sophisticated brushed brass Lewis Dolin pulls from Upper Canada Specialty Hardware are the perfect finishing touch on the cabinet doors of the built-ins.

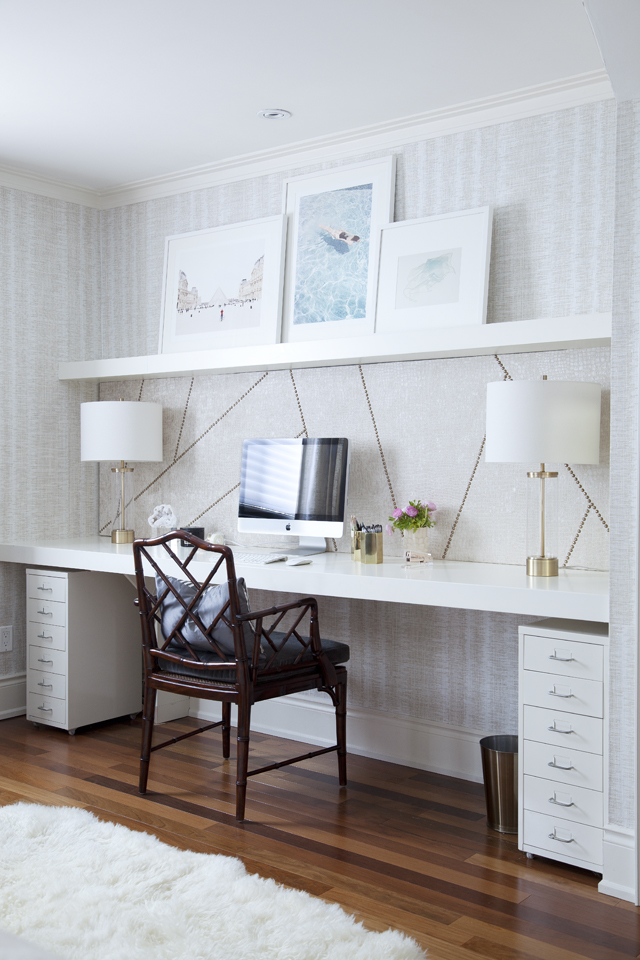
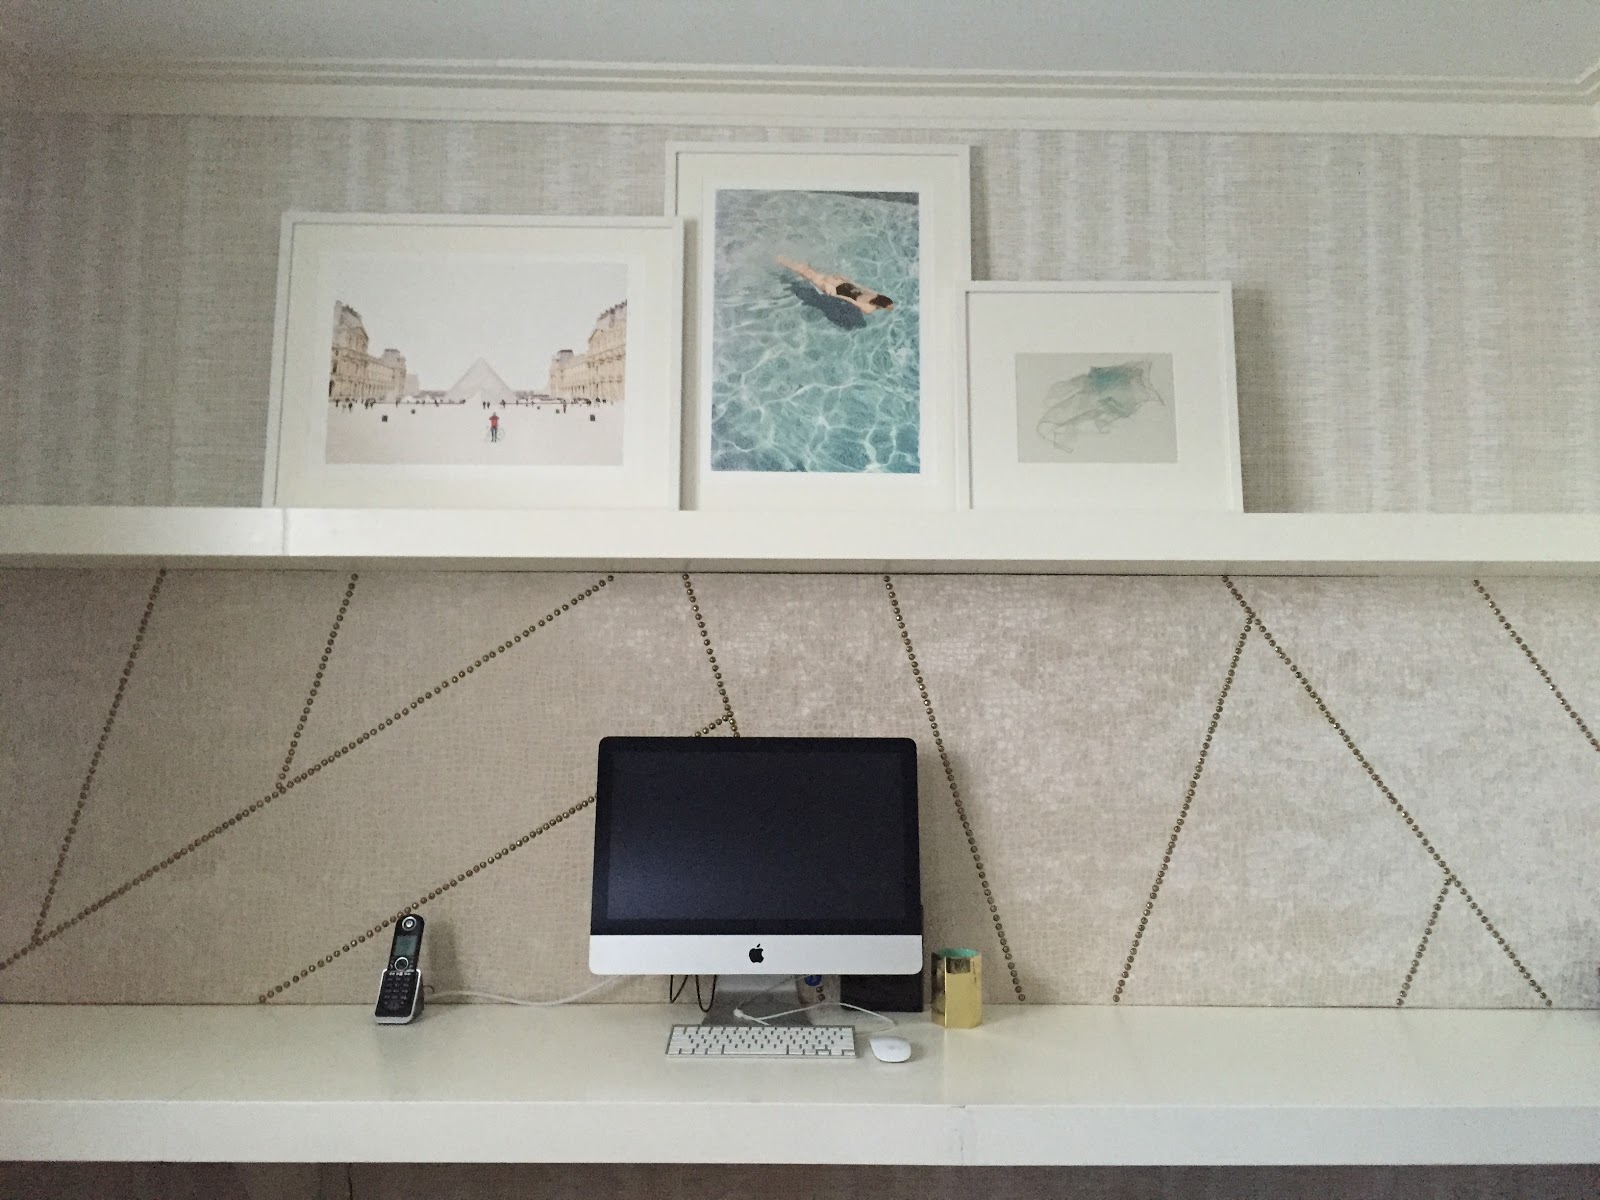
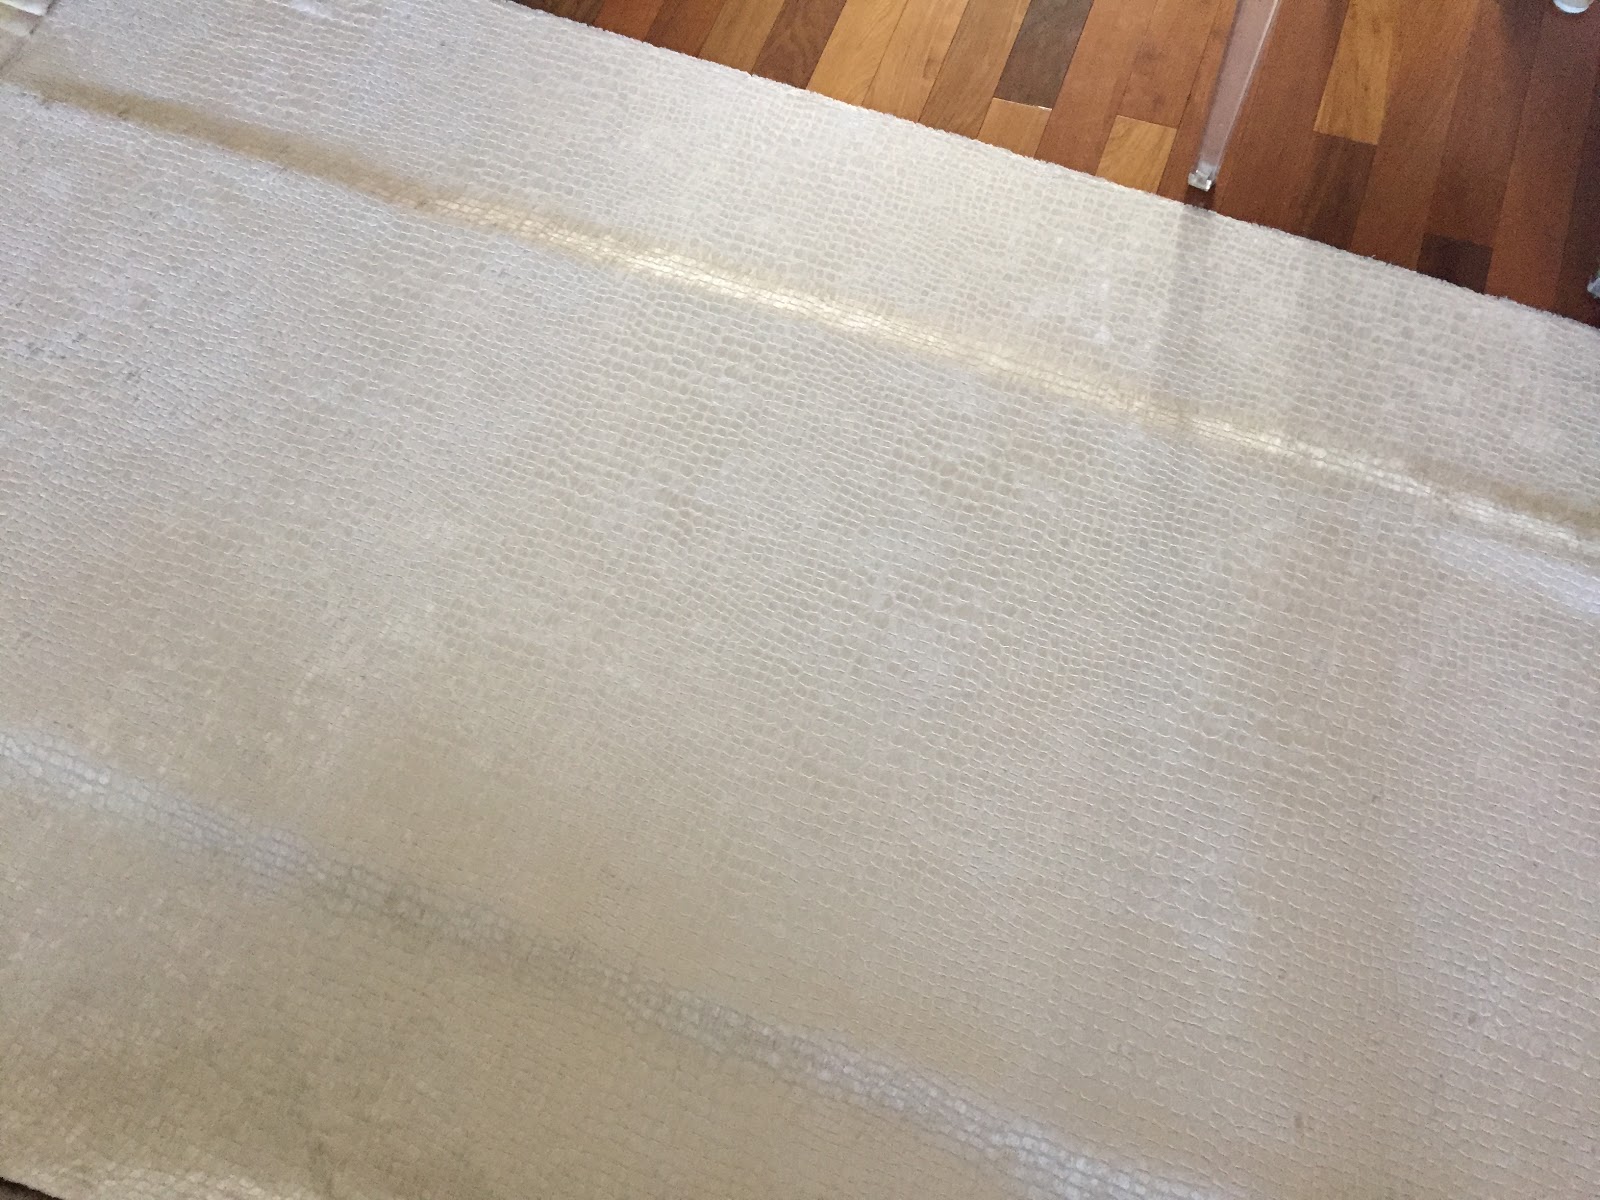
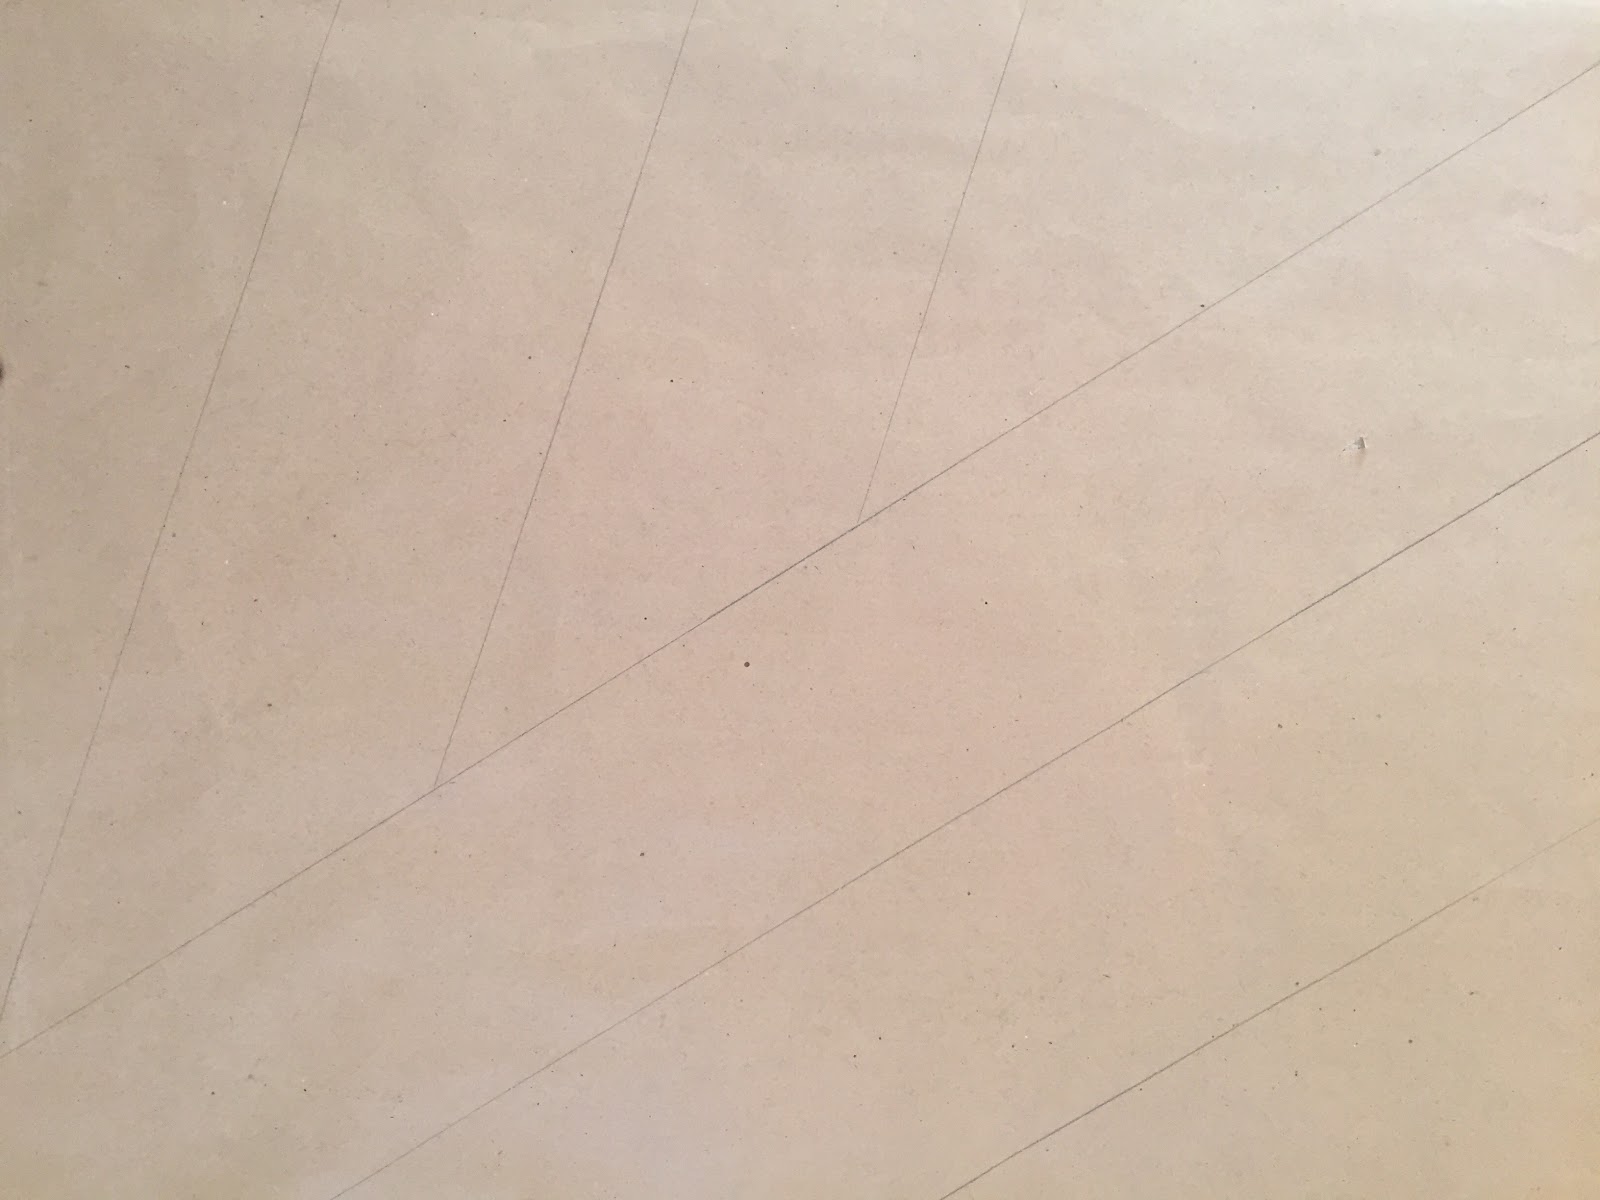
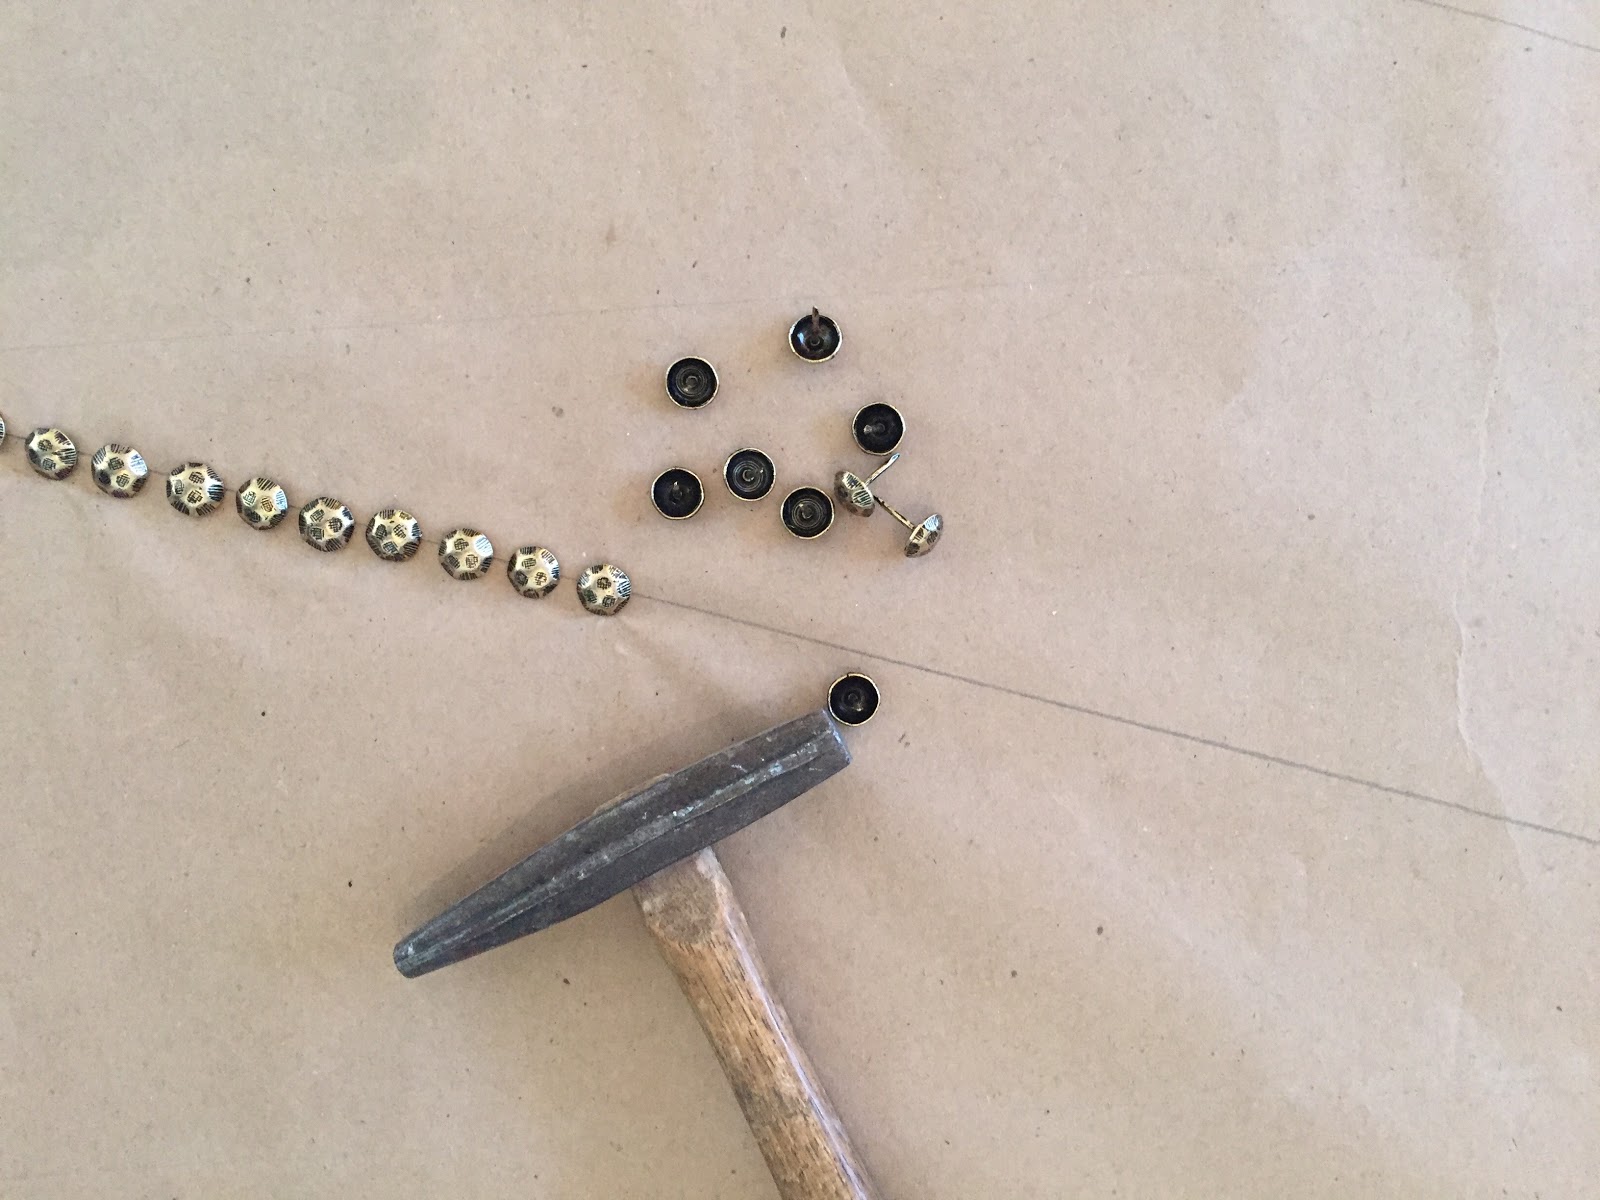
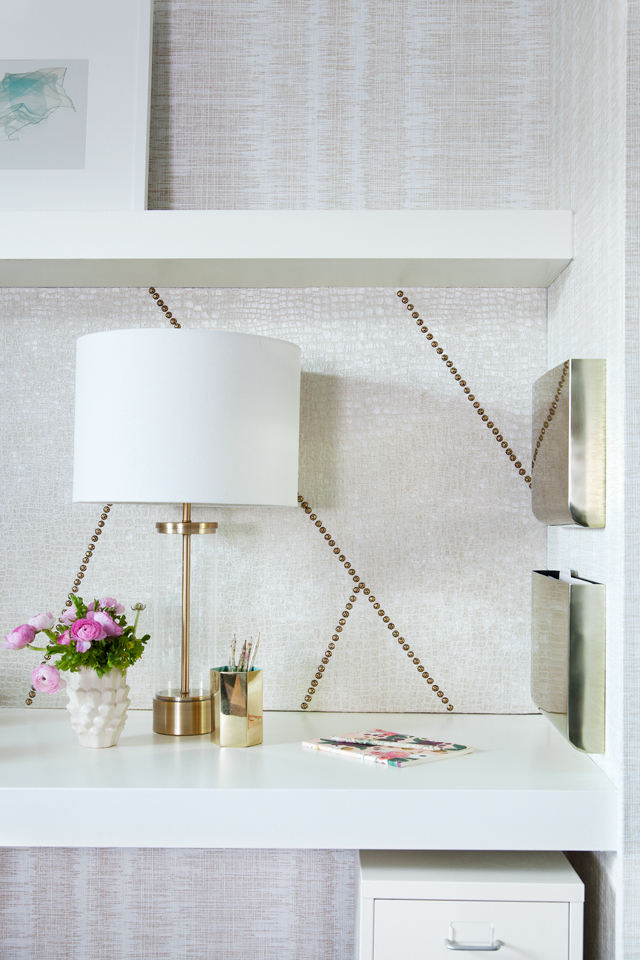
To say I’m happy about the transformation of my desk area would be a major understatement. I actually LIKE sitting at my desk now. Just like with the laundry room, I’m reminded once again of the power of good design to transform our quality of life. I love my DIY modern pin board with Kelly Wearstler-esque nailhead detail. The radiant Kravet Contract reptile pattern velvet mixed with the faceted antique brass nail heads offers an elegant canvas on which to pin fabric memos and inspiration images, though I confess I may leave it clean for awhile so I can enjoy it in all its modern simplicity.

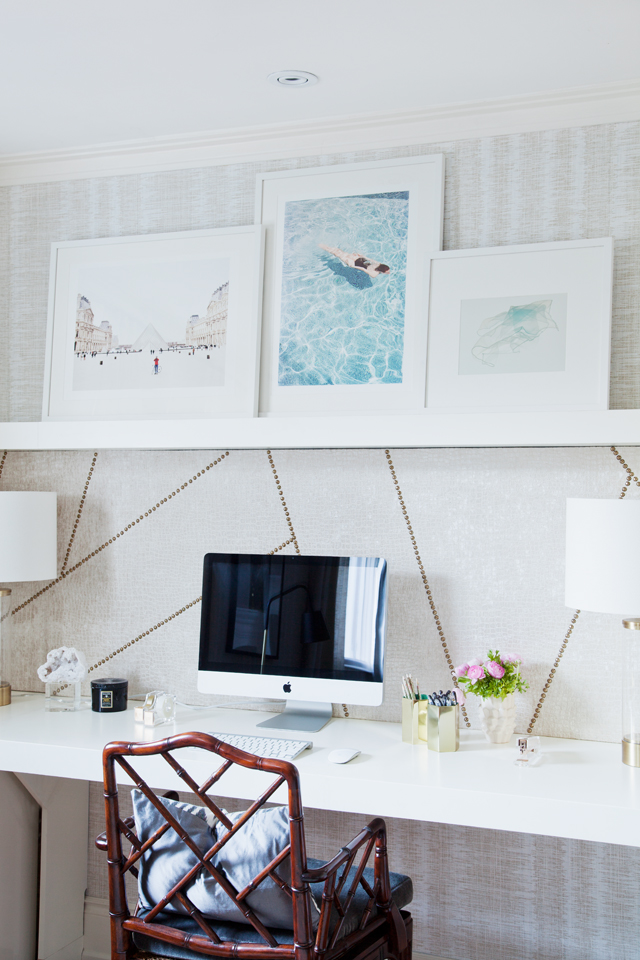
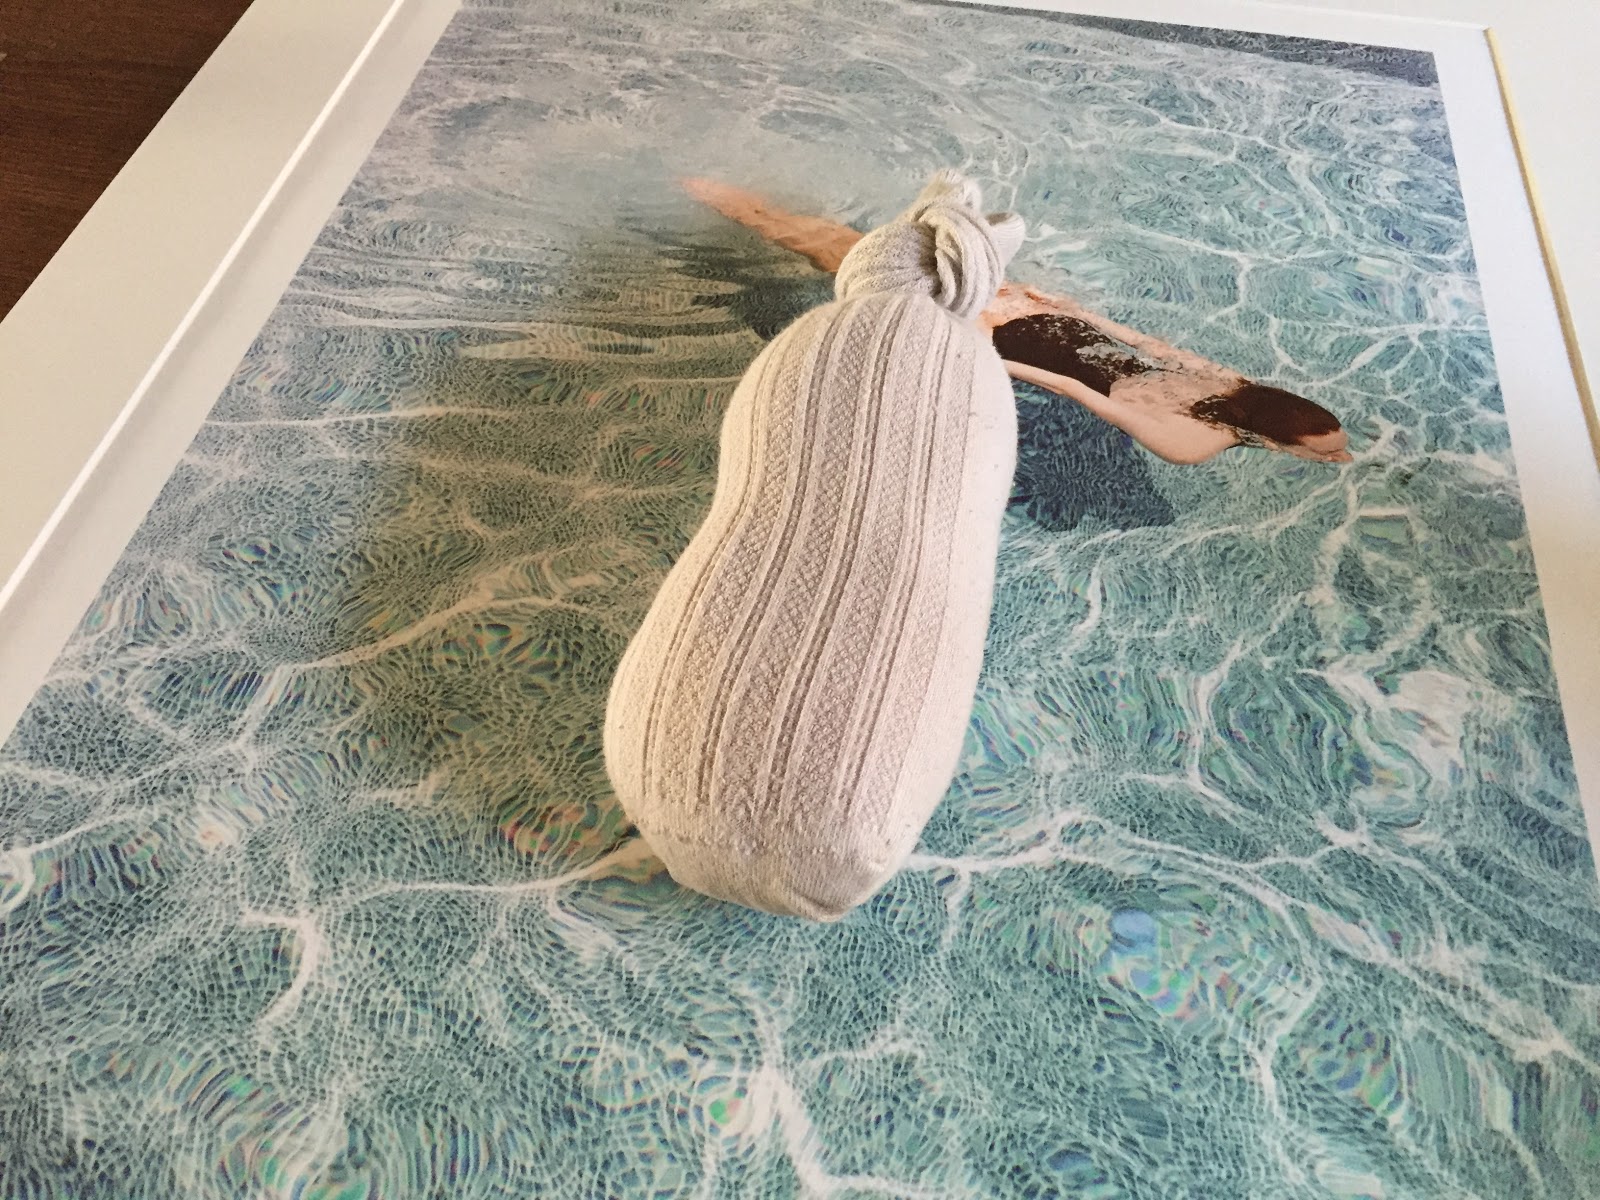
The trio of art above the desk – framed in gorgeous Framed & Matted gallery frames – fuels my sense of wanderlust and quite simply makes me happy. The two pieces on the left – limited edition prints from Minted – work brilliantly with Amy Friend’s emotional and moving Babushka {Blue}.

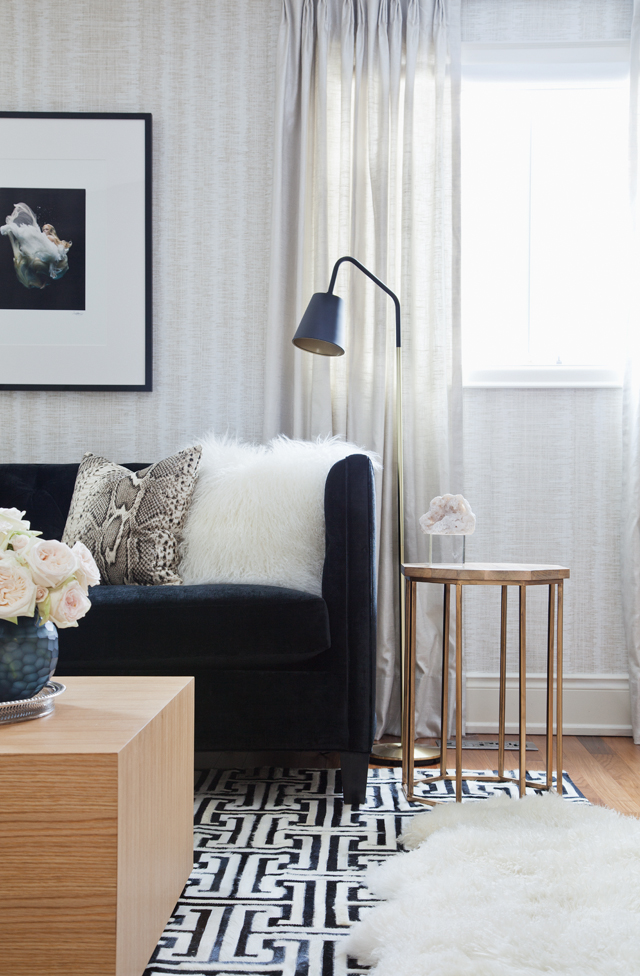
I like a bright work area {and I’m somewhat obsessed with symmetry} so I framed out the desk area with a pair of acrylic and brass column lamps from West Elm and love them. They’re timeless classics that I can repurpose in any room of the house should I choose to do so.

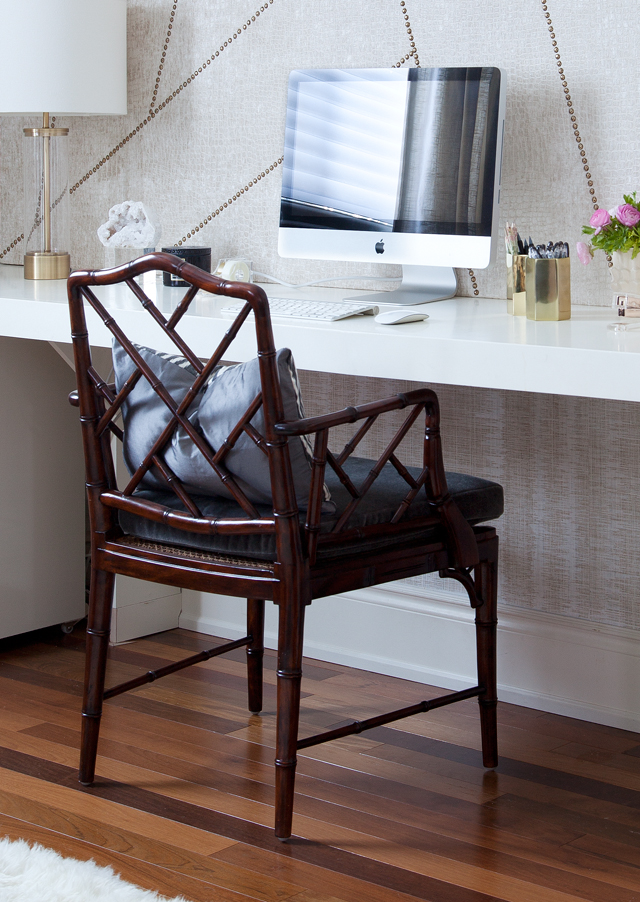
As you can see, the great debate on what colour to paint the gorgeous faux bamboo mahogany chairs from 55 Downing St. ended up with a “no paint” solution! My Brazillian walnut floors have a lot of variation in them, and I am a fan of mixing wood tones for a more interesting space. Add to that the madcap dash to the finish line of this design dare, and not painting them turned out to be the perfect solution! I really do love them, especially finished with the Kravet dove grey mohair seats and Bermingham & Co. lumbar cushions. Check out my Instagram for a straight-on shot of the chairs side by side from yesterday’s feed.

As a pair {perched atop the super warm and cozy lambswool rug} they face into the family room for a beautifully balanced floor plan, and one of them easily pulls away to sit at the desk when I’m working. It’s an elegant, flexible solution to a room with more than one function! It is practical and pretty without looking utilitarian. Perfection.

I can’t believe it, but that’s it! I’m grateful and delighted to have this room completed and can say that my family is already connecting more and feeling inspired by the dramatic transformation of this luxe family room makeover. 
Huge thanks to Ashley Capp for being such a delight to work with on the photography, and to the one and only Linda from Calling It Home for corralling all the designers daring enough to dive into this adrenaline-fueled biannual design event!
SOURCES
Black Velvet Tufted Shelter Arm Sofas – Kravet | Ikat Wallpaper – Thibaut | Shelf + desk – Custom | Rolling Desk Drawers – IKEA | Pin board fabric – Kravet | All frames – Framed & Matted | Desk lamps – West Elm | Wall Art – Citizen Atelier, Art Interiors, David Graham White, Minted, Anewall, Art Resin | Crystal Docahedron, Coral Mounted on Lucite, Geode Mounted on Lucite, Gold Stretching Greyhound, Michael Aram gold candlesticks – Elte | Leather Bound Books – Vintage | Sepia Sketch in Bookcase – Purchased on the streets of Paris | Lewis Dolin Brushed Brass Pulls – Upper Canada Specialty Hardware | Glass Cloche, Glass + Brass Box – Indigo | Sea Urchin – Paxton Gate SF | Silver Hurricane – Ralph Lauren available through Elte | Faux Coral – House Warmings | Tibetan Fur Pillows – Fibre by Auskin | Python Print Fabric – Kravet | Herringbone Faux Fur Fabric {on blanket} – Kravet | Ombre Chevron Fabric on Bench – Cassaro | Reupholstery of Bench – Switch Studio | Paint – PARA Paints | Silver Linen Drapery Fabric – Kravet | Sewing of Drapery + Pillows – Hollie Cooper | Hexagon Pencil Cups – CB2 | Lucite + Rose Gold Kate Spade Tape Dispensers + Stapler – Indigo | Brass Wallhanging File Holders – CB2 | Voluspa Candle – Indigo | Sheepskin rug – Costco | Mouldings for Fireplace Surround + Mantel – Metrie | Custom Nero Marquina Herringbone Mosaic – Creekside Tile | Curved Black Fireplace Screen – Anvil & Co. | Rift Cut Oak Coffe Table + Helix End Table – Custom through The Curated House by Sarah Walker | Silver Tray – Heirloom | Vintage Opera Glasses – Heirloom | Coffee Table Books – Indigo |

Be sure to check out the stellar work of these designer daredevils. There are some incredible finished spaces to be seen as a part of this year’s One Room Challenge, my favourites being those by Design Manifest and Kimberly Whitman. But that said, they’re all gorgeous!!

Apartment 34 | Arianna Belle | Because It’s Awesome | Coco+Kelley | Christine Dovey | Design Darling | Design Indulgence | Design Manifest | The English Room | Vanessa Francis | Hi Sugarplum | Honey We’re Home |Jojotastic The Pink Clutch | The Pink Pagoda | Simplified Bee Style Your Senses | A Thoughtful Place |Kimberly Whitman | The Zhush | Guest Participants

Until next time, darlings!

xx
s.

By |November 12th, 2015|96 Comments

ONE ROOM CHALLENGE: FALL 2015 | WEEK FIVE UPDATE

Well friends, things are starting to get real around here. It’s Week Five Update time with the One Room Challenge, and I’m grateful to say we’ve made some progress this week for sure! This week was truly all about the DIY’s for me, and I’m sharing three of them with you today, so fasten your seat belts!

MATTING + FRAMING: HOW TO DO IT YOURSELF

Remember the gorgeous frames from Framed & Matted that I shared in last week’s post? Well, I carved out some toddler-free time to get the gorgeous art safely framed up, and they look beautiful! For anyone who hasn’t mounted artwork before, I thought I’d give a quick tutorial on how to mount your art in a way that preserves the quality for decades to come. Given that I was working with editioned pieces, I wasn’t messing around!

Here’s what you’ll need:

1. Frames and matts from Framed & Matted
2. Lineco archival linen Tape
3. Lineco see-thru archival mounting strips
4. Lineco white gloves for handling the art
5. Needle nosed pliers for tying off the hanging wire
6. A clean sock, filled with rice and tied off with a knot

STEP ONE: Remove the matt and mounting board from the frame.

STEP TWO: Use the linen tape to hinge the matt to the mounting board from the inside.

STEP THREE: Place the artwork and fold the matt overtop, ensuring the art is centred exactly where you want it. Place the sock in the middle of the piece to anchor it so you can lift the matt again and adhere your mounting strips to the mounting board.

STEP FOUR: Hinge the matt back over the artwork and return it to the frame. Close the frame up and install the hanging wire, being careful to follow the instructions provided by Framed & Matted.

STEP FIVE: Install and enjoy your beautifully framed art!

Art from left to right: Men In Red by Kate Baird, Going For A Swim by Whitney Deal, Babushka (Blue) by Amy Friend

HOW TO MAKE YOUR OWN MODERN PIN BOARD

The photo above leads me to my next DIY from this week: the pin board! I wanted to do something unique with the nailheads – something a little modern edge – and landed on this game plan above. I like that the use of nailheads is unexpected, and the pattern energizes my work space while still leaving me with lots of space to actually hang things on the pin board. Just in case you want to make one for yourself, here’s how I did it:

MATERIALS

1. Enough homasote to cover the area
2. Some gorgeous Kravet fabric
3. A piece of craft paper the same size as your pin board
4. A pencil and large ruler
5. Nailheads and a finishing hammer

STEP ONE: Cut the homasote to size, joining it if necessary using PL construction adhesive and screwing strips of wood across any joints to create a stable finished piece. Next, lay the fabric over the face of the board and trim to leave enough to wrap around the back of the board. Using a staple gun, attach the fabric by stapling in the centre of each side, working on opposite ends each time you staple and pulling the fabric tight to ensure it is smooth. Slowly work your way around, always doing small sections and working on the opposite side next to maintain a balance in the tension on the fabric.

STEP TWO: Lay your craft paper over the face of the board and trim it to size. On a flat surface, use the pencil and ruler to determine your patter. Feel free to play with it a bit and erase the lines that don’t work. This part is not an exacting science so much as an intuitive art! I initially drew twice as many lines on the craft paper as what I ended up using in the end, so give yourself the freedom to try an idea and then step back and edit it.

STEP THREE: Following your guidelines, hammer the nailheads in about halfway. Be sure you determine how much space you want between the nailheads and stay consistent.

STEP FOUR: Remove the paper and hammer the nailheads down completely. You can adjust them as you go by hammering the sides to move them back in line if any of them go off the rails a bit. My mantra as I worked was Progress Over Perfection. This took me a couple of days, but it was well worth the effort in the end!

THE ART IS ALWAYS MY FAVOURITE PART: HOW TO RESIN ART

The last and most exciting DIY of the week was customizing the art for over the fireplace. I worked with my lovely friends at Anewall, who graciously customized one of their murals, turning it into a stretched canvas for me. Wanting to take it a step further, I partnered with the awesome Dave and Rebecca of Art Resin to transform the piece into a gorgeous and unique feature.

If a picture’s worth a thousand words, a video’s worth a thousand more! So rather than me typing out the step-by-step instructions on how to do this yourself, have a gander at this video for all the steps you’ll need to resin your own piece of art for a totally stunning end result!


Do you not love the Art Resin product? VOC-free, non-yellowing, super easy to use, and such a gorgeous finished product! I absolutely loved working with them on this.

HOW TO FINISH FURNITURE WITHOUT VOC’s

Speaking of VOC-free, I haven’t been the only one working away on projects for this space. I’m super excited to say that my awesome furniture maker wins the day again and has finished my custom coffee table using the most incredible finish – Rubio Monocoat from my inspiring friends at Exotic Woods in Burlington.

This oil-baed product is truly phenomenal. The nanotechnology actually bonds molecularly with the wood fibres, ensuring that whatever you finish it with – from furniture to floors – is incredibly durable for years to come. Even better, just like the Art Resin, it is totally VOC free and non-toxic, an absolute MUST in my book both as a designer and as a mom.

I can’t wait to get this gorgeous piece in place, along with everything else that will transform this room from a pretty shell to a warm and inspired context where my family can connect. I plan to refinish our dining table with this product myself, so I’ll be sure to post a step-by-step How To DIY once I get to it!

And THAT, my friends, is what I’ve been up to this week! Maybe that explains the bags under my eyes in that video? Haha! Here’s this week’s to-do list:

1. Pick up and load in all the furniture
2. Paint the bamboo chairs
3. Steam the drapes
4. Hang the last of the art
5. Arrange the flowers
6. Style the space
7. Shoot it
8. Write the reveal post
9. High five all my fellow ORC designers/survivors
{10. Take a giant nap}

I do hope you’ll come back to see the final ta-da! In the meantime, be sure to check out what these lovelies have been getting up to this week:

Apartment 34 | Arianna Belle | Because It’s Awesome | Coco+Kelley | Christine Dovey | Design Darling | Design Indulgence | Design Manifest | The English Room | Vanessa Francis | Hi Sugarplum | Honey We’re Home |Jojotastic The Pink Clutch | The Pink Pagoda | Simplified Bee Style Your Senses | A Thoughtful Place |Kimberly Whitman | The Zhush | Guest Participants

xx
s.

By |November 5th, 2015|4 Comments

ONE ROOM CHALLENGE: FALL 2015 | WEEK FOUR UPDATE

Oh me, oh my, does the time ever fly! It’s been such a busy, blurry week that I seriously lost track of what day it was and almost forgot to post today! It’s a sign of the times, my friends. Lots on the ol’ plate.

THE UPDATE

All kinds of good things have been happening around here, like our Metrie mouldings being transformed into a gorgeous fireplace surround and mantel. If you follow me on Instagram, you caught a couple of sneak peeks of that in process. My furniture maker is seriously the bomb diggity.

That baby is now installed and simply awaiting the mantel top to be truly complete, and friends, she’s a looker.

The custom herringbone nero marquina mosaic from Creekside Tile is in the process of being installed as we speak and I lerv it. So classy. So timeless.

This week was also kind of like Christmas, as those lovely faux bamboo chairs from 55 Downing St. arrived, and after a little cross border adventure with my friend Rachelle to pick them up, they are now safely at home and awaiting their paint job. Noah made a suggestion for a different direction on the paint colour for them and – sophisticated 12 year old that he is – I agree with him, so you’ll have to wait and see where that is headed.

The rug arrived and to be honest there are some problems with it, so I’m putting on my English heritage “stiff upper lip” and managing that sitch all calm, cool and collected like.

THE FRAMING

In much better news, the gorgy-gorg frames from Framed & Matted arrived and I’m sooooo happy!!

Framing can be such a massive expense for any project, especially if you want great customer service and you want things done right. I’m thrilled that the lovely Chrissy has chosen to partner with me on this project and I have to tell you, her product is as fabulous as her incredible customer service ethic. Framed & Matted is currently only available in the US, so to all of my design friends south of the border, take note! Framed & Matted is truly a top-notch resource to keep in your designer arsenal of awesome.

THE ART IS MY FAVOURITE PART

I cannot WAIT to get all of the art mounted in these gorgeous frames. I’ve given you little sneak peeks at a couple of the pieces on the mood boards, but let me properly introduce you to some of the beauties that will grace this space with their soulful inspiration.

I have had this 12×12 stunner from fine art photographer David Graham White for awhile now and can’t believe it’s taken me this long to frame it up.

David’s process for this series is so inspiring: He photographed topiary gardens in the UK on old polaroid film, and then processed the polaroids using the heat from an old tube television, documenting the BBC channels that were playing as the polaroids processed. The heat flares from the television created the gorgeous and unpredictable saturation of colour that you see in the final works, and they tell the story of extreme control {topiaries} juxtaposed with the uncontrollable medium of television which invades our daily lives. We may attempt to control nature, but does media control us in the end? The intellectual dialogue behind these stunning works only serves to make them more beautiful to me.

Then there is this breathtakingly ethereal wonder from Zena Holloway.

I have truly been coveting this piece since I first laid eyes on it in Alessandra of Citizen Atelier‘s collection, and I’m still pinching myself that she has now come to live with us. I often struggle to feel at home with figurative artwork, but the ethereal sense of reverie and mystery in Zena’s work blurs the line between reality and fantasy in a way that I find utterly mesmerizing, transporting me to a place of imagination and wonder. For me, this piece is an elegant invitation to dream. Invitation accepted, Zena. Invitation accepted.

I really struggled with what to do with the art over the desk. I have a large shelf that used to house all of my product catalogues, but now that everything is available online I don’t need them cluttering up my space. Such a visual relief! In contrast to that utilitarian past, I wanted to make this space now feel airy and open and light, so I ordered three warm white frames from Framed & Matted. They will serve as the new home for a very happy little trio, starting with this incredible piece from Amy Friend.

This series, called Babushka, documents Amy’s deep bond with her grandmother. After her passing, Amy floated her grandmother’s nightgowns and scarves in water and captured their movement and essence in a most hauntingly beautiful, emotional way. I’m so honoured to have this piece in my home.

Complimenting the piece from Amy Friend are these two lovely limited edition prints from Minted.

I love how together they tell a story of wanderlust and adventure, of exploration and wonder. If I can instil those values in my boys I will be a very happy mama. If I can remember to live by them myself, I’ll be all the happier. I have no doubt this art will fuel me in achieving those goals – visual reminders of our core values of beauty, curiosity, gratitude and wonder.

I have one more piece to share with you – the one that will sit over the fireplace – but there’s a special project involved on that front and I can’t share it with you just yet. Stay tuned, as it’s all kinds of lovely.

THE GREAT SIDE TABLE DEBATE

So I picked up our Plan B side tables this week, and once out of the box discovered that they are way too pinky-copper for my liking. This photo belies the actual colour.

I’m all for mixing metals, but I need to actually like the shades of said mixed metals. So, back they go and it’s back to the drawing board for a rather close-for-comfort race to the finish line on this element of the room.

On the flip side, I picked up these beautiful acrylic column table lamps in brass from West Elm and they are perfection.

Classy, modern, timeless and just right for this room. I’m just waiting on the pair of Crane Floor Lamps from CB2 to come in and the lighting for the room will be officially checked off my list.

THE TO-DO LIST

I’m pretty sure I’m going to have to do at least one extra update post as I have a ton to get done this week and I want to make sure you don’t miss out on all the fun. So much of the action takes place right at the end of a project!

Here’s this week’s strike list:

  • Paint the bamboo chairs
  • Dive into my biggest DIY for this space: the custom pin board. I’ve got something pretty fabulous planned and am grateful to say I just yesterday found what I need for it, so stay tuned on that front.
  • Finalize all of the styling, which is probably a 3-full-days kind of job to get it just right. 
  • Oh yes, and move all the old furniture out, move the new pieces in, get the drapery installed, hang the artwork, and somehow manage to continue doing my day job and care for my family in the midst of it all! 

If you’re the praying kind, I’ll take it!

In the meantime, check out the progress of this ridiculously talented lot:

Apartment 34 | Arianna Belle | Because It’s Awesome | Coco+Kelley | Christine Dovey | Design Darling | Design Indulgence | Design Manifest | The English Room | Vanessa Francis | Hi Sugarplum | Honey We’re Home |Jojotastic The Pink Clutch | The Pink Pagoda | Simplified Bee Style Your Senses | A Thoughtful Place |Kimberly Whitman | The Zhush | Guest Participants

Can’t wait to catch you up on everything that’s about to unfold, so check back in soon and have a fabulous weekend!

xx
s.

By |October 29th, 2015|4 Comments