Well friends, things are starting to get real around here. It’s Week Five Update time with the One Room Challenge, and I’m grateful to say we’ve made some progress this week for sure! This week was truly all about the DIY’s for me, and I’m sharing three of them with you today, so fasten your seat belts!
MATTING + FRAMING: HOW TO DO IT YOURSELF
Remember the gorgeous frames from Framed & Matted that I shared in last week’s post? Well, I carved out some toddler-free time to get the gorgeous art safely framed up, and they look beautiful! For anyone who hasn’t mounted artwork before, I thought I’d give a quick tutorial on how to mount your art in a way that preserves the quality for decades to come. Given that I was working with editioned pieces, I wasn’t messing around!
Here’s what you’ll need:
1. Frames and matts from Framed & Matted
2. Lineco archival linen Tape
3. Lineco see-thru archival mounting strips
4. Lineco white gloves for handling the art
5. Needle nosed pliers for tying off the hanging wire
6. A clean sock, filled with rice and tied off with a knot
STEP ONE: Remove the matt and mounting board from the frame.
STEP TWO: Use the linen tape to hinge the matt to the mounting board from the inside.
STEP THREE: Place the artwork and fold the matt overtop, ensuring the art is centred exactly where you want it. Place the sock in the middle of the piece to anchor it so you can lift the matt again and adhere your mounting strips to the mounting board.
STEP FOUR: Hinge the matt back over the artwork and return it to the frame. Close the frame up and install the hanging wire, being careful to follow the instructions provided by Framed & Matted.
STEP FIVE: Install and enjoy your beautifully framed art!
| Art from left to right: Men In Red by Kate Baird, Going For A Swim by Whitney Deal, Babushka (Blue) by Amy Friend |
HOW TO MAKE YOUR OWN MODERN PIN BOARD
The photo above leads me to my next DIY from this week: the pin board! I wanted to do something unique with the nailheads – something a little modern edge – and landed on this game plan above. I like that the use of nailheads is unexpected, and the pattern energizes my work space while still leaving me with lots of space to actually hang things on the pin board. Just in case you want to make one for yourself, here’s how I did it:
MATERIALS
1. Enough homasote to cover the area
2. Some gorgeous Kravet fabric
3. A piece of craft paper the same size as your pin board
4. A pencil and large ruler
5. Nailheads and a finishing hammer
STEP ONE: Cut the homasote to size, joining it if necessary using PL construction adhesive and screwing strips of wood across any joints to create a stable finished piece. Next, lay the fabric over the face of the board and trim to leave enough to wrap around the back of the board. Using a staple gun, attach the fabric by stapling in the centre of each side, working on opposite ends each time you staple and pulling the fabric tight to ensure it is smooth. Slowly work your way around, always doing small sections and working on the opposite side next to maintain a balance in the tension on the fabric.
STEP TWO: Lay your craft paper over the face of the board and trim it to size. On a flat surface, use the pencil and ruler to determine your patter. Feel free to play with it a bit and erase the lines that don’t work. This part is not an exacting science so much as an intuitive art! I initially drew twice as many lines on the craft paper as what I ended up using in the end, so give yourself the freedom to try an idea and then step back and edit it.
STEP THREE: Following your guidelines, hammer the nailheads in about halfway. Be sure you determine how much space you want between the nailheads and stay consistent.
STEP FOUR: Remove the paper and hammer the nailheads down completely. You can adjust them as you go by hammering the sides to move them back in line if any of them go off the rails a bit. My mantra as I worked was Progress Over Perfection. This took me a couple of days, but it was well worth the effort in the end!
THE ART IS ALWAYS MY FAVOURITE PART: HOW TO RESIN ART
The last and most exciting DIY of the week was customizing the art for over the fireplace. I worked with my lovely friends at Anewall, who graciously customized one of their murals, turning it into a stretched canvas for me. Wanting to take it a step further, I partnered with the awesome Dave and Rebecca of Art Resin to transform the piece into a gorgeous and unique feature.
If a picture’s worth a thousand words, a video’s worth a thousand more! So rather than me typing out the step-by-step instructions on how to do this yourself, have a gander at this video for all the steps you’ll need to resin your own piece of art for a totally stunning end result!
Do you not love the Art Resin product? VOC-free, non-yellowing, super easy to use, and such a gorgeous finished product! I absolutely loved working with them on this.
HOW TO FINISH FURNITURE WITHOUT VOC’s
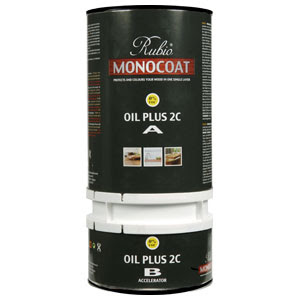
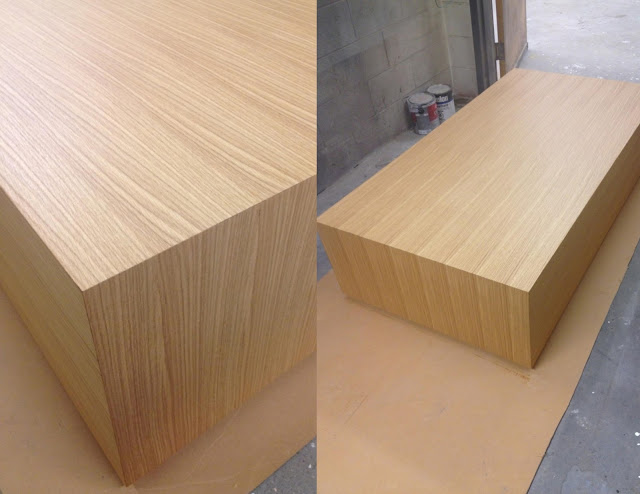
Speaking of VOC-free, I haven’t been the only one working away on projects for this space. I’m super excited to say that my awesome furniture maker wins the day again and has finished my custom coffee table using the most incredible finish – Rubio Monocoat from my inspiring friends at Exotic Woods in Burlington.
This oil-baed product is truly phenomenal. The nanotechnology actually bonds molecularly with the wood fibres, ensuring that whatever you finish it with – from furniture to floors – is incredibly durable for years to come. Even better, just like the Art Resin, it is totally VOC free and non-toxic, an absolute MUST in my book both as a designer and as a mom.
I can’t wait to get this gorgeous piece in place, along with everything else that will transform this room from a pretty shell to a warm and inspired context where my family can connect. I plan to refinish our dining table with this product myself, so I’ll be sure to post a step-by-step How To DIY once I get to it!
And THAT, my friends, is what I’ve been up to this week! Maybe that explains the bags under my eyes in that video? Haha! Here’s this week’s to-do list:
1. Pick up and load in all the furniture
2. Paint the bamboo chairs
3. Steam the drapes
4. Hang the last of the art
5. Arrange the flowers
6. Style the space
7. Shoot it
8. Write the reveal post
9. High five all my fellow ORC designers/survivors
{10. Take a giant nap}
I do hope you’ll come back to see the final ta-da! In the meantime, be sure to check out what these lovelies have been getting up to this week:
Apartment 34 | Arianna Belle | Because It’s Awesome | Coco+Kelley | Christine Dovey | Design Darling | Design Indulgence | Design Manifest | The English Room | Vanessa Francis | Hi Sugarplum | Honey We’re Home |Jojotastic | The Pink Clutch | The Pink Pagoda | Simplified Bee | Style Your Senses | A Thoughtful Place |Kimberly Whitman | The Zhush | Guest Participants
xx
s.


amazing!!! perfect DIYs and I may have to try it myself! Love the graphic design for the pinboard!
I love those pictures! This room is going to be stunning!
I can't even with your grasscloth and DIY fabulous. I mean stop it with all the amazingness would you?!?!?! Loved your video and I have to try that resin. I did my own when I was painting and made such a mess of it everytime. I was glued to my seats watching the pros do it. Can't wait to check back next week!!!
Love the modern pin board idea! Good luck with next week's finale!