/Master Ensuite

A Timeless, Traditional Master Ensuite

As a designer, two of my favourite rooms in the house to design and decorate are kitchens and bathrooms. I think it’s because we spend so much time in them just living. They can contribute so significantly to our lives – to our freedom to relax, unwind, connect and dream. And kitchens and baths are also an amazing opportunity to explore and express a love of details
I went through no less than twelve iterations of the floor plan for this bathroom before the owners settled on my first instinct. We were taking out a very dated bath and removing their walk-in closet {replacing it with a larger one as a part of the addition}. As such, we had a lot more space to work with than what they had been living with previously, and they wanted careful consideration to be given to each and every detail. Form could not trump function, and function could not make anything less than beautiful. I was certainly up for the challenge.
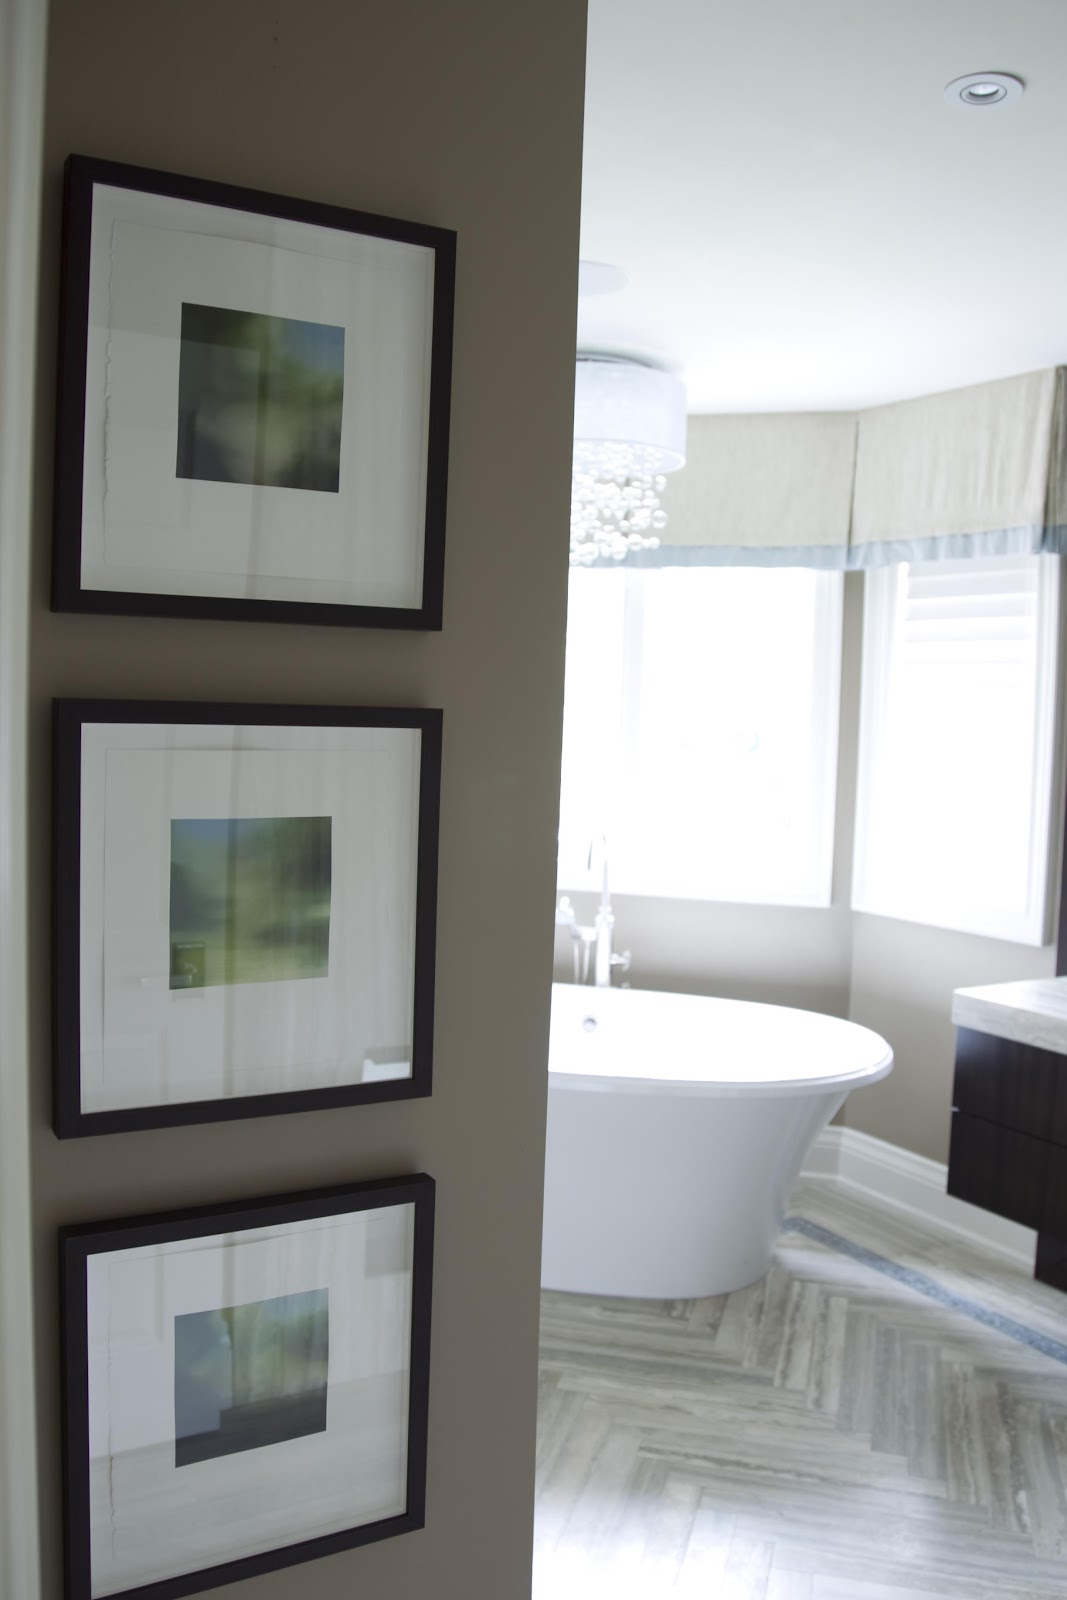
Painting by Elzbieta Krawecka via Art Interiors
The obvious centrepiece when entering the room is the creamy, wood-paneled tub floating in the centre of the space. Its interesting shape and timeless, Romanesque paneling set the tone for the entire room. The elliptical skylight above mirrors the shape of the tub and floods the space with healing and inspiring natural light. Truly a successful focal point.
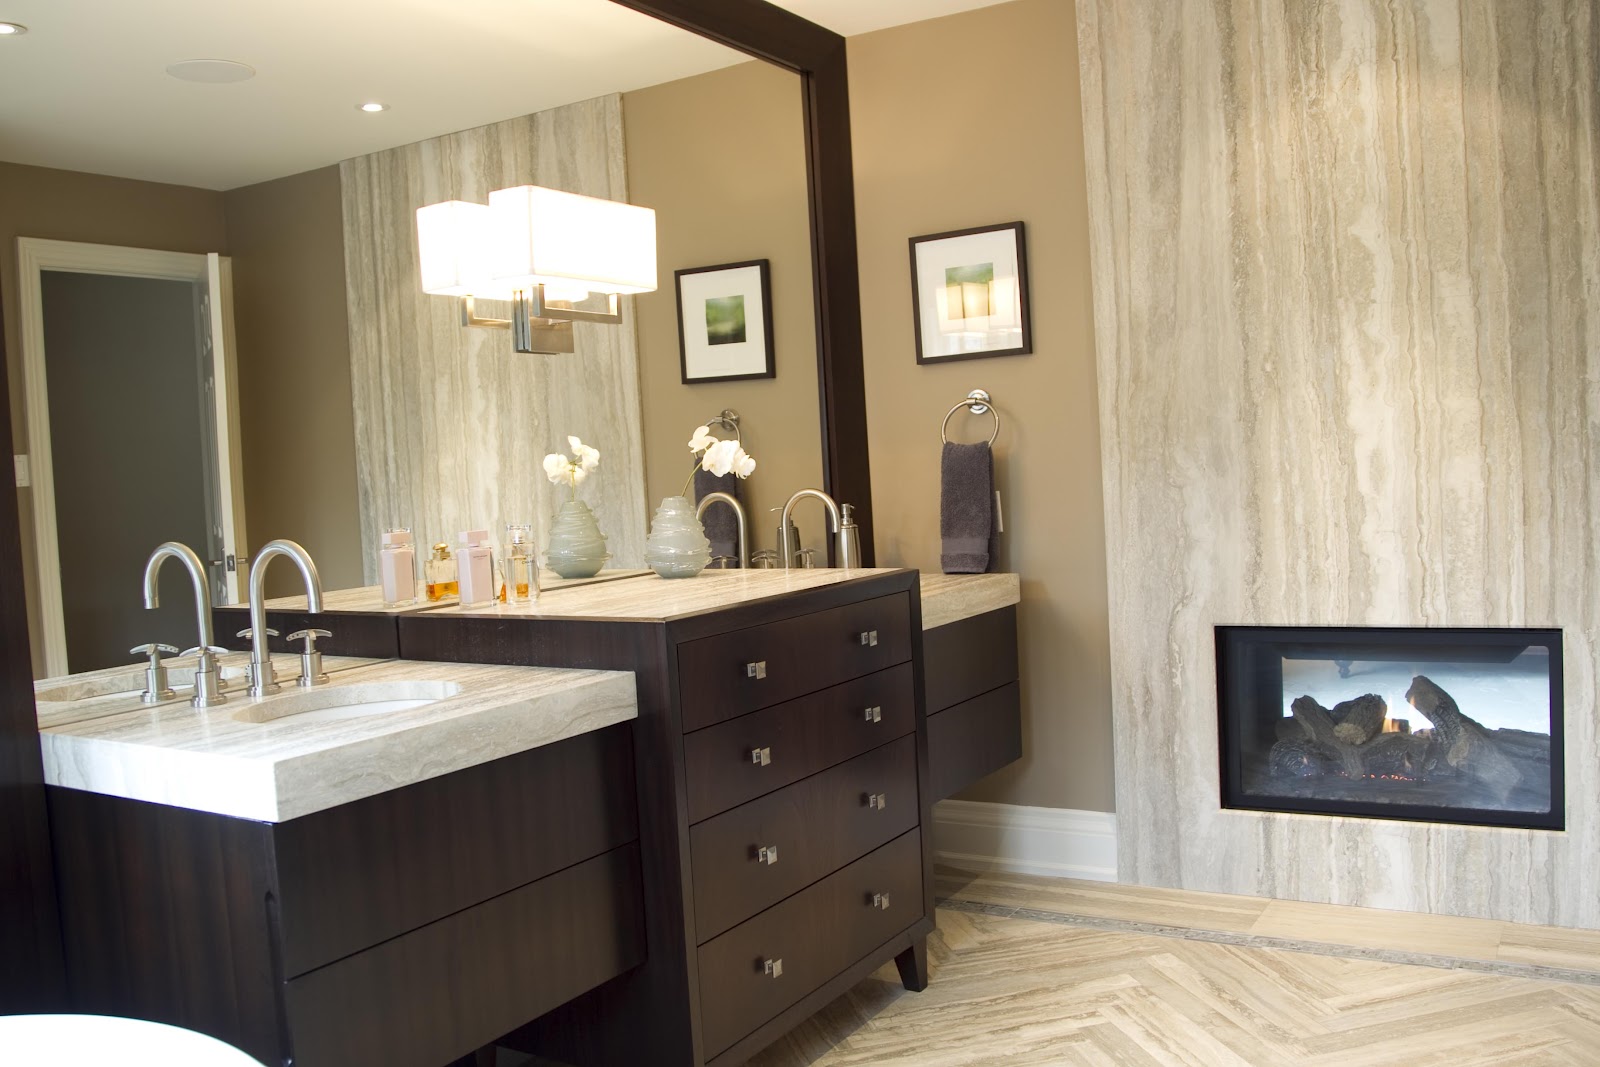
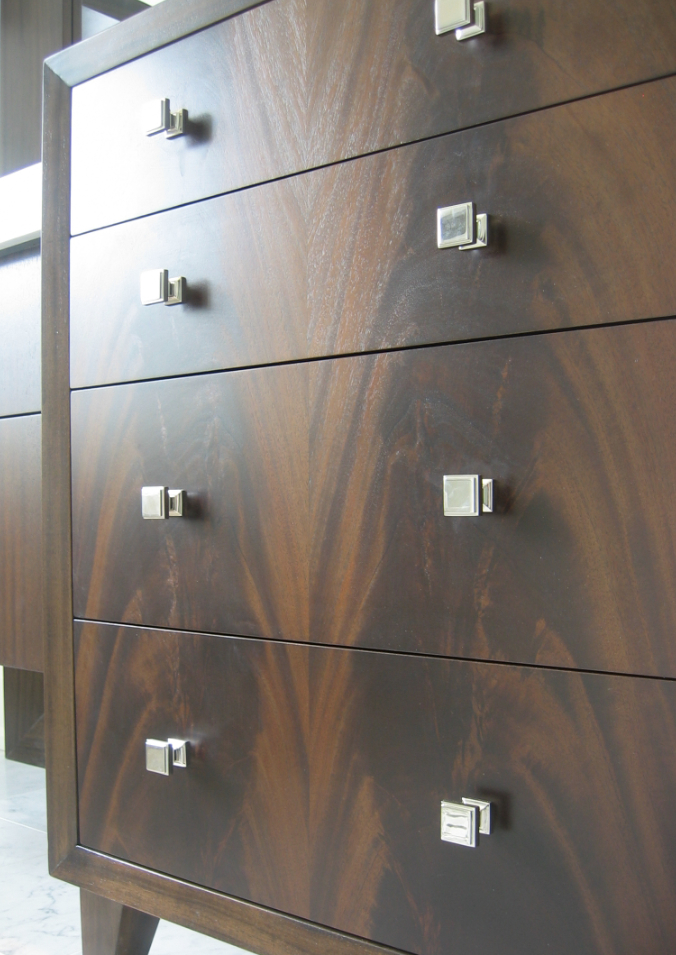
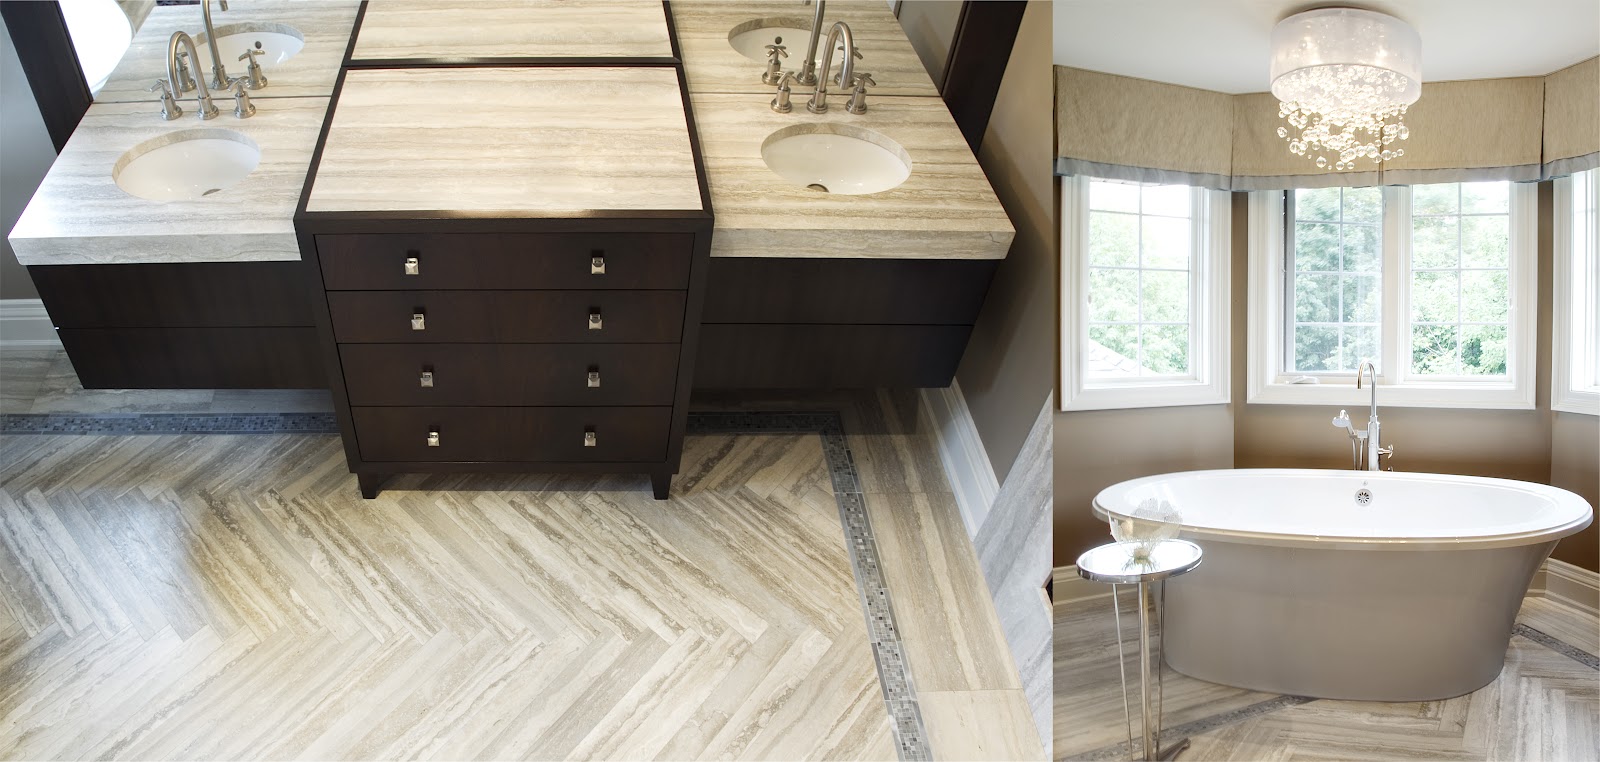
My goal with this master ensuite was to interpret my clients’ traditional taste with a refined restraint that would be simply timeless. For that to be accomplished, symmetry became the absolute rule, starting with “his and hers” custom, bow-front mahogany vanities on either side of the tub.
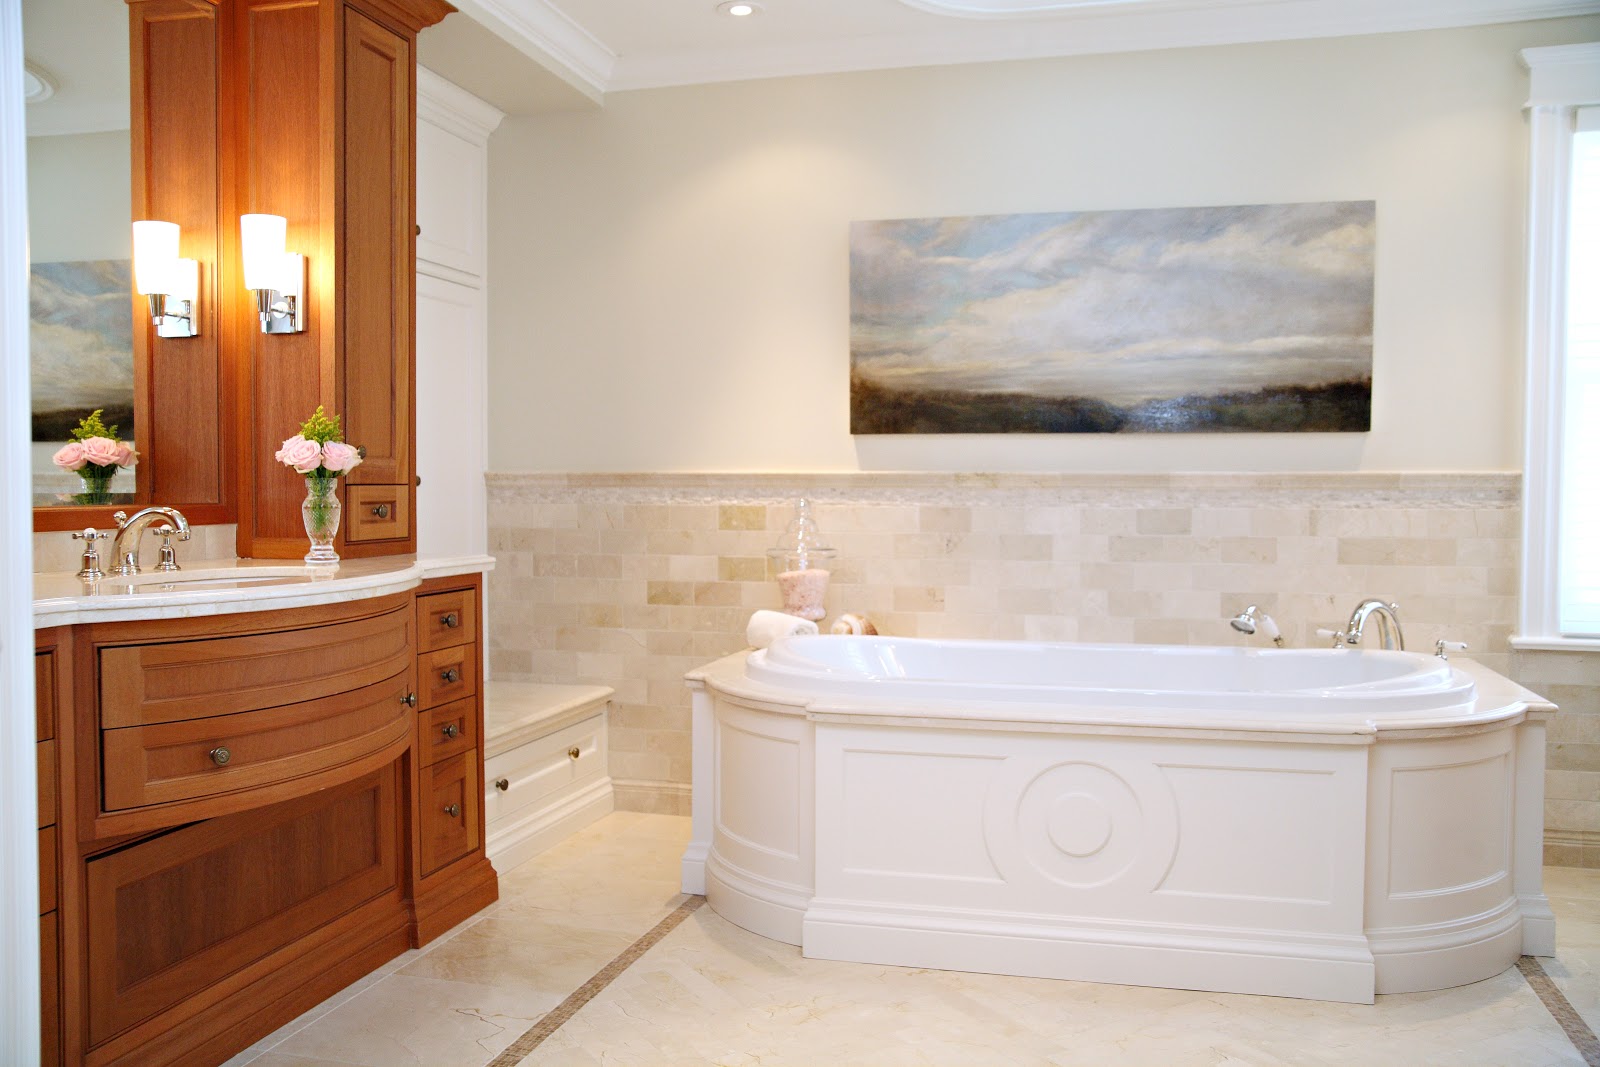
My clients wanted ample storage so that the space could remain uncluttered while entirely functional. Even the bow front drawers on the face-frame vanities offer storage, eeking every square inch of possible function out of their lovely, curvaceous forms. We chose to leave the mahogany unstained in all its natural glory, with just a clear-coat finish to protect the wood. The warmth of the mahogany works so beautifully with the Crema Marfil tile work, speaking beautifully to its golden veins and timeless character.
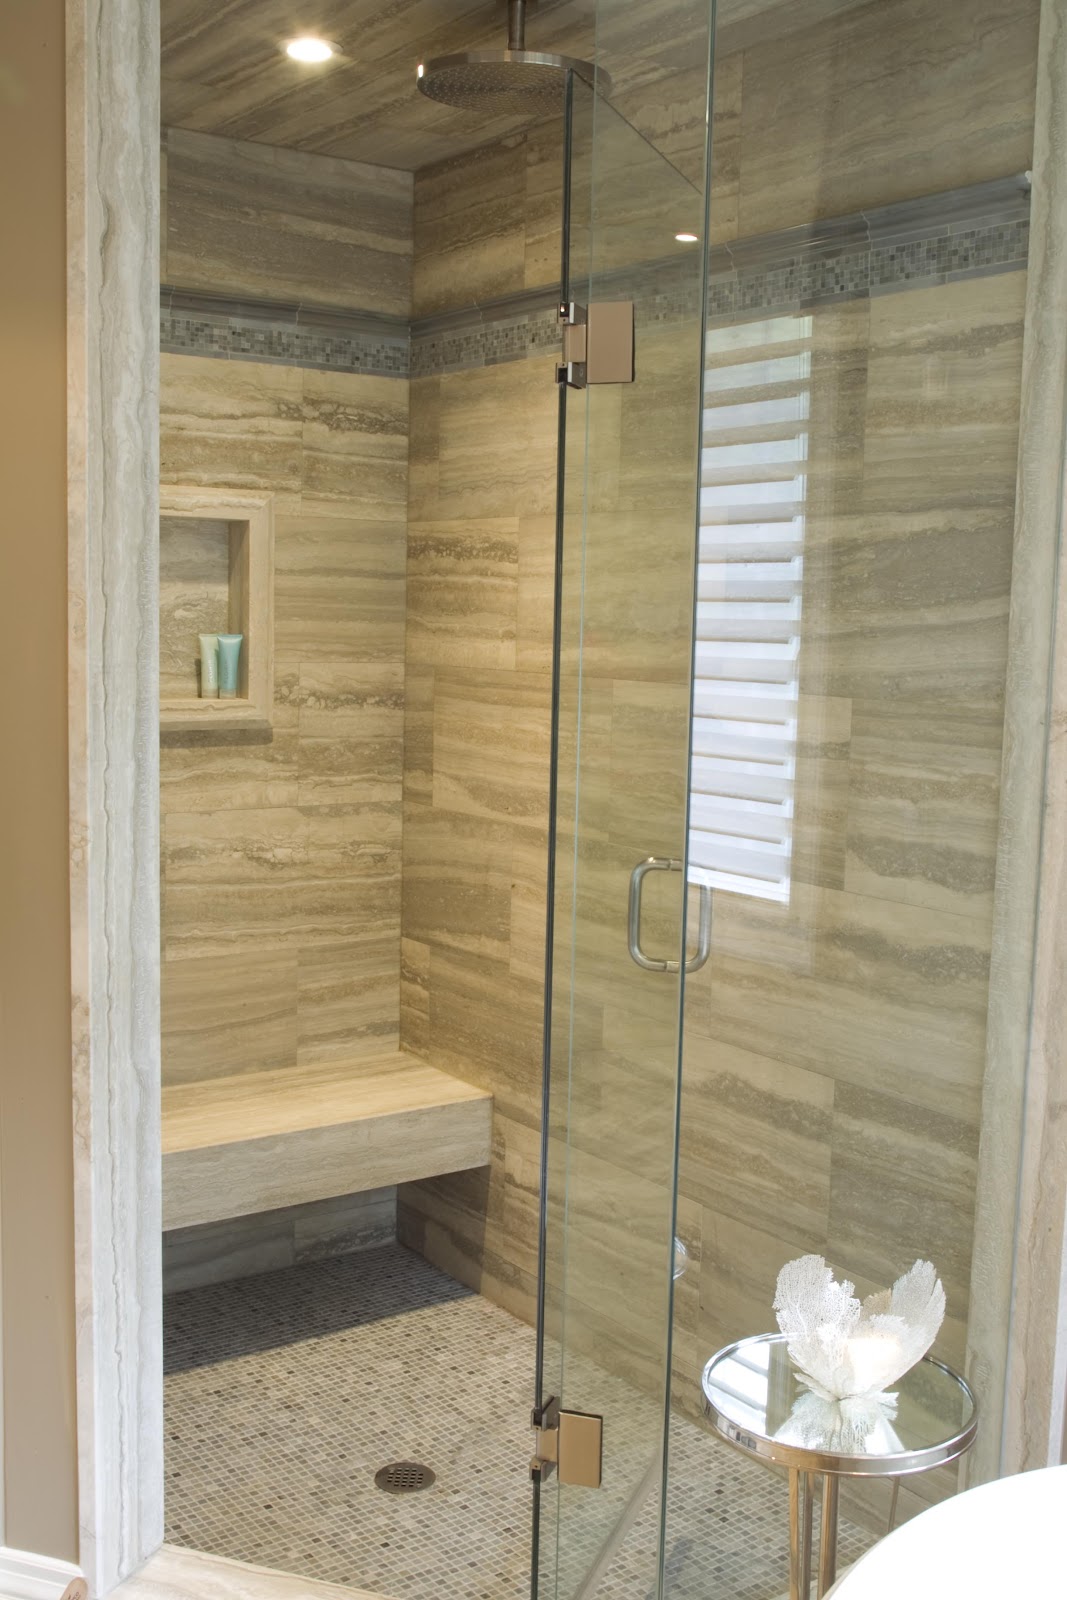
What you don’t see in these shots are the perfectly balanced water closet and walk-in shower {picture them over the right and left shoulders of the photographer as you enter the room and face the tub}. The privacy offered and the elegant and refined balance to the floor plan work beautifully together to marry form and function.
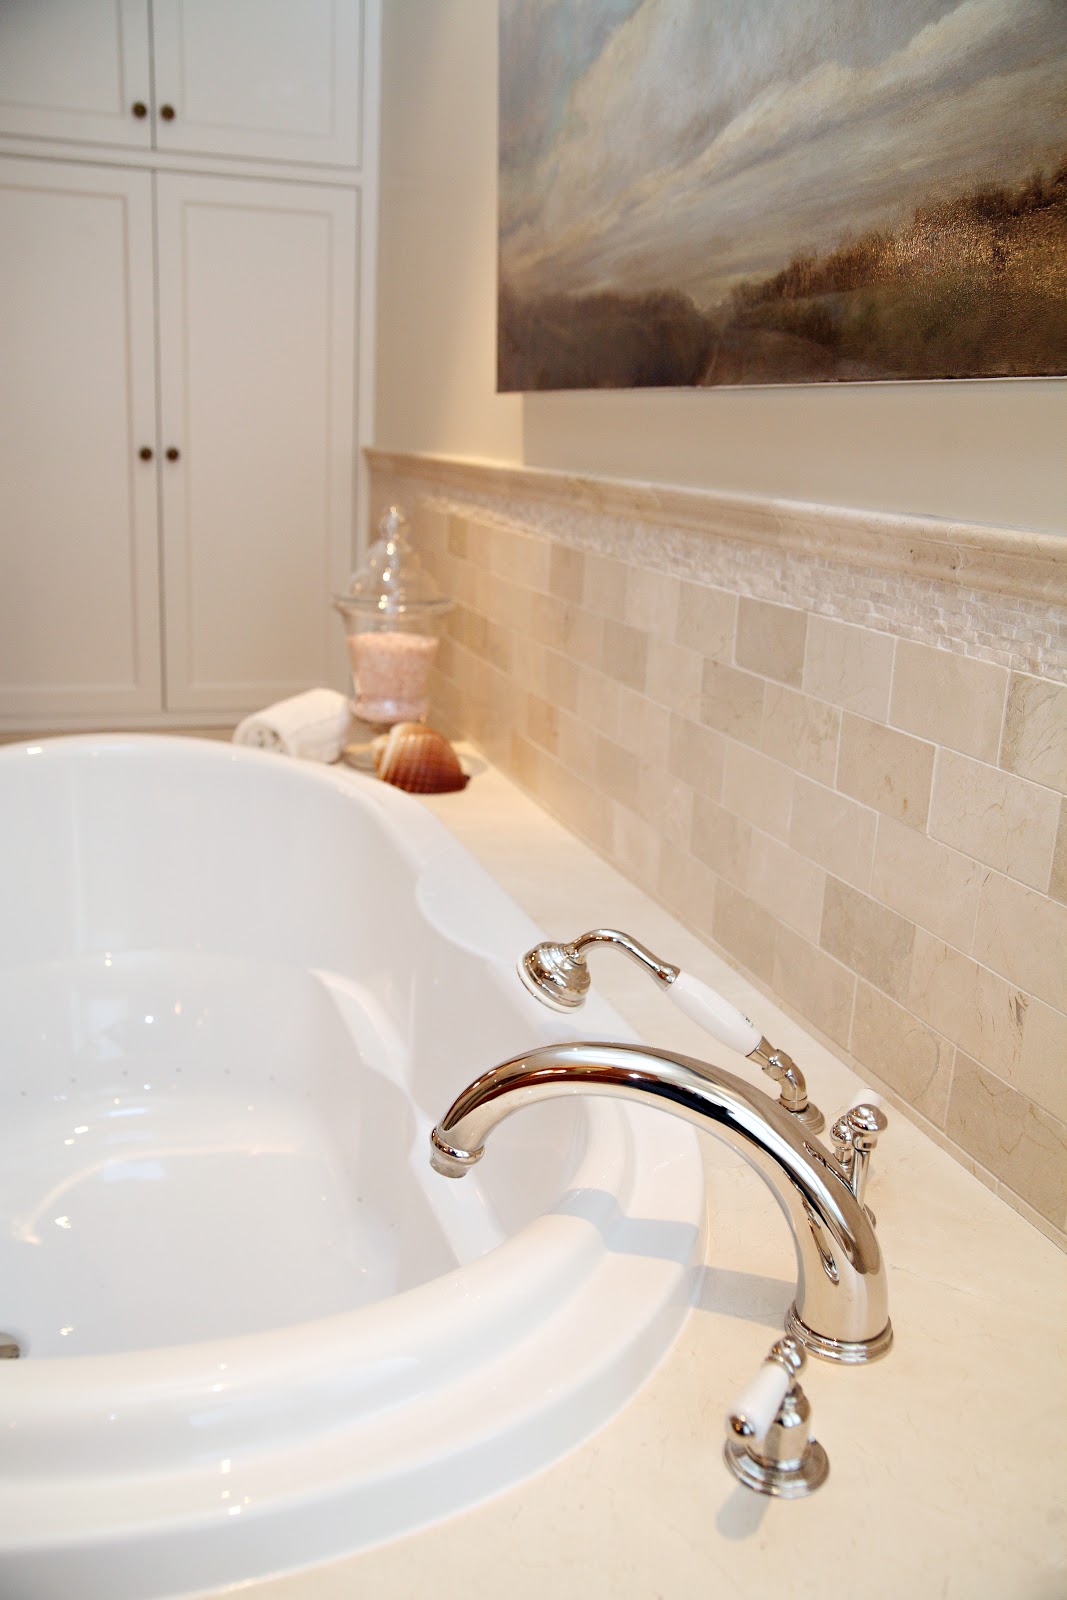
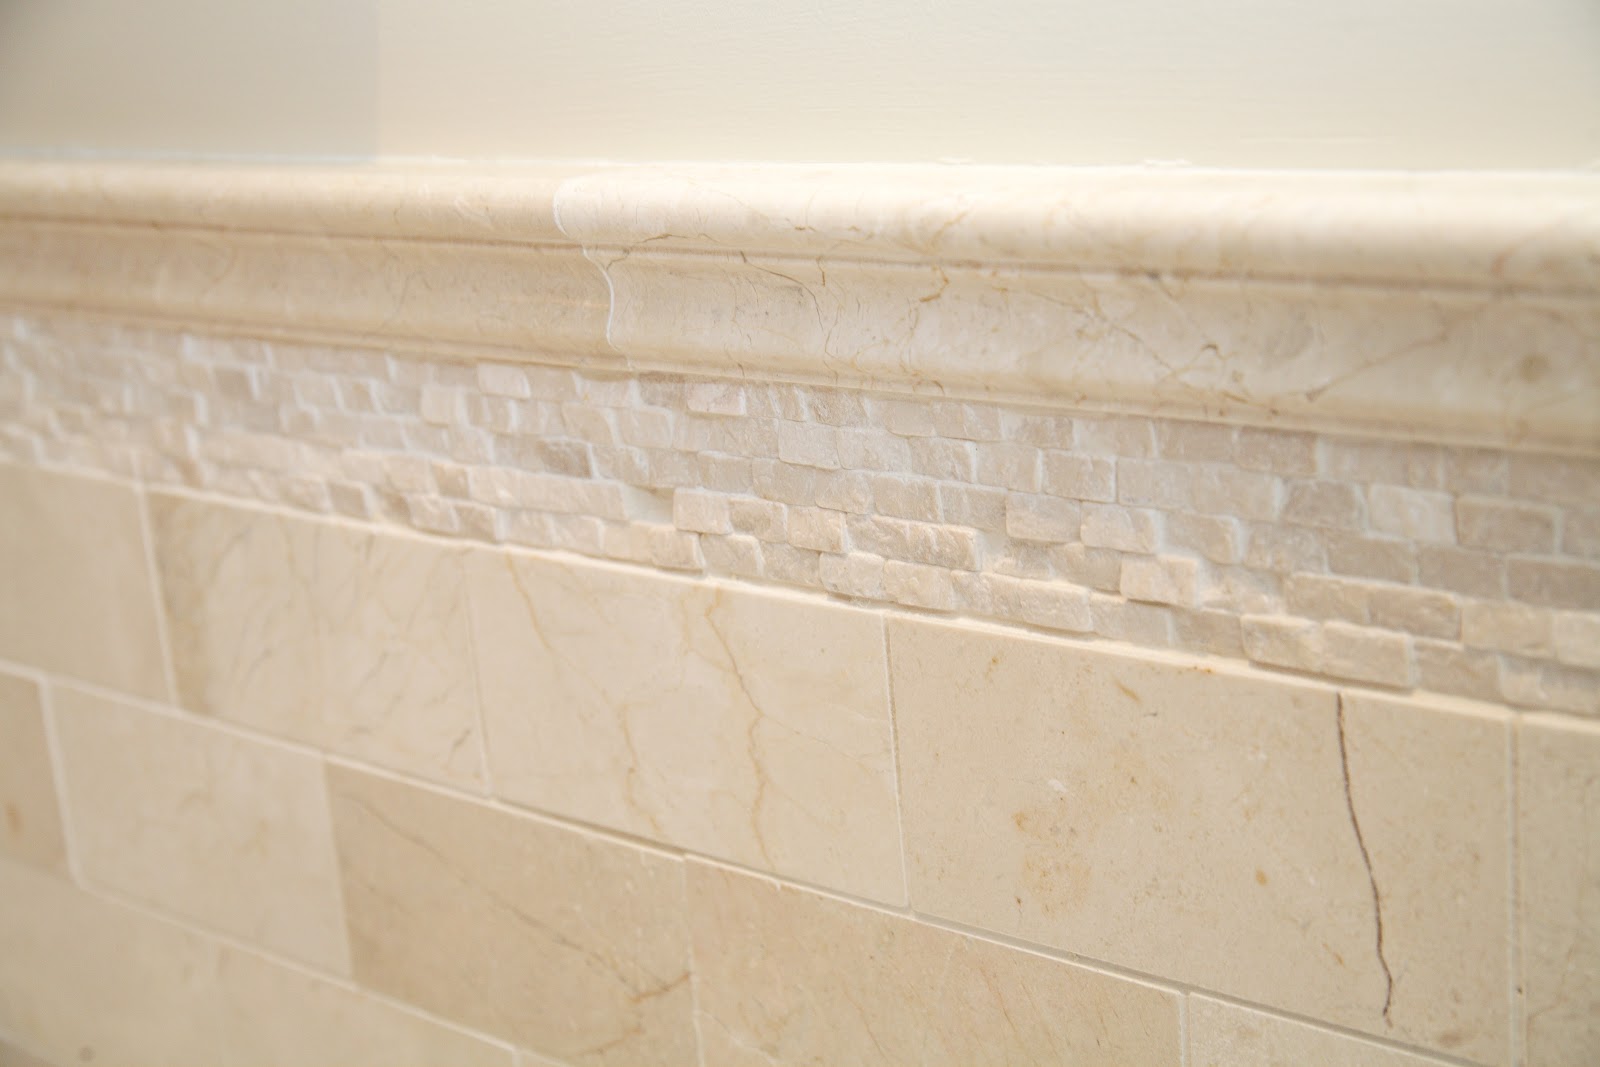
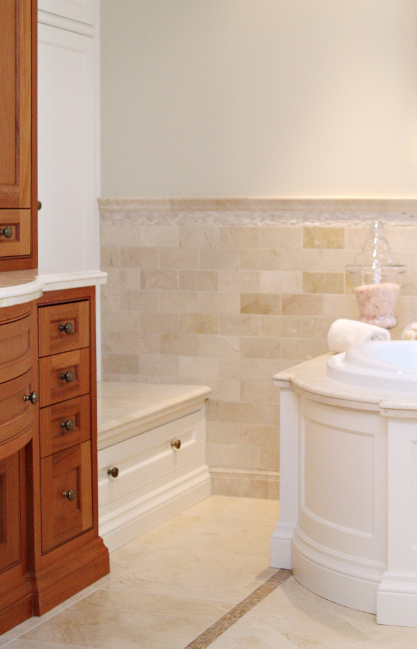
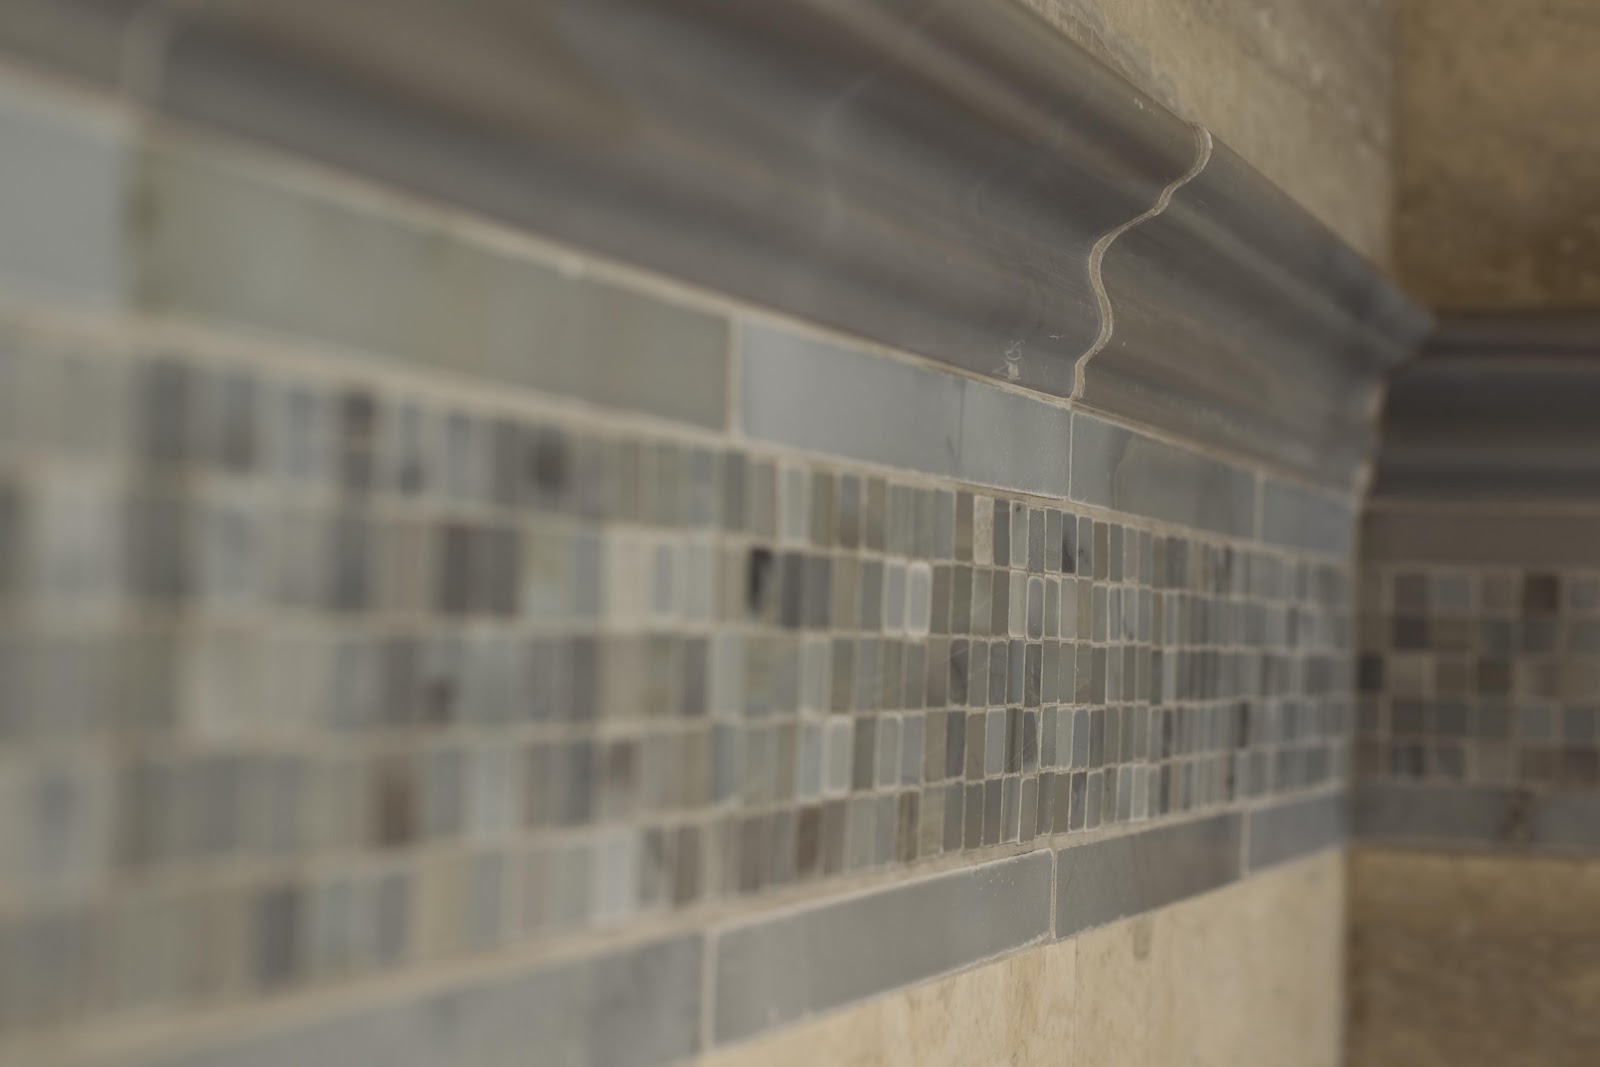
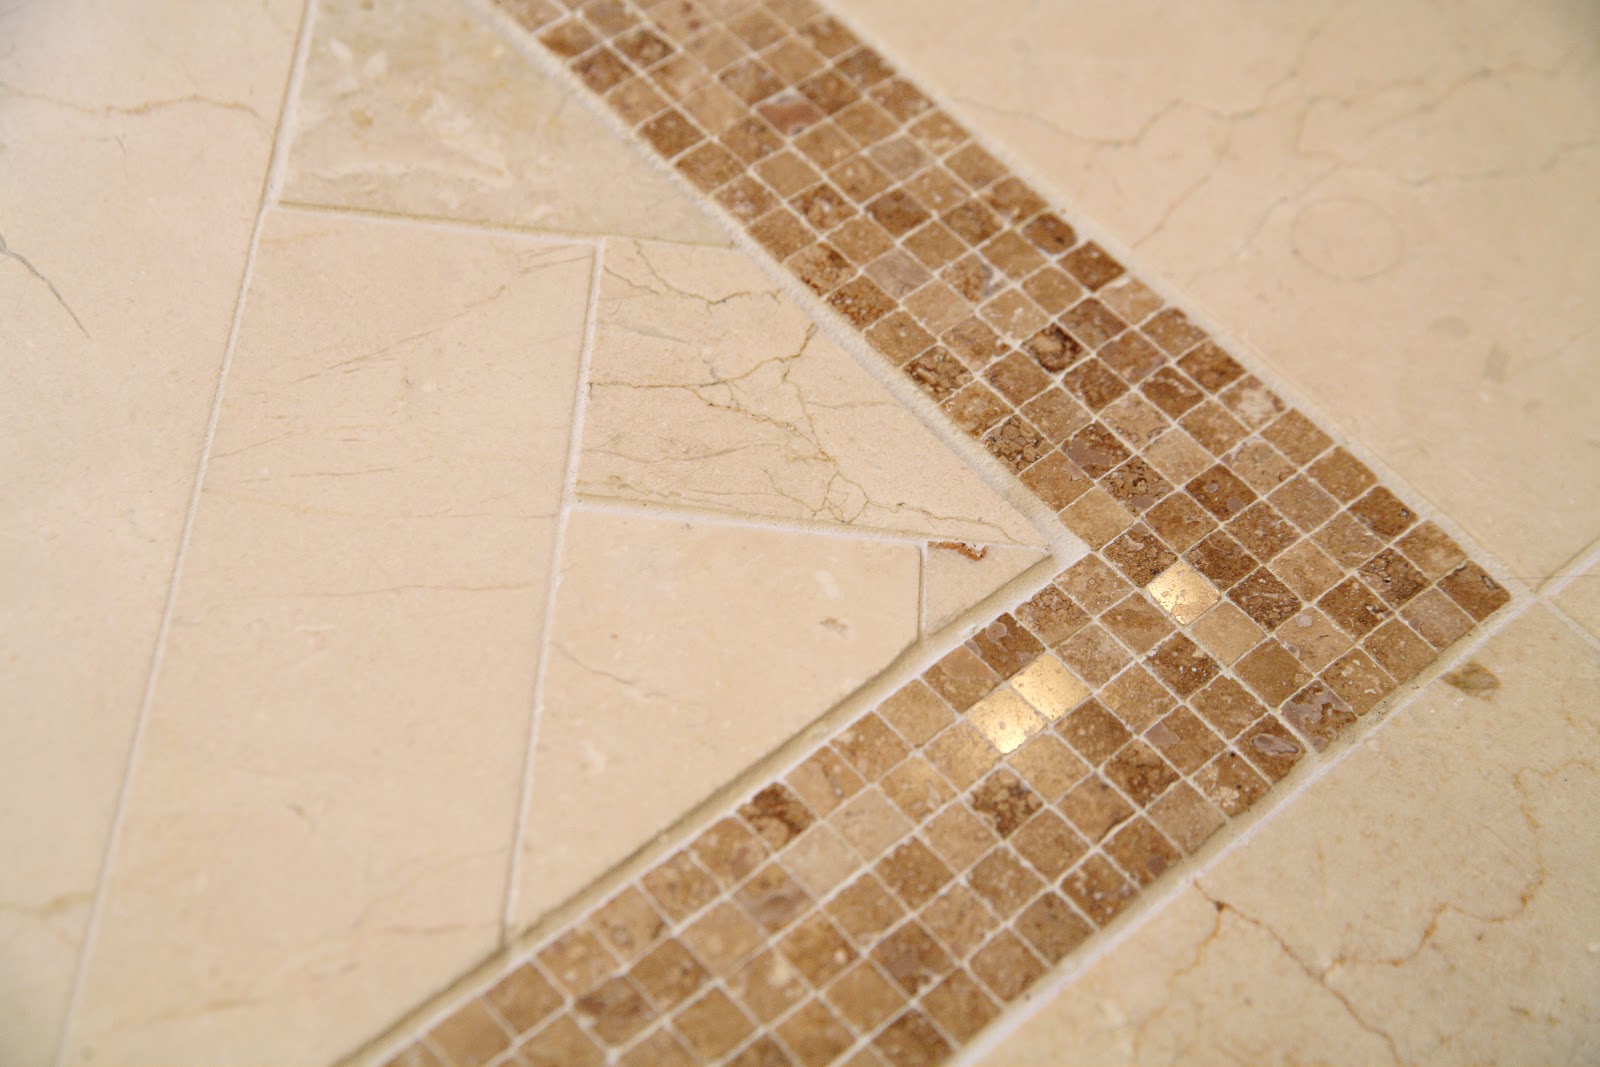
As I’m sure you know by now, I am quite addicted to the texture and patterns made possible when working with tile. This bathroom was a delightful opportunity to work with the timelessness of Crema Marfil and create elegant and timeless designs. Even the baseboards around the room are carved from Crema Marfil! Decadent, elegant, gorgeous.
I have already confessed to you my addiction to all things herringbone, so the design for the inside of this tile carpet was an honest marriage of intuition and addiction. I love the way that this tile carpet runs under the tub, anchoring it like a piece of furniture in the room. I also love the way the warm brown mosaic border draws the eye straight into the room and towards the beautiful focal point of the tub and the gorgeous art hanging above it. Overall, the floor is an elegant exercise in scale, pattern and warmth.
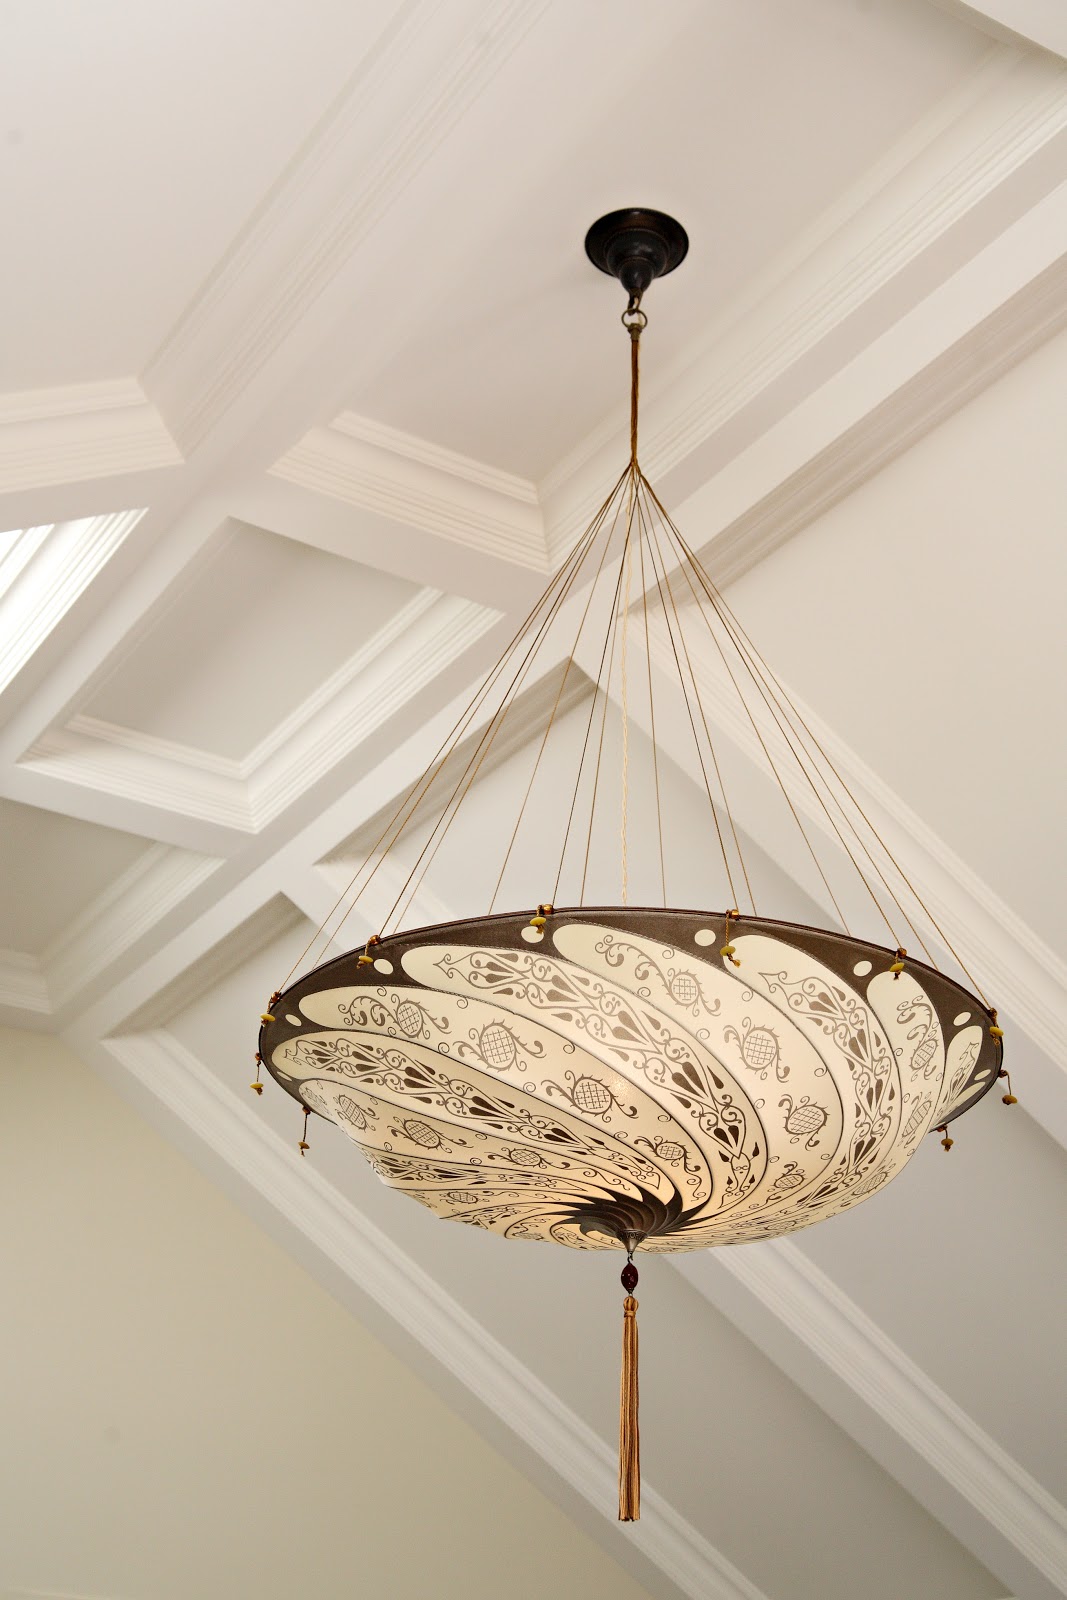
Because I know you’re the kind that love details, I had to share the ceiling of the master bedroom with you today as well. I designed this together with architect Kevin Crozier, and I think the end result of this collaboration is rather stunning. From the window design to the deep coffers in the ceiling to the skylight to the elegant focal point of the Fortuny silk chandelier, I love the view looking up in this master retreat!

Wishing you a Wednesday filled with details to delight!

xo
s.

All photographs by Amy Montgomery

By |October 31st, 2012|0 Comments

“Ocean” Master Ensuite – Part 2 – Cabinetry

Yesterday I shared Part 1 one of one of my favourite clients’ bathroom renovation projects, revealing some of my secrets to creating interesting texture with the use of tile. Today I’m excited to share with you the cabinetry design and the 2-way fireplace “big reveal.”

As I said yesterday, my goal for the cabinetry was for it to have a very “furniture-like” look and feel while still being extremely functional for this bathroom application. I wanted to distinguish the “his and hers” sinks and break them up with the centre cabinet. Also on my creative designer’s “wish list” was to create a floating effect, with at least one element of the cabinetry cantilevered from the wall.

I also wanted the mirror to be dramatic, so in this case I designed a beveled 5″ mahogany frame that wraps around the entire vanity – floor to ceiling – and graphically defines the vanity area. The vanity feels like it is floating on the mirror itself, creating both a dramatic and sophisticated effect in the space.

I decided to face the centre drawer cabinet in crotch mahogany – one of my favourite woods for creating an artistic swirl of texture courtesy of nature herself. This cabinet also has a beveled face frame to tie in the details of the top (with the stone damper inset) and the larger scale bevel on the mirror frame.

Even the fireplace has a beveled edge around the face of the opening! No detail was left untouched.

Story time: Installing this floor-to-ceiling slab of vein-cut travertine was NO. SMALL. FEAT. In fact, the fabricator wound up doing it for us twice as they broke the slab on the way into the house the first time. {Design lesson: When renovating, expect the unexpected and the delays to go with it! The end result can still be spectacular, but remember to take your patience pill on stone installation day!} The end result is really breathtaking, and speaks so beautifully to what is on the other side.

I think this is one of the most beautiful fireplace surrounds I’ve yet to design. Inspired by the clean, sophisticated lines of the Deco period, I designed this waterfall, stepped mahogany mantel to sit proud of a paneled Sapele or ribbon-stripped mahogany wall.  This focal point in the Master Bedroom is powerful, grounding and extremely elegant.

I hope you’ll take away some inspired ideas for your next bathroom from this project. This one is truly a reflection of my motto: Beautiful process, beautiful product. SO loved working with this client!

xo
s.

All photos courtesy of Jordan Fretz

By |July 4th, 2012|1 Comment

“Ocean” Master Ensuite – Part 1 – Creating Texture with Tile

Today I thought I’d show you a stunning master ensuite that I had the privilege of designing for the loveliest of clients. She’s a woman with exquisite taste, is thoughtful and kind, and she trusts me implicitly {read: THE BEST}.


This was a renovation project, and as such, the floor plan wasn’t really up for negotiation. Moving the plumbing stack for the toilet would have just been too costly, and that was really the only change we would have considered (swapping it with the shower). Thankfully it was a generous space to start with and we were content with the placement of all the key elements. Our biggest change in the end was to add a 2-way fireplace…but I’m getting ahead of myself.

Regardless of whether you are renovating or redecorating, I always say you should start from your inspiration point and work your way out. As you’re coming to learn about me, I start with art whenever possible, but with a bathroom I start with the tile and the vanity design. Tile is not just tile anymore, my friends. Tile is an opportunity to work with colour and texture in some really inspired ways, especially if you think outside the box.

In the case of this bathroom, “outside the box” was about how we used the tile that captured our hearts: a Vein-Cut Ocean Travertine. We fell in love with it for its quiet, watery palette, but my creative imagination was already one step ahead with the excitement of what could be done with it.

What I love about the Vein-Cut stone is the linear grain structure. While it still has some natural swirl and variation, it has a much cleaner, more contemporary feel than Cross-Cut stone. This worked beautifully for this Master Ensuite where we wanted a warm but modern feel to the space.

Rather than just lay it straight, I chose to have the 12″ x 24″ tiles cut into 2.5″ wide planks (like hardwood flooring planks). I then designed a tile carpet, and the inset of the carpet was carefully crafted out of these 2.5″ x 24″ planks to create a stunning yet subtle, beautifully textured herringbone pattern. (Confession: I am addicted to all things herringbone!)

I designed the herringbone tile carpet to be bordered with a combination of 5/8″ x 5/8″ moonstone mosaics (5 rows) and then on either side of that, a single strip of 5/8″ x 6″ moonstone to create a clean finish. The remaining outer portion of the floor was set with uncut 12″ x 24″ tiles.

The photo above shows you one of my favourite details with the vanity. We used the same travertine in 1 1/2″ thick slab for the countertops (double the standard thickness of 3/4″). I wanted the vanity to feel like a furniture piece, so I decided to set the stone down into the top of the centre, raised drawer section to mimic a leather damper on an old fashioned desk. The beveled wood edge that slopes off from the stone inset is a simple but extremely elegant detail.

The placement of the tub over the border edge of the tile carpet really makes the tile carpet feel like an area rug in the middle of the space. I love this effect. It takes the plumbing fixtures and cabinetry to a whole new level while anchoring each element, tying them together as with an area rug in an elegant living room.

This photo shows our grouping of 3 small pieces of art leading into the bathroom (all from a series by David Gillanders via Art Interiors). For this project, the art was one of our finishing touches rather than our starting point, but the watery, blue-green palette is just perfect for the tile’s inspirational story line. I love how these 3 smalls connect so beautifully with the quiet colour and texture of the tiles.

Not to be forgotten, the shower was yet another opportunity to showcase tile in an interesting way. I made use of the linear grain on the walls to create a greater sense of depth by using the grain horizontally to push the eye away. The shower floor is a tumbled version of the same 5/8″ x 5/8″ mosaic. Always go for tumbled on the shower floor whenever possible – it has better grip and you won’t find yourself slipping as often! I absolutely love the beautifully framed and beveled shower cubby and the cantilevered solid stone shower bench (in the photo above). The floating effect of the bench mimics the “his and hers” floating sink cabinets on the vanity. This repeated floating element plays well off of the watery, suspended feeling of the colour palette. It takes the cliché of “spa bathroom” to a whole new level of sophistication in my book.
 

The shower’s tile inset reflects the border on the main floor’s tile carpet with the addition of a chair rail in the natural polished moonstone. So delicious you could almost bite it! I love the dimension the chair rail gives this shower detail.

Tomorrow I’ll share a bit more about the vanity and reveal the amazing 2-way fireplace we created. It’s a stunner! Can’t wait to share it with you.

xo
s.

All photos courtesy of Jordan Fretz

By |July 3rd, 2012|1 Comment